
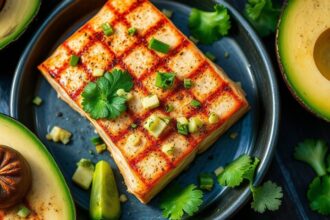
Sweet and sour crispy fish gives you two pleasures in one plate: tangy flavor and a crisp, golden crust. When you balance vinegar brightness with gentle sweetness, every bite tastes clean, not cloying. This is the style many people order at takeout—yet you can recreate it at home with consistent technique.
- Sweet and Sour Crispy Fish: What Makes It Work
- Ingredients You Need (and Why Each One Matters)
- Prep and Cook Time
- Yield and Difficulty
- Instructions (Step-by-Step for Crisp Results)
- 1) Prep the Fish
- 2) Coat for Crunch
- 3) Fry at the Right Temperature
- 4) Make the Sauce
- 5) Toss and Serve Immediately
- Chef’s Notes and Troubleshooting
- Serving Suggestions That Keep Texture
- Nutrition Snapshot
- FAQ
You’ll also notice the texture stays crisp longer when you control moisture and fry at the right temperature. Next, you’ll learn the key steps for coating, frying, saucing, and serving so the fish doesn’t turn soggy. The goal is simple: tangy, sweet, crunchy harmony you can repeat.
At a Glance: Key Takeaways
- Pat fish dry to help starch cling and crisp.
- Fry at ~350°F/175°C for fast sealing.
- Thicken sauce to glossy so it coats without pooling.
- Toss at the last moment to protect crunch.
Sweet and Sour Crispy Fish: What Makes It Work
Sweet and sour crispy fish relies on a clear flavor equation: acid + sugar + savory depth. Vinegar or citrus gives the tang, while sugar or pineapple juice rounds it out. Soy sauce adds a savory background that makes the sauce taste more “complete.”
The crisp crust comes from starch gelation during frying. Cornstarch coats the fish and forms a light, brittle layer that shatters pleasantly. For best results, you need a dry surface and a hot oil bath that cooks the coating quickly.
Many versions pair fruit like pineapple with vinegar for a bright profile. The exact balance varies by region and household preference, but the structure stays the same: a glossy sauce that clings to crisp seafood.
For sauce texture, thickening matters as much as flavor. A cornstarch slurry thickens as it heats, creating a smooth glaze instead of a watery coating. That glaze helps the fish taste crisp rather than steamed.
Ingredients You Need (and Why Each One Matters)
Start with firm white fish so the pieces cook evenly. Cod, sea bass, and snapper hold shape under frying and still taste tender after sauce. Avoid very delicate fish that falls apart during handling.
For the coating, cornstarch creates a crisp shell with a light feel. Adding eggs helps the starch adhere and improves coverage. Salt and white pepper season the fish itself, so the flavor doesn’t rely only on the sauce.
For tangy sweetness, rice vinegar or similar mild vinegar provides controlled acidity. Pineapple juice boosts fruity aroma and supports the sweet note. Brown sugar adds depth, while ketchup contributes color and a gentle tomato tang.
To add savory balance, soy sauce offers umami. Garlic and ginger build a warm aromatic base that prevents the sauce from tasting flat. For extra freshness and color, bell pepper and pineapple chunks add crunchy contrast.
Fish and Coating
Use firm fillets, cut into even strips so frying times stay consistent. Uniform size prevents burnt edges and undercooked centers. Pat the fish very dry right before coating to reduce steam in the hot oil.
Coat with egg, then cornstarch. The cornstarch layer thickens during frying and turns crisp as water escapes. This step is where you create the “crunch first” experience people love.
Tangy Sweet and Sour Sauce
Build the sauce in a saucepan so you can control heat and thickness. Simmering activates the starch and helps flavors blend. Keep the mixture moving so it turns glossy without lumps.
When thickening, cook just until it coats the back of a spoon. Over-reduction makes the sauce too dense and can turn it pasty on the fish. Taste for tang and sweetness at the end.
Prep and Cook Time
Plan ahead so your timing supports crispness. You need prep time to dry, cut, season, and set up a coating station.
- Preparation: 20 minutes
- Cook Time: 15 minutes
- Total Time: 35 minutes
Yield and Difficulty
This recipe makes enough for about 4 servings. The serving count assumes normal appetites and a side like rice.
Difficulty stays medium because frying requires consistent oil temperature and quick timing. If you’ve made battered or breaded foods before, you can handle this with a thermometer.
Instructions (Step-by-Step for Crisp Results)
Follow the steps in order. Each one protects texture and prevents the classic problem: soggy fish. Keep the sauce ready, but don’t drown the coating too early.
For deeper reliability, use a kitchen thermometer for the frying oil. Oil temperature controls coating color and crispness. If you skip it, you risk uneven results.
1) Prep the Fish
Rinse fillets under cold water, then pat them dry with paper towels. Moisture causes steam during frying, which softens the coating. Season with salt and white pepper.
Cut fish into 2-inch strips or similar sizes. Consistent cuts help oil cook each piece at the same pace. Set a wire rack near your fryer to drain without trapping heat.
2) Coat for Crunch
Dip fish pieces into beaten eggs, letting excess drip off. Then dredge thoroughly in cornstarch. A full, even coat gives you a thicker crisp layer that resists moisture longer.
Place coated pieces on a wire rack and rest for about 5 minutes. This short set helps the starch hydrate slightly and cling better. Don’t rest too long, or coating can absorb any air moisture.
3) Fry at the Right Temperature
Heat vegetable oil to about 350°F (175°C) in a deep skillet or wok. Hot oil seals the coating quickly and prevents grease absorption. If oil runs too cool, the crust turns heavy and greasy.
Fry in batches to avoid crowding. Overcrowding drops oil temperature and increases sogginess. Fry until golden brown, about 3–4 minutes depending on strip size.
4) Make the Sauce
Sauté minced garlic and grated ginger over medium heat for about 1 minute until aromatic. Then add diced bell pepper and pineapple chunks. Cook briefly so vegetables stay bright and slightly crisp.
Whisk rice vinegar, pineapple juice, brown sugar, ketchup, and soy sauce in a separate bowl. Pour into the pan and bring to a gentle simmer. Stir in cornstarch slurry and cook until glossy, about 1–2 minutes.
For sauce chemistry, cornstarch thickens when heated and kept moving. This creates a stable glaze rather than a watery mixture. For reference on starch behavior, see starch.
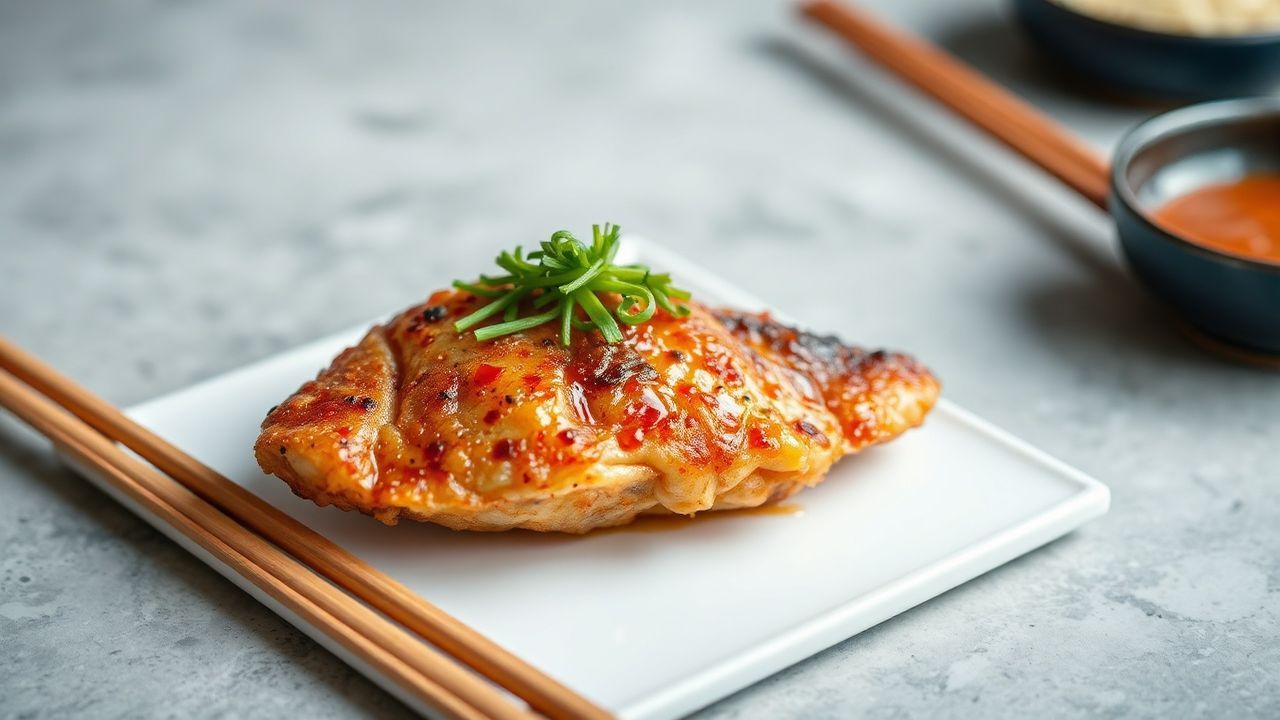
5) Toss and Serve Immediately
Gently fold crispy fish into the sauce right at the end. Aim for coating without saturating the crust. If you prefer maximum crunch, drizzle sauce over the top or serve sauce on the side for dipping.
Transfer to a serving platter right away. Garnish with scallions and sesame seeds for contrast and aroma. Serve with jasmine rice or lightly stir-fried greens to balance tangy richness.
Expert Insight: Use a two-stage workflow—fry first, then finish sauce, then combine fast. When you time sauce thickness and the final toss together, you get both glaze and crunch instead of one overpowering the other.
Chef’s Notes and Troubleshooting
Small changes make a big difference in crispness. Most issues come from moisture, temperature swings, or sauce thickness. Fix those, and the rest becomes easier.
If your crust looks pale, oil likely ran too cool. If crust darkens too fast, oil may be too hot. Adjust in small steps and keep batches consistent.
Best Fish Choices
Choose firm white fish with mild flavor so the sauce stands out. Cod, sea bass, tilapia, and snapper work well because their flesh holds up to frying and coating. Mild fish also prevents flavor clashes.
For seafood handling, keep fish cold until you coat it. Warm fish can get tacky, which affects how egg and cornstarch bind. Cold handling supports cleaner coating coverage.
Control Moisture
Pat dry thoroughly before seasoning. After coating, rest briefly on a rack so excess surface moisture evaporates. Don’t cover coated fish with plastic wrap too tightly, or trapped humidity can soften the crust.
When draining, use a wire rack when possible. Paper towels absorb oil but can also trap heat unevenly. A rack helps excess oil drip away while steam escapes.
Double-Dip Option
For extra crunch, you can double-dip after the first coating sets. Dip in egg again, then dredge in cornstarch once more. Keep the second coat thin so it stays crisp instead of heavy.
If you double-dip, reduce frying time slightly and watch color closely. Thicker coating cooks faster on the outside but still needs time to set through. Use your thermometer and adjust for batch size.
Balance Sweetness vs. Tang
Adjust sugar and vinegar based on your preference. If you want brighter tang, add more vinegar or citrus at the end. If your sauce tastes sharp, increase brown sugar in small amounts.
Pineapple juice adds fruit sweetness and aroma. For quality insight on fruit flavor, you can reference pineapple and how it contributes to fresh, tropical notes.
Serving Suggestions That Keep Texture
Serve immediately for best crispness. Place fried fish on a platter first, then toss with sauce quickly or spoon sauce over the top. That method keeps the crust exposed to air and stays crisp longer.
Pair with steamed jasmine rice, which absorbs some sauce without making fish mushy. Light stir-fried greens add crunch and help balance acidity. For extra freshness, add lime wedges.
For garnishing ideas, scallions add a mild onion bite. Toasted sesame seeds provide nutty aroma and visual contrast. These toppings also help food look “restaurant-ready.”
If you plan to serve family-style, set sauce in a bowl. Guests can dip or spoon sauce as they eat. This avoids soggy fish and increases satisfaction.
Nutrition Snapshot
Nutritional values vary based on fish cut, oil absorption, and portion size. The table below gives a practical estimate per serving for planning.
Use it as a guide when pairing with sides. For more general background on fish and nutrition, you can reference fish.
| Nutritional Info (per serving) | Calories | Protein | Carbs | Fat |
|---|---|---|---|---|
| Sweet and Sour Crispy Fish | 420 kcal | 35 g | 28 g | 15 g |
You can also explore crisping science through starch references like corn (as a starch source for many coatings) and sauce for glaze fundamentals. Keep your cooking process simple: dry fish, hot oil, glossy sauce, fast serving.
FAQ
If you’re troubleshooting your first batch, these answers cover the most common questions. They focus on crispness, sauce balance, and timing so you can get repeatable results.
Use the fixes below as a checklist. Adjust one variable at a time so you can learn what improved flavor and texture.
Why does my sweet and sour sauce make the fish soggy?
Soggy fish usually comes from timing. If the sauce sits on the crust too long, starch absorbs moisture. Toss or drizzle right before serving, or serve sauce on the side for dipping.
What’s the best oil temperature for crispy coating?
Target 350°F (175°C) for a crisp exterior and fully cooked interior. If the oil runs cooler, the coating absorbs more oil and turns heavy. If it runs hotter, coating browns before the fish cooks through.
Can I make the sauce ahead of time?
Yes. Cook the sauce, cool it, and refrigerate it in a sealed container for up to a few days. Reheat gently until glossy again, then toss the fish at the end for best texture.
Which fish works best for this recipe?
Choose firm white fish like cod, snapper, sea bass, or tilapia. Mild flavor helps the sweet-tangy sauce stand out. Firm texture holds the coating during frying and saucing.
How do I get extra-crispy results?
Dry the fish well, rest coated strips briefly, and fry in small batches. For an upgrade, try a thin double-dip in egg and cornstarch. Finish by tossing quickly so the crust stays crisp.
Enjoy your tangy crunch. With steady heat control and fast finishing, sweet and sour crispy fish becomes a reliable weeknight win.
See also: sweet and sour crispy fish