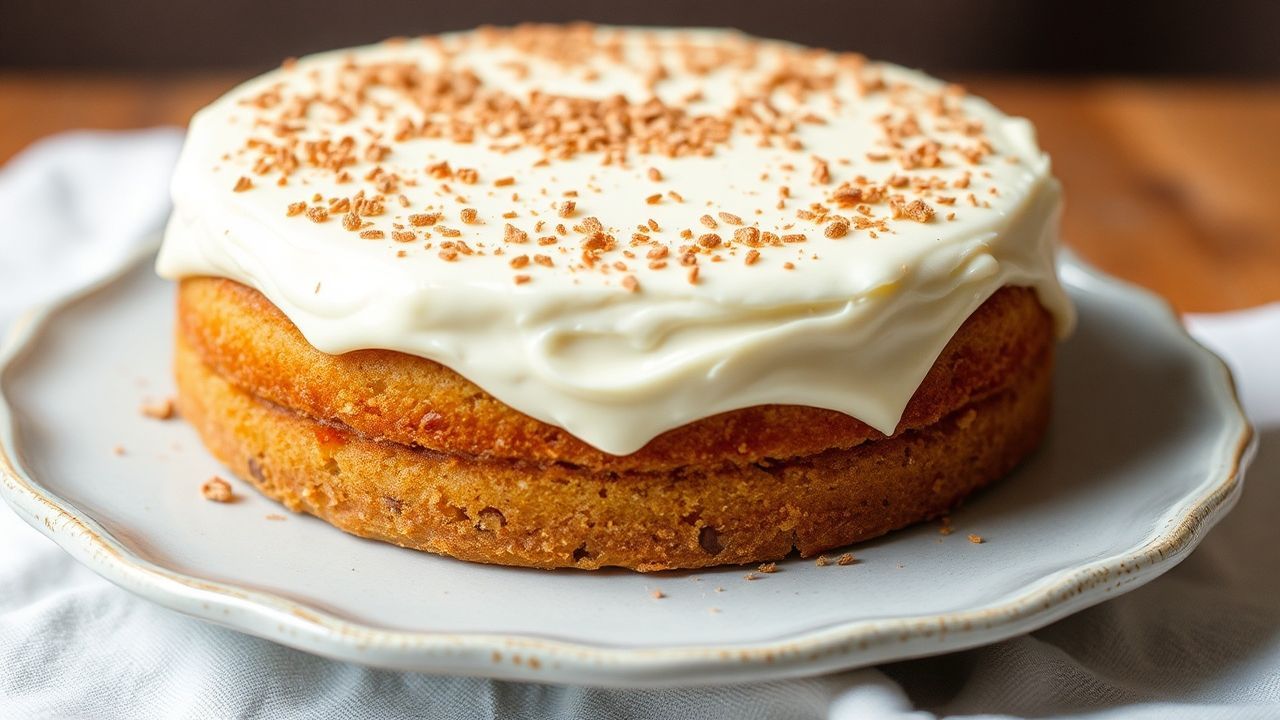
Baking a cake from scratch blends science and art. You manage ingredients, timing, and a bit of intuition. When you bake gluten-free vanilla cake, the “rules” shift because gluten no longer forms the batter’s elastic network. Still, you can achieve a tender, moist crumb and a clean vanilla flavor.
- Choosing the Finest Gluten-Free Flours for Light and Fluffy Texture
- Mastering the Art of Moisture: Secrets to a Tender Gluten-Free Vanilla Cake
- Flavor Boosters and Enhancers that Elevate Your Cake Batter
- Foolproof Baking Techniques for Even Rise and Perfect Crumb
- Q&A
- Why is baking a gluten-free vanilla cake different from a traditional cake?
- What are the best gluten-free flours for a vanilla cake?
- How can I ensure my gluten-free vanilla cake stays moist and tender?
- What’s the secret to stronger vanilla flavor?
- Do I need binders like xanthan gum?
- How should I adjust baking time or temperature?
- The Conclusion
At a Glance: Key Takeaways
- Use a flour + starch blend to mimic structure and keep the crumb soft.
- Control moisture with dairy-free or dairy fats plus smart hydration.
- Mix gently to protect air and prevent a tight, dry texture.
- Test doneness early; gluten-free cakes can overbake fast.
In this guide, you’ll learn how to build a reliable gluten-free vanilla cake from the first flour choice to the final cooling steps. You can use it for birthdays, potlucks, or any time you want a dessert everyone can share. You’ll also get a clear method for even rise, stable crumb, and consistent results.
The core idea stays simple: replace gluten’s structure with the right mix of starches, binders, and fats. Then support that structure with hydration and proper mixing. Once you follow that logic, your cake will taste “homemade” instead of “modified.”
Choosing the Finest Gluten-Free Flours for Light and Fluffy Texture
The best texture comes from balancing gluten-free flours and starches. Wheat flour naturally contributes protein-driven structure. Gluten-free systems rely on starch gelatinization and (often) added binders. For background on how wheat protein forms structure, see gluten.
Start with a classic trio: rice flour, tapioca starch, and potato starch. Rice flour gives a neutral base and smoother crumb. Tapioca brings stretch and chew. Potato starch supports softness and keeps the cake moist. For more on starch behavior in baking, review starch.
Use finely milled flours and fresh starches. Coarse particles can create a gritty bite. Stale starch also absorbs moisture differently, which can dull the lift you expect. If you want a reliable crumb, weigh ingredients and keep your blends consistent.
Avoid building the cake from only one flour type. A single flour often lacks the balance of absorption and tenderness that starches provide. For example, almond flour can add flavor but sometimes makes the crumb softer than you want. Coconut flour absorbs more liquid and can dry out the batter if you don’t adjust hydration. For general flour behavior, see flour.
You can add a small portion of gluten-free oat flour or millet flour for gentle flavor. Keep the add-on modest so the cake still sets cleanly. Oat flour also helps round out the texture, but too much can make the cake dense.
Finally, sift your dry mix. Sifting won’t “create” lift, but it removes lumps and helps distribute leaveners evenly. That even distribution supports a more uniform rise across the pan.
Mastering the Art of Moisture: Secrets to a Tender Gluten-Free Vanilla Cake
Moisture determines whether your crumb feels tender or dry. Gluten-free cakes lose moisture faster because they lack gluten’s elastic network. Use fats and hydration together so the crumb stays soft after cooling. For a science overview of water in baking, see baking.
Pick your liquid and fat strategy before you mix. In this recipe, you’ll use buttermilk (or a dairy-free milk plus lemon juice) and melted butter. The acidity can support tenderness and flavor, while the dairy fat smooths the crumb. If you need dairy-free options, choose a milk you like to drink for best flavor consistency.
Eggs also matter for both structure and moisture retention. Eggs coagulate as the cake bakes, helping the batter set. That set creates a stable slice that doesn’t crumble when you lift it. For background on egg proteins, see eggs.
Whip the eggs and sugar until slightly fluffy. This step aerates the batter and improves lift. Then fold wet into dry gently so you keep that air. Overmixing after flour goes in can tighten the crumb and reduce the lightness you worked to build.
Swap options can help you tailor moisture. Greek yogurt and applesauce can add hydration and softness. If you use them, keep the rest of your batter method the same so the cake still sets properly. Consistency beats guessing.
[WARNING]Pro-Caution: Don’t pack in extra liquid “just to be safe.” Too much moisture can delay starch gelatinization, leaving a gummy center even if the edges look done. Measure carefully and rely on the toothpick test.
Cool the cake fully before slicing or frosting. Gluten-free cakes finish setting as they cool. If you frost too soon, steam and trapped moisture can soften the crumb and blur the slice.
Flavor Boosters and Enhancers that Elevate Your Cake Batter
Vanilla flavor works best when it feels layered, not one-note. Use pure vanilla extract for a clean aroma. If you want stronger flavor, vanilla bean paste works too. For a quick primer on vanilla’s basics, see vanilla.
You can deepen the flavor with small additions. A touch of almond extract adds warmth and a “bakery” aroma. Lemon zest can brighten the vanilla and sharpen sweetness. Use these accents lightly so they support the cake rather than overpower it.
Consider switching part of the sugar to demerara or brown sugar. Brown sugar includes molasses, which adds caramel notes and a softer sweetness. Keep it modest if you want a classic vanilla profile.
A pinch of fine sea salt also improves perceived sweetness. Salt doesn’t make the cake salty. It balances the flavor and makes the vanilla taste more “rounded.”
[TIP]Expert Insight: For the most consistent vanilla taste across batches, add vanilla during the wet-mix stage after you whisk eggs and sugar. That timing distributes flavor evenly without risking curdled pockets.
Foolproof Baking Techniques for Even Rise and Perfect Crumb
Precise technique keeps gluten-free crumb stable. Measure with a kitchen scale and preheat fully. Gluten-free batters often show faster “set” once heat triggers starch gelatinization and egg coagulation. So a steady oven matters. For general heat effects in baking, see oven.
Use light-colored, non-stick pans or line with parchment. Dark pans brown faster, which can leave the center underbaked. Even bake color helps you pull the cake at the right moment.
Mix with a folding method. Combine dry ingredients until evenly mixed, then fold wet into dry just until no dry streaks remain. If the batter looks thick or lumpy, stop and scrape the bowl once. Don’t keep stirring.
Divide batter evenly and smooth the tops. Overworking the surface can deflate air pockets. Place pans on the same rack level. If you bake two pans, rotate halfway through for consistent heat exposure.
Midway through baking, don’t open the oven unless you must. Temperature drops can affect rise. Instead, check visually through the oven window if your oven has one. When you start checking doneness early, use the toothpick test.
Test doneness 5–10 minutes before the expected time. Insert a toothpick in the center. You want moist crumbs or a few tender crumbs clinging to the toothpick. A fully wet batter means it needs more time. If the toothpick comes out bone-dry, you likely overbaked.
Prep and Cook Time
Preparation: 20 minutes.
Cooking: 30–35 minutes.
Yield
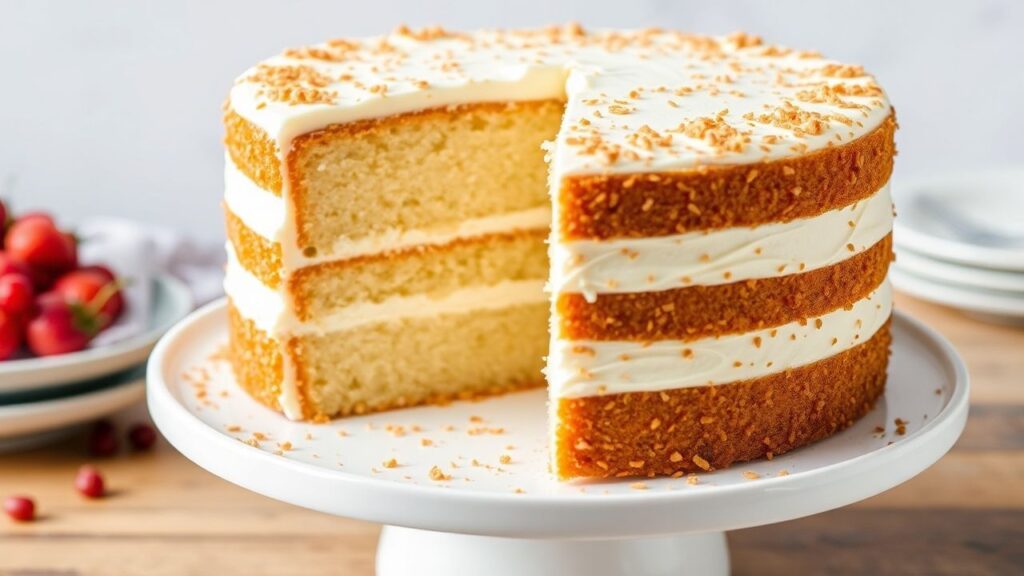
This recipe makes two 8-inch layers.
It yields 8–10 generous slices depending on thickness.
Difficulty Level
Medium: best for bakers who want a dependable gluten-free method.
You’ll learn flour balancing, hydration control, and careful mixing.
Ingredients
Use room-temperature eggs for smoother batter and better aeration.
Weigh ingredients when possible for the most consistent crumb.
- 1 cup gluten-free rice flour, sifted
- 1/2 cup tapioca starch
- 1/4 cup potato starch
- 1/4 cup gluten-free oat flour
- 1 1/2 tsp baking powder, gluten-free
- 1/2 tsp baking soda
- 1/4 tsp fine sea salt
- 3/4 cup granulated sugar
- 3 large eggs, room temperature
- 1/2 cup unsalted butter, melted and cooled
- 3/4 cup buttermilk or dairy-free milk + 1 tsp lemon juice
- 2 tsp pure vanilla extract
- Optional: 1/2 tsp almond extract or zest of 1 lemon
Instructions
Read through the steps once before you begin. That habit prevents rushed mixing and under-preheating.
Keep a gentle hand once the flour enters the bowl.
- Preheat your oven to 350°F (175°C). Grease and line two 8-inch cake pans with parchment for easy release.
- Whisk together the rice flour, tapioca starch, potato starch, oat flour, baking powder, baking soda, and salt until evenly combined.
- Beat eggs and sugar in a separate bowl until pale and slightly fluffy, about 3 minutes with an electric mixer.
- Mix in wet ingredients by slowly adding melted butter, vanilla extract, and buttermilk. Mix gently until incorporated. Add almond extract or lemon zest now if using.
- Fold dry into wet just until no dry streaks remain. Stop as soon as the batter looks uniform to keep tenderness.
- Divide batter evenly between pans. Smooth tops with a spatula.
- Bake 30–35 minutes, rotating pans halfway for even browning. Check doneness with a toothpick; aim for moist crumbs.
- Cool in pans for 10 minutes, then turn out onto wire racks. Cool completely before slicing or frosting.
Tips for Success
Gluten-free baking rewards repeatable habits. Use these checks to improve results fast.
Small adjustments can prevent common crumb issues.
- Use a blend of gluten-free flours and starches to mimic elasticity and improve slice stability.
- Room-temperature ingredients mix more smoothly and support better aeration.
- Sift flours to prevent lumps and ensure even leavening distribution.
- For extra moisture, test alternative liquids like oat yogurt—keep the total liquid volume consistent.
- Store properly: wrap tightly and refrigerate up to 3 days, or freeze for longer storage.
- Pair with a vanilla buttercream or light glaze based on your preference for richness.
- Use an oven thermometer if your oven runs hot or cool; accurate temperature improves rise.
Serving Suggestions
Serve this cake with simple toppings to let vanilla shine. Powdered sugar and fresh berries highlight the flavor without heavy sweetness.
For celebrations, frost with vanilla buttercream, cream cheese frosting, or a thin vanilla bean glaze.
You can also add texture with toasted nuts. Garnish carefully so the cake stays visually clean and the crumb remains tender.
| Nutrient | Per Slice (1/10 cake) |
|---|---|
| Calories | 220 kcal |
| Protein | 4 g |
| Carbohydrates | 30 g |
| Fat | 9 g |
Q&A
If you’ve baked gluten-free before, you’ve probably noticed that timing and texture respond differently than wheat cakes. These answers address the most common issues: rise, moisture, crumb stability, and vanilla flavor.
Use them as troubleshooting notes while you bake your next layer.
Why is baking a gluten-free vanilla cake different from a traditional cake?
Gluten provides elasticity and structure in wheat baking. Gluten-free cakes rely on starch gelatinization and egg protein set to create a stable crumb.
Because of that, you must choose flour blends and mixing methods that support lift and tenderness. The method matters as much as the ingredients.
What are the best gluten-free flours for a vanilla cake?
A flour blend works best because each component performs a specific job. Rice flour helps structure, tapioca supports chew and spring, and potato starch improves softness.
Oat flour or millet flour can add flavor depth if you keep the ratio balanced. When you balance starch and flour, you get a lighter slice.
How can I ensure my gluten-free vanilla cake stays moist and tender?
Use fats plus measured hydration. In this recipe, melted butter and buttermilk (or a dairy-free alternative plus lemon juice) support tenderness.
Mix gently and avoid overbaking. Gluten-free cakes dry out faster once they pass doneness.
What’s the secret to stronger vanilla flavor?
Use pure vanilla extract for consistent aroma. For deeper flavor, add a small amount of vanilla bean paste or a touch of almond extract.
Lemon zest also boosts perceived brightness, making vanilla taste more “open.”
Do I need binders like xanthan gum?
Many gluten-free cake recipes use binders because they help hold structure. However, this specific flour-and-starch formula already supports a tender set through starches and eggs.
If you substitute flours or change ratios, a binder may help. For general binder concepts, see xanthan gum.
How should I adjust baking time or temperature?
Check for doneness earlier than you would for wheat cake. Gluten-free layers often bake quickly or unevenly depending on your flour brands.
Use the toothpick test for moist crumbs, and let the cakes cool fully so they set without crumbling.
The Conclusion
Baking a gluten-free vanilla cake comes down to smart structure and careful moisture control. When you use a balanced flour-and-starch mix, aerate the eggs, and fold gently, the cake bakes up light and tender.
Follow the timing cues, test early, and cool completely before frosting. Then you’ll get layers that slice cleanly and taste like a real celebration cake, not a workaround.
Now you have a method you can repeat. Bake one layer, learn your oven’s rhythm, and adjust with confidence on the next run.
See also: gluten-free vanilla cake