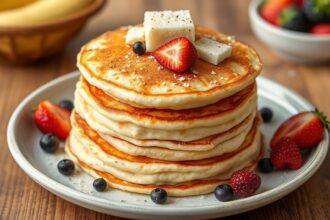
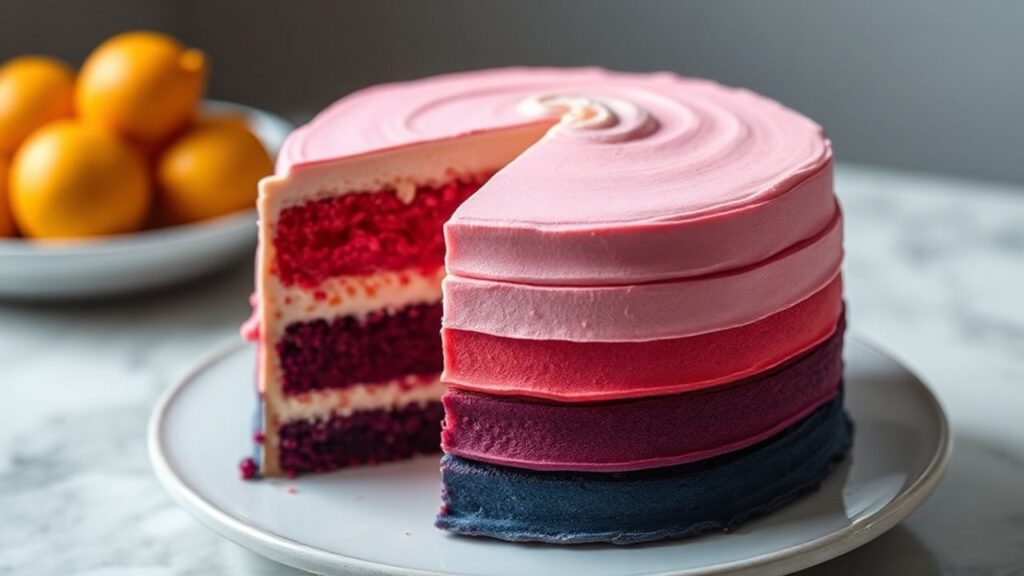
There’s something undeniably magical about desserts that dazzle both the eyes and the palate. The Ombre Layer Cake does exactly that: it uses a smooth gradient of color across multiple baked layers, then finishes with a clean frosting surface that makes the effect pop.
At a Glance
- Build five layers (or more) and tint each one with a stepped shade.
- Cool fully before stacking to protect color clarity.
- Use a thin crumb coat first, then frost again for sharp edges.
- Plan your palette with gel color for smooth, repeatable transitions.
With its mesmerizing gradient of colors cascading from light to dark, the ombre cake turns a simple confection into a standout centerpiece for birthdays, weddings, or any celebration. It also rewards careful technique: each layer bakes evenly, then stacks into a gradient story you can slice and serve with confidence.
In this guide, you’ll learn a practical workflow for crafting your own gradient masterpiece. You’ll also pick up timing cues, color-mixing methods, and frosting steps that help you achieve an ombre layer cake that looks polished and tastes balanced. For background on cake structure, see how cake batter and baking create crumb and stability.
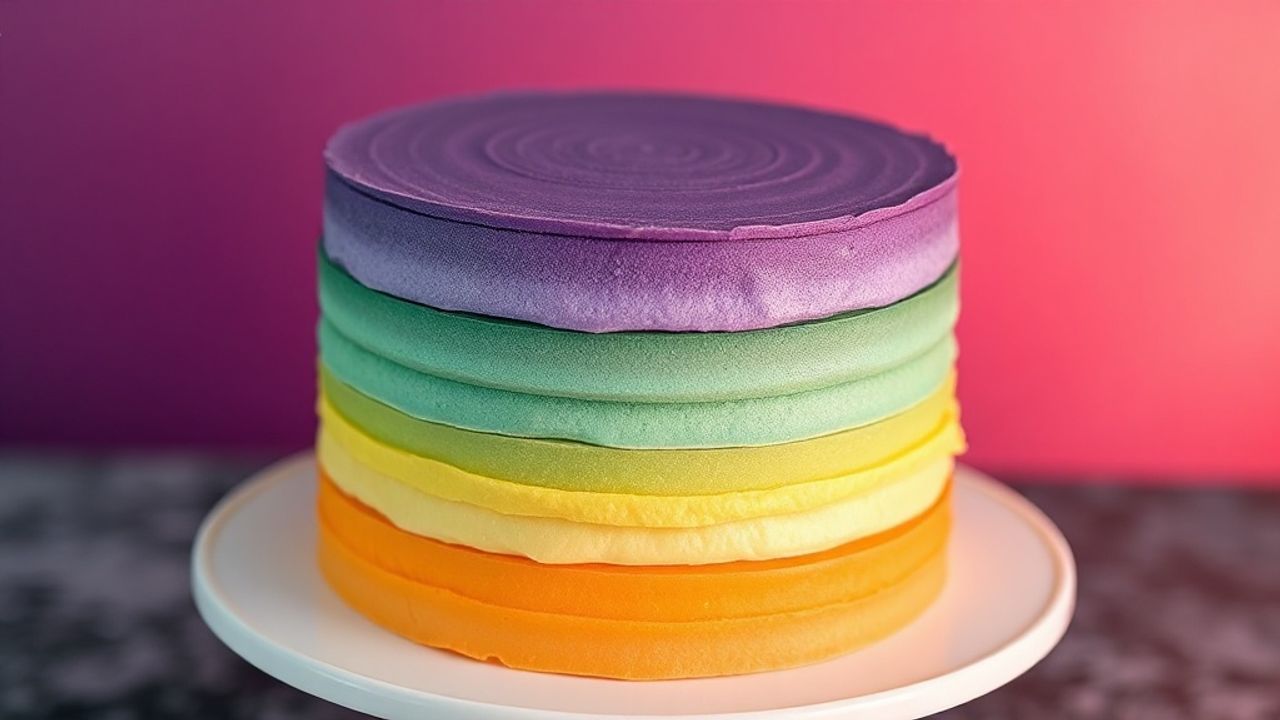
The Ombre Layer Cake is an eye-forward dessert that blends visual artistry with classic baking fundamentals. Each tier gets tinted in increasing intensity, so the stack naturally shows a smooth color fade from light to deep. This approach connects nicely with the way French pastry traditions prize precision and finishing, then adapts those skills to modern decorating trends.
Prep and cook time
Readiness: 45 minutes
Cooking: 30 minutes | Total time: 1 hour 15 minutes
These timings assume five baked layers with cool-down time before frosting. If you plan to bake earlier in the day, your frosting workflow stays calmer and more controlled.
For even baking, place pans on the same shelf position and rotate once halfway through. Batter that bakes at consistent heat sets more evenly, which supports a cleaner gradient.
Yield
Serves: 12–14 generous slices
This yield works well for an 8-inch, five-layer cake. If you use a wider pan or fewer layers, adjust your portioning expectations accordingly.
Difficulty level
Medium — ideal for cake bakers with some experience in layering and frosting.
You don’t need advanced pastry school skills, but you do need patience for cooling, stacking, and frosting. The ombre effect depends on repeatable layers and smooth finishes.
Ingredients
- 2 ¾ cups all-purpose flour, sifted
- 1 tbsp baking powder
- ½ tsp salt
- 1 cup unsalted butter, softened
- 2 cups granulated sugar
- 4 large eggs, room temperature
- 1 tbsp pure vanilla extract
- 1 cup whole milk, room temperature
- Food coloring gel (choose 4–5 shades of one hue, such as pinks or blues)
- 1 batch Swiss meringue buttercream (see your preferred recipe)
Gel color works best for saturated, consistent shades without thinning the batter. For a deeper look at frosting types, review buttercream basics and how butter and sugar create texture.
If your eggs and dairy stay too cold, the batter can look slightly thicker and may mix unevenly. Bring ingredients to room temperature for smoother emulsification and more uniform crumb.
Instructions
Follow each step in order. This workflow reduces stress and protects the gradient effect from smudging or muddy transitions.
- Preheat your oven to 350°F (175°C). Grease and line five 8-inch round cake pans. Even pan prep helps each layer release cleanly.
- Whisk flour, baking powder, and salt in a medium bowl. Set it aside for later.
- Beat butter and sugar on medium-high until fluffy and pale, about 4 minutes.
- Add eggs one at a time, mixing well after each. Stir in vanilla extract.
- Add dry ingredients alternately with milk in three additions. Start and end with the flour mixture. Mix on low until just combined.
- Divide the batter evenly into five bowls using a kitchen scale. Equal volume helps the gradient stay proportional.
- Tint each bowl gradually with food coloring gel. Keep the first bowl very light, then step up shade intensity each time. Mix gently until color looks uniform.
- Spoon each colored batter into its prepared pan. Smooth tops with a spatula so layers bake at similar height.
- Bake for 25–30 minutes, or until a toothpick comes out clean. Rotate pans halfway for more even browning.
- Cool cakes in pans for 10 minutes, then move to wire racks to cool completely.
- Frost prep: once cool, place the darkest layer on the bottom. Spread a thin, even layer of Swiss meringue buttercream between layers.
- Stack carefully with colors aligned from darkest below to lightest on top.
- Crumb coat the entire cake with buttercream, then chill for 30 minutes to set.
- Apply the final smooth layer. Use an offset spatula and bench scraper for clean edges.
Color mixing and ombre control
Start with a single hue and build a logical shade ladder. For most palettes, the difference between shades should be noticeable but not dramatic at each step.
Because gel concentrates pigment, you can refine tint gradually. If you want more reliability, weigh each tint addition so your gradient stays consistent across batches.
For general food science context on color and pigments, you can reference food coloring. This helps explain why gel intensity differs from liquid dyes and why small changes matter.
Stacking for crisp gradient lines
Color clarity depends on temperature. Let cakes cool all the way before frosting so buttercream doesn’t warm the surface and cause smearing.
After stacking, a chilled crumb coat locks crumbs in place. Then the final coat produces smoother coverage, which makes the ombre transition look sharp instead of dusty.
If you need a stability refresher, review cake stand usage and how a stable base supports even decorating pressure.
Instead, aim for room-temperature cake layers before you stack. If the layers feel even slightly warm, wait longer to protect the gradient effect.
Also, use a gentle hand when aligning layers. Sliding can smear tint where frosting meets cake, which makes transitions look uneven on the slice.
Chef’s Notes: Mastering the ombre layer cake
These notes target the biggest reasons ombre cakes turn out less than perfect. Use them to improve texture, color, and slice-clean presentation.
- Flavor pairings: Match your hue to subtle flavor cues. Light lemon or almond pairs well with pastel shades, while vanilla bean or coconut often complements deeper tones.
- Color transitions: Add gel in small steps. When you jump shades too far, the gradient looks banded rather than smooth.
- Prevent color bleeding: Cool fully before frosting, then chill between crumb coat and final coat. Cold buttercream helps keep color contrasts crisp.
- Improve layer evenness: Level domed tops so stacking stays flat. Even layers reduce tilt and keep frosting smooth.
- Make-ahead: Bake layers a day ahead, wrap tightly, and store at room temperature. Assemble and frost the next day for cleaner handling.
If you’re trimming domes, use a long serrated knife and a steady sawing motion. This technique keeps layers level without compressing crumb.
For better ingredient quality decisions, consider how butter moisture and temperature influence batter and buttercream behavior. This supports smoother mixing and more stable frosting.
After tinting, pause and check color under bright light. What looks balanced in dim kitchen lighting can skew warm or cool once the cake bakes.
Finally, keep your tools consistent. Use the same spatula and mixing bowl style across shades so you minimize variance in how pigment disperses.
Serving suggestions
Present your Ombre Layer Cake on a cake stand that keeps the sides visible. White stands amplify the gradient and help guests notice the full color story.
For garnish, add edible flowers or small fresh berries in complementary tones. You can also sprinkle shaved white chocolate around the base for a texture contrast that feels elegant.
Serve slices with vanilla bean whipped cream or fruit compote. This balances the sweetness of buttercream and brightens the overall flavor, especially with citrus or berry-forward palettes.
If you plan to store leftovers, refrigerate in an airtight container. Most buttercream cakes hold best when protected from drying air and strong fridge odors.
| Nutrition | Per Slice |
|---|---|
| Calories | 380 kcal |
| Protein | 5 g |
| Carbohydrates | 52 g |
| Fat | 16 g |
For frosting fundamentals, revisit meringue. Swiss meringue buttercream relies on whipped egg whites and sugar, so understanding meringue behavior supports stable texture and smooth spreading.
Q&A
Use these answers to troubleshoot common ombre layer cake questions. Quick fixes often solve the biggest visual problems.
What exactly is an Ombre Layer Cake?
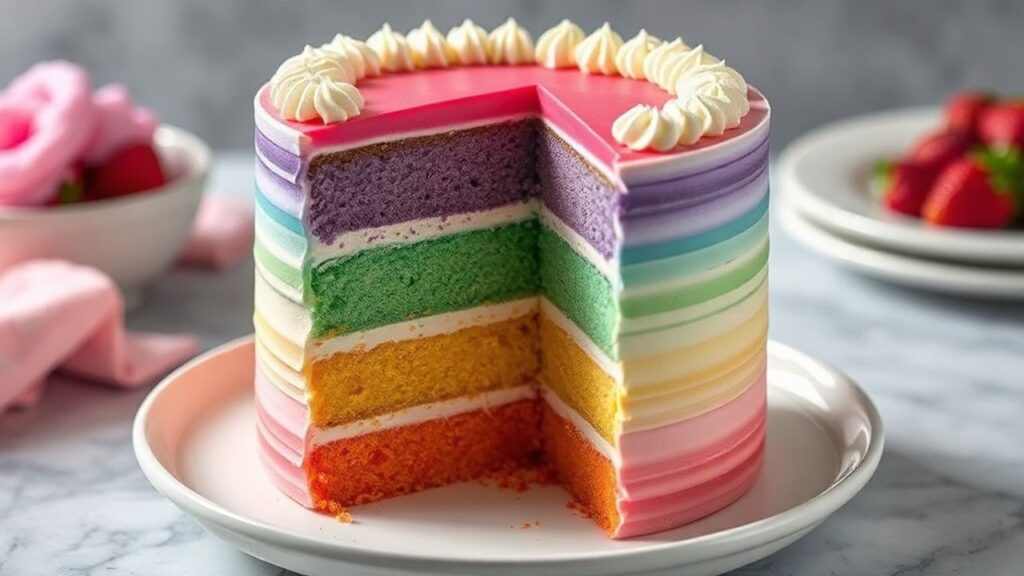
An ombre layer cake is a multi-layer cake where each tier uses progressively lighter or deeper color. The gradient comes from baking tinted batters and then stacking them in sequence.
Why does the ombre effect look smoother after frosting?
Frosting fills tiny gaps between layers and helps cover small crumb imperfections. When you crumb coat first and chill, the final coat smooths evenly, so color transitions appear continuous.
How do I prevent muddy colors between layers?
Cool baked layers completely before frosting, and chill after the crumb coat. Also spread buttercream thin at layer joins to keep colors crisp and reduce bleed where cake surfaces contact frosting.
Which flavors pair best with a gradient cake?
Most ombre cakes work well with classic, balanced flavors like vanilla, almond, lemon, or coconut. These flavors stay clear and don’t overpower the visual focus of the gradient.
Can I create an ombre effect in the frosting too?
Yes. You can tint buttercream in several shades and apply them in bands, then blend lightly with a scraper or offset spatula. Work carefully so you keep the outside smooth while still showing the gradient.
See also: Ombre Layer Cake