

Wholesome Oatmeal Molasses Bread: Nutty-Sweet Comfort You Can Actually Master
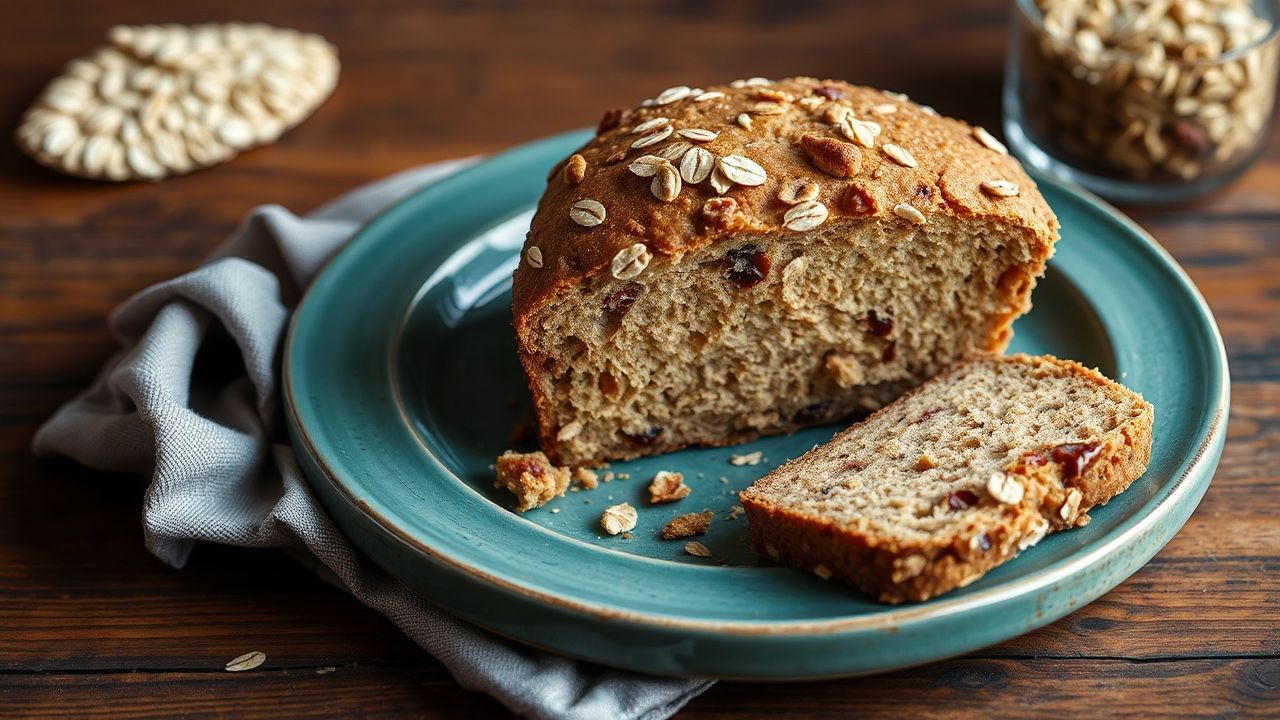
Wholesome oatmeal molasses bread turns pantry staples into a loaf that smells like toasted grain and caramel depth. Rolled oats add a rustic bite, while molasses brings a dark, glossy crust and a sweetness that tastes richer after the loaf cools.
- Wholesome Oatmeal Molasses Bread: Nutty-Sweet Comfort You Can Actually Master
- Why Oats and Molasses Belong Together
- Ingredients (With Practical Substitutions)
- Step-by-Step: The Method That Builds a Strong Rise
- Step 1: Proof the yeast (5–7 minutes)
- Step 2: Combine wet ingredients
- Step 3: Mix dry ingredients evenly
- Step 4: Bring dough together (sticky is okay)
- Step 5: Knead until elastic (8–10 minutes)
- Step 6: Bulk fermentation (about 1 hour)
- Step 7: Shape for even oven spring
- Step 8: Proof until domed (30–35 minutes)
- Step 9: Bake deeply brown (35 minutes at 375°F/190°C)
- Step 10: Cool completely (minimum 45 minutes)
- Texture and Crumb: What to Look For
- Tips for Consistent Results (No Guesswork Required)
- Serving Ideas That Highlight Molasses and Oats
- Storage and Freezing Guide
- Nutritional Notes (What to Expect)
- FAQ
This bread works for everyday meals because it slices cleanly, holds moisture well, and stays flexible for toast, sandwiches, or French toast. If you want a dependable yeast loaf with warm flavor and practical storage, this is a strong match.
At a Glance
- Flavor: Molasses adds caramel notes and a mineral-like depth that pairs with toasted oats.
- Texture: Rolled oats create a rustic crumb without making the bread dry.
- Success driver: Proofing time and dough feel matter more than exact minutes.
- Best result: Cool fully before slicing so the crumb sets.
Why Oats and Molasses Belong Together
Oats bring a nutty, earthy flavor plus fiber that helps bread feel hearty. They also hold water, which can improve keeping quality by slowing staling.
Molasses contributes more than sweetness. It adds dark color, a rounded caramel aroma, and a taste that feels “baked-on” rather than sugary. For background on how grains behave in bread, see oats, and for baking fundamentals, review bread.
The taste changes as the loaf cools
Right from the oven, molasses can taste sharper. During cooling, moisture redistributes and starches finish setting, so sweetness feels rounder and more integrated.
That’s why slicing too early often leads to “underwhelming flavor” even when the bake went well. Plan for a full cooling period so your loaf tastes its best.
Ingredients (With Practical Substitutions)
Use this ingredient list for a classic 9-inch loaf with a hearty crumb. Keep everything measured; yeast breads perform best when hydration and salt stay consistent.
Warm water matters for yeast activity. Aim for about 110°F/43°C. Too hot reduces yeast strength and can lead to a dense loaf.
Core recipe
- 1 cup rolled oats (+ extra for topping)
- 1 1/2 cups warm water (110°F/43°C)
- 2 1/4 tsp active dry yeast (1 packet)
- 1/2 cup unsulfured molasses
- 2 tbsp melted coconut oil or olive oil
- 1 tbsp apple cider vinegar
- 1 tbsp maple syrup (optional)
- 2 tsp fine sea salt
- 3 cups whole wheat flour
- 1 1/2 cups all-purpose flour
- 1/2 cup chopped walnuts or pecans (optional)
Substitutions that keep the bread reliable
Flour: Whole wheat absorbs more water than white flour. If you swap to more white flour, you may need slightly less water.
Oats: Quick oats soften faster and can reduce the rustic chew. Rolled oats give you the best “bite” for this loaf.
Step-by-Step: The Method That Builds a Strong Rise
Yeast breads succeed when you control hydration, give gluten time to develop, and proof at the right temperature. Follow the sequence below and adjust by dough feel rather than guesswork.
Total time is about 2 hours 10 minutes, with most of it happening while the dough ferments and proofs.
Step 1: Proof the yeast (5–7 minutes)
In a large bowl, combine warm water, active dry yeast, and molasses. Stir gently until mixed, then let stand until foamy.
This foaming step tells you yeast activity is strong. If it stays flat, the yeast may be old or the water may be too hot or too cool.
For yeast background, you can reference brewer’s yeast and fermentation.
Step 2: Combine wet ingredients
Stir in oil, apple cider vinegar, and maple syrup (if using). You want a smooth, dark mixture.
The vinegar adds a mild acidity that can support flavor and gluten stability during fermentation. It won’t make the bread taste sour when balanced correctly.
Step 3: Mix dry ingredients evenly
In a second bowl, whisk whole wheat flour, all-purpose flour, salt, rolled oats, and nuts (if using). Breaking up lumps now prevents flour pockets later.
Whole wheat flour varies by brand, so mixing dry ingredients evenly helps you hit consistent hydration.
Step 4: Bring dough together (sticky is okay)
Add dry ingredients to the wet in batches, stirring until a shaggy dough forms. Then switch to hand mixing to combine the last dry bits.
Expect tackiness. If the dough feels dry and stiff, add water 1 tablespoon at a time. If it’s soupy, add flour 1 tablespoon at a time.
Step 5: Knead until elastic (8–10 minutes)
Knead by hand on a lightly floured surface, or use a stand mixer with a dough hook. Your goal is elastic dough that springs back slightly.
This stage develops gluten networks that trap gas during fermentation. Without enough development, the loaf will rise less and feel dense.
Step 6: Bulk fermentation (about 1 hour)
Place dough in a lightly greased bowl, cover, and let rise until doubled. Use a draft-free spot for steady results.
If your kitchen runs cool, the dough may need more time. Watch volume change and soft expansion, not just the clock.
Step 7: Shape for even oven spring
Gently deflate the dough, then shape into a tight loaf. Place it seam-side down in a greased 9-inch pan.
Brush the top with water and sprinkle extra oats. The moisture helps oats adhere and encourages a textured, rustic top.
Step 8: Proof until domed (30–35 minutes)
Cover the pan and proof until the dough domes slightly above the rim. When you lightly press the dough, it should feel springy, not rigid.
If it rises too long, the loaf can collapse as it bakes. If it’s under-proofed, it can feel tight and heavy.
Step 9: Bake deeply brown (35 minutes at 375°F/190°C)
Bake until the crust turns deep brown and the loaf sounds hollow when tapped. For best slicing, keep the pan centered so heat reaches evenly.
Molasses darkens the crust quickly, so use color plus hollow sound as your guide—not just time.
Step 10: Cool completely (minimum 45 minutes)
Cool the loaf on a rack before slicing. Cooling finishes starch gelatinization and lets moisture redistribute.
If you cut too early, the crumb can look gummy and feel dense even though the loaf is fully baked. Cooling is where “great bread” becomes “great bread you repeat.”
[ TIP ]Expert Insight: If your kitchen feels cool, create a gentle proofing environment by turning on your oven light (no heat). The stable warmth helps molasses and oats ferment evenly, improving both rise and crumb texture.[/TIP]
Texture and Crumb: What to Look For
This loaf should slice with a clean edge and show a tender, slightly chewy crumb. Rolled oats create small visible bits, while the molasses keeps the interior moist.
If the crumb looks tight and uneven, the cause usually falls into one of three categories: weak yeast, under-proofing, or insufficient kneading. Adjust one variable at a time next bake.
Common outcomes and their likely causes
- Loaf rises slowly: Dough may be too cold or water may be off-temperature.
- Dense interior: Under-proofing or under-kneading usually limits gluten structure.
- Gummy crumb: Cutting too early or insufficient baking time.
- Dry slices: Overbaking or over-flouring during shaping.
For more on fermentation and how trapped gas affects bread structure, see bread making.
Tips for Consistent Results (No Guesswork Required)
Use dough feel as your primary measurement. Whole wheat absorbs water differently depending on brand and season, so exact hydration ratios may need tiny corrections.
Also remember that molasses tastes stronger or weaker depending on cooling time. Let the loaf cool before judging sweetness.
Dial sweetness and texture
Want more sweetness? Add 1 tablespoon honey or increase molasses by 1–2 tablespoons. Do it gradually so yeast and flavor stay balanced.
Want a more pronounced oat texture? Increase oats on top and keep the crumb rustic by avoiding over-flouring during shaping.
Timing shortcuts that still work
If your schedule changes, you can extend proofing by 10–15 minutes instead of increasing yeast. Controlled time often yields better flavor than forced speed.
You can also bake and freeze slices for up to 3 months. Wrap well to prevent freezer burn.
Serving Ideas That Highlight Molasses and Oats
This bread pairs naturally with both sweet and savory flavors because molasses sits in the “caramel” family. Oats add an earthy base that doesn’t get lost under toppings.
Warm serving boosts aroma, so lightly toast slices or use quick pan-warming when you can.
Sweet breakfasts
Spread almond butter, layer banana slices, and drizzle a touch of honey. The honey mirrors the molasses sweetness, while the nutty oat crumb adds texture contrast.
For a cozy option, make French toast with cinnamon and top with berries. Molasses already gives depth, so keep spices simple.
Savory meals
Try smoked turkey with sharp cheddar and grainy mustard. The molasses sweetness balances the salty tang, so every bite tastes intentional.
You can also serve thick slices with soups like butternut squash or lentil. The bread soaks up broth without becoming gummy.
Storage and Freezing Guide
Cool the loaf fully, then wrap it tightly to prevent moisture loss. At room temperature, it stays best for about 3 days.
If you slice first, store slices in a sealed bag to reduce drying. For longer storage, freeze whole or sliced.
Reheating for best taste
Thaw at room temperature, then toast lightly to restore crust character. This method gives you a fresh-baked feel without risking over-drying.
If you freeze the loaf whole, thaw first, then slice with a serrated knife for clean cuts.
Nutritional Notes (What to Expect)
Nutritional values vary based on flour brand, nut choice, and slice thickness. Whole wheat and oats increase fiber, which makes the bread more filling.
Molasses adds minerals and a deeper sweetness profile, while nuts add healthy fats that improve satiety.
If you track macros, weigh your loaf after baking, then calculate per-slice values for the most accurate numbers.
FAQ
Can I use quick oats instead of rolled oats?
Yes, but the texture will change. Quick oats absorb water faster and can soften the crumb, making the loaf less rustic and slightly denser.
Why did my loaf come out dense?
Density usually comes from one of these: weak yeast, under-proofing, or insufficient kneading. Check water temperature next time and confirm that bulk fermentation doubled the dough.
How can I tell if it’s properly proofed before baking?
The dough should look slightly domed above the pan edge. When you gently press it, it should spring back slowly, leaving a slight indentation.
What’s the best way to store this bread so it stays soft?
Cool completely, then wrap tightly. Store at room temperature up to 3 days, or freeze wrapped slices for up to 3 months. Re-toast after thawing for best crust.
Can I make this bread ahead for a holiday menu?
Absolutely. Bake, cool, then freeze slices. Thaw at room temperature and toast lightly so it feels fresh for serving.
See also: oatmeal molasses bread