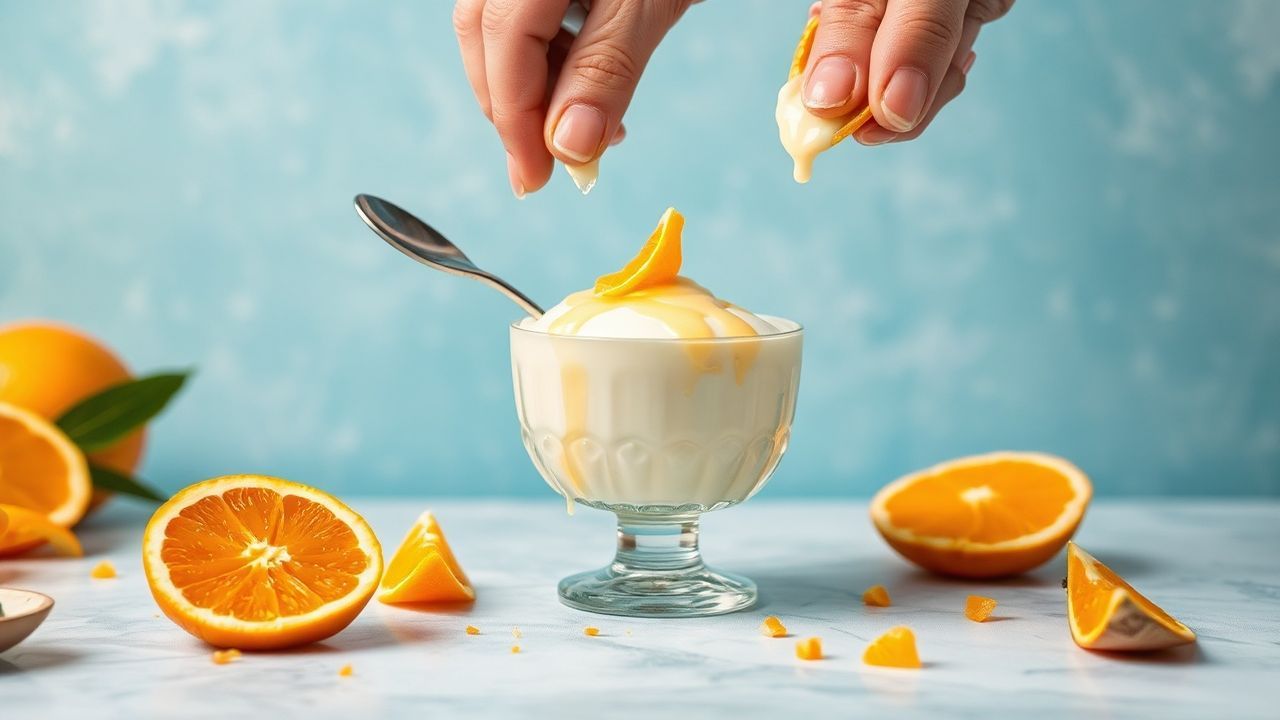
Milk-and-cornstarch pudding delivers a silky custard texture without eggs. Add a bright orange blossom drizzle, and you get a dessert that tastes refined but stays easy to make at home.
- Why Silky Milk & Cornstarch Pudding Stays Smooth
- Orange Blossom Drizzle: Keep the Fragrance Bright
- Ingredients You Can Trust (and What to Swap)
- Step-by-Step: Foolproof Method for Silky Milk & Cornstarch Pudding
- Step 1: Whisk Dry for Lump Prevention
- Step 2: Warm the Milk
- Step 3: Combine and Whisk Until Smooth
- Step 4: Cook Until Custard-Glossy
- Step 5: Add Vanilla and Orange Blossom Off-Heat
- Chilling for Clean Slices (and Better Texture)
- Pro-Caution and Expert Checks for Consistent Results
- Make-Ahead, Storage, and Re-Serving
- Sweetness and Dairy Variations
- Serving Ideas That Look Premium
- Recipe: Silky Milk & Cornstarch Pudding with Orange Blossom Drizzle
- FAQ
- Silkiness comes from cornstarch hydration and steady, medium heat.
- No lumps depends on proper dry whisking and gradual hot-milk tempering.
- Orange blossom stays fragrant when you add it off-heat.
- Clean slices require full chilling and a skin-free storage method.
Milk-and-cornstarch pudding wins because it gives you custard texture without eggs. Add a fragrant orange blossom drizzle, and the dessert shifts from comfort into elegant. Best of all, it sets quickly, slices cleanly, and reheats back to a smooth spoon texture.
- Perfect set comes from correct cornstarch hydration and steady, medium heat.
- No lumps: whisk dry starch with sugar, then whisk in hot milk gradually.
- Fresh aroma: stir orange blossom water in off-heat to protect its top notes.
- Serve smart: chill for clean slices, then garnish right before serving.
Why Silky Milk & Cornstarch Pudding Stays Smooth
Cornstarch thickens by forming a starch gel as heat and water work together. When you heat at the right pace and stir constantly, the gel network forms evenly, so the pudding stays glossy instead of grainy.
This method relies on controlled food chemistry you can repeat. Milk supplies fat and proteins for a creamy mouthfeel, while cornstarch supplies the thickening structure that holds the pudding after chilling. For a clear primer on gel behavior, see gel.
The Thickening Science (In Plain Kitchen Terms)
Cornstarch granules absorb liquid as they warm. As they swell, they link into a gel that thickens the whole mixture. If you cook too hot or you stop stirring, granules hydrate unevenly and you get lumps or a soft set.
Milk’s proteins also change as temperature rises. They help the pudding feel creamy and less “starchy” once it sets. If you want broader context on dairy proteins and function, review milk.
Glossy Texture Starts Before You Cook
Most “lumpy pudding” problems begin at mixing, not simmering. Whisking cornstarch with sugar and salt in the dry bowl helps disperse starch granules before heat activates hydration. That step reduces clumping at the moment the pudding begins to thicken.
Then whisk hot milk in gradually while the mixture stays thin. This tempering by whisking keeps cornstarch from forming instant pockets that cook too fast on the surface. If you want a helpful definition of thickening mechanisms, see thickening.
Orange Blossom Drizzle: Keep the Fragrance Bright
Orange blossom water tastes floral, sweet, and softly citrus-like. Heat can mute delicate aromatic compounds, so the timing matters more than most cooks expect.
Add orange blossom water after cooking and after you remove the pot from heat. That timing protects the top notes and preserves a clean floral finish. For flavor basics and compound behavior, see flavor.
How Much Orange Blossom Water Should You Use?
Start with a measured dose, then adjust. Orange blossom water varies by brand strength, so “one size fits all” doesn’t work for the best taste.
For a 4-serving batch, use about 1 tablespoon to start. If you want more, add 1 teaspoon at a time after the pudding cools slightly off-heat. Taste before chilling so you can correct the balance early.
Drizzle vs. Stir-In
Stirring orange blossom into the hot-but-off-heat pudding gives evenly flavored bites. A top drizzle increases aroma at the surface and makes the dessert look more luxurious.
For the best balance, flavor the pudding base off-heat, then use an optional extra drizzle for presentation. That approach keeps the interior smooth and ensures your garnish looks intentional.
Ingredients You Can Trust (and What to Swap)
This silky milk & cornstarch pudding uses pantry staples with one key rule: measure cornstarch precisely. Too little can stay runny, while too much can taste pasty instead of creamy.
Whole milk delivers the richest mouthfeel, but you can adjust within reason. If you change the dairy, expect a slightly different body and “custard” feel after chilling.
Core Recipe Ingredients
- Whole milk: 2.5 cups (for body and smoothness)
- Granulated sugar: 0.5 cup (adjust to taste)
- Cornstarch: 3 tablespoons (for the silky set)
- Vanilla extract: 1 teaspoon (warm base note)
- Orange blossom water: 1 tablespoon (floral finish)
- Fine sea salt: pinch (balances sweetness)
Optional Garnishes That Lift the Finish
Garnishes add texture contrast and visual polish. Toasted pistachios bring crunch and a subtle green tone, while mint adds a fresh lift that makes the floral note feel lighter.
If you love floral desserts, edible rose petals also work well. For a nutty garnish option, use pistachio and keep portions modest so the pudding stays the star.
Step-by-Step: Foolproof Method for Silky Milk & Cornstarch Pudding
This method follows a simple order: disperse starch, warm milk, cook until glossy, then add aromatics off-heat. Stay consistent with stirring during the final thickening phase, because that’s where smoothness gets locked in.
Use a medium saucepan with an even base. A thin-bottom pan can scorch milk proteins at the edges, and that can create an uneven flavor and texture.
Step 1: Whisk Dry for Lump Prevention
In a bowl, whisk cornstarch, sugar, and a pinch of salt until smooth. Keep whisking until you see no cornstarch streaks.
This creates even distribution before heat activates the starch. If you want a deeper look at how starches thicken, see starch.
Step 2: Warm the Milk
Pour 2 cups of the milk into a saucepan. Warm over medium heat until it’s hot but not boiling, with small bubbles at the edges as a guide.
Hot milk hydrates cornstarch more quickly and more evenly. If you start with cold milk, you can get uneven thickening before the mixture reaches the right temperature.
Step 3: Combine and Whisk Until Smooth
Pour hot milk into the dry mixture while whisking constantly. Aim for a smooth, thin base with no visible dry cornstarch.
Return the mixture to the saucepan. Add the remaining 0.5 cup milk, then switch back to medium heat.
Step 4: Cook Until Custard-Glossy
Cook for about 7–10 minutes, stirring constantly. The texture changes in stages: creamy first, then noticeably thicker, then glossy.
For doneness, the pudding should coat the back of a spoon. Another reliable check: run a spoon through the mixture; the line should hold briefly before slowly closing.
Step 5: Add Vanilla and Orange Blossom Off-Heat
Remove the pan from heat. Stir in vanilla extract and orange blossom water gently but thoroughly.
Off-heat addition keeps aroma brighter. If you overheat orange blossom water, you can taste a duller perfume note instead of a fresh, airy finish.
Chilling for Clean Slices (and Better Texture)
Portion the pudding into ramekins and cover each one with plastic wrap pressed directly on the surface. This prevents a skin from forming and protects the glossy top.
Refrigerate for at least 2 hours. Chilling gives the starch gel time to firm up so you can slice or scoop cleanly without crumbling.
If You Want Softer Spoon Texture
Chill for 45–60 minutes instead of 2 hours. The pudding stays creamy and spoonable, with less firm structure.
In this softer stage, you’ll often taste more of the floral top notes because the surface stays slightly looser and aromatics feel more immediate.
Pro-Caution and Expert Checks for Consistent Results
Making cornstarch-thickened pudding is simple, but small errors show up fast. The two biggest problems are boiling too hard and inconsistent stirring.
Follow the checks below and you’ll hit the sweet spot: silky, glossy, and set enough to serve beautifully.
Boiling forces starch gelation too aggressively. Gentle heat gives the starch time to hydrate evenly, which supports a uniform gel network.
If your pudding looks lumpy during cooking, stir hard right away while it’s still hot. Lumps often break down if you correct the heat and agitation early.
If lumps persist after proper cooking, strain through a fine mesh sieve while the pudding is still hot. Straining won’t fix undercooked starch, but it will remove cooked lumps and improve texture.
After straining, chill again for the full setting time. That helps the gel restabilize and regain a stable, sliceable structure.
Make-Ahead, Storage, and Re-Serving
Milk-and-cornstarch pudding keeps well because the gel network stays stable in the refrigerator. Make it ahead for dinner parties, since chilling often smooths flavor.
Store covered in the fridge for 3–4 days. The surface may compress as it cools, but the pudding should stay creamy if you keep the wrap pressed to the top.
Reheat Without Turning It Watery
If you want to serve it warm, reheat gently on low heat. Stir slowly until it loosens to your preferred spoon texture.
For best flavor, taste after reheating. Add a tiny splash of orange blossom water if needed, since aroma can fade over time.
Freezing (Usually Not Recommended)
Freezing can disturb the gel texture and cause separation on thawing. If you freeze anyway, plan for a softer set and a need to re-stir thoroughly.
Thaw in the fridge, then reheat gently while stirring to rebuild a uniform texture.
Sweetness and Dairy Variations
Sweetness controls how the floral note reads. If sugar feels too high, the orange blossom can seem harsh instead of elegant. If sugar feels too low, the pudding can taste milky and flat.
Adjust gradually so the cornstarch ratio stays correct. Small sugar changes usually won’t break thickening, but large swings can still affect how the dessert tastes.
Lower-Sugar Option
Reduce sugar by 2–3 tablespoons and stir in off-heat as directed. Keep cornstarch the same so the gel forms properly.
Then taste and add more orange blossom water only if the flavor needs a brighter lift.
Plant Milk Notes
You can use some unsweetened plant milks, but texture varies. Many plant milks contain different protein and fat levels, so the pudding may feel lighter.
Choose an unsweetened plant milk to keep flavor controlled. Keep cornstarch the same so thickening still works as intended.
Serving Ideas That Look Premium
Presentation affects how people taste. Use clear ramekins so diners see the glossy set and smooth sides.
Top at the last moment for contrast. Crunch stays crisp, and herbs stay fresh when you garnish just before serving.
Classic Garnish Pairings
- Orange blossom + pistachio: crunch and floral harmony
- Orange blossom + mint: fresh lift over rich dairy
- Orange blossom + rose petals: visual romance
- Orange blossom + honey: glossy sweetness (use lightly)
Optional Citrus Accent
If you want a more vivid aroma, add a tiny amount of orange zest as garnish. Keep it light; zest can dominate if you go heavy.
For a quick botanical and culinary reference on citrus, see orange.
Recipe: Silky Milk & Cornstarch Pudding with Orange Blossom Drizzle
This is the full, repeatable method for 4 servings. Follow it once, then adjust sweetness and aroma to match your palate.
When you master the heat and stirring rhythm, you can swap garnishes while keeping the same reliable custard structure.
Ingredients
- 2 1/2 cups whole milk, divided
- 1/2 cup granulated sugar
- 3 tablespoons cornstarch
- 1 teaspoon vanilla extract
- 1 tablespoon orange blossom water
- Pinch of fine sea salt
- Optional garnish: toasted pistachios, mint leaves, edible rose petals, light honey drizzle
Instructions
- Whisk dry: In a bowl, whisk cornstarch, sugar, and sea salt until smooth.
- Warm milk: Heat 2 cups of milk in a saucepan over medium heat until hot (not boiling).
- Combine: Pour hot milk into the dry mix while whisking. Whisk until smooth.
- Cook: Return mixture to the saucepan. Add remaining 1/2 cup milk. Cook 7–10 minutes on medium heat, stirring constantly, until glossy and spoon-coating.
- Finish off-heat: Remove from heat. Stir in vanilla and orange blossom water.
- Portion: Pour into ramekins. Press plastic wrap directly on the surface.
- Chill: Refrigerate at least 2 hours for clean slices.
- Garnish: Top just before serving.
See also: milk pudding
FAQ
Why does cornstarch pudding sometimes turn lumpy?
Lumps usually come from uneven hydration. Whisk the dry cornstarch with sugar and salt first, whisk in hot milk gradually, and keep stirring during cooking. Also avoid boiling, which can create rough texture.
If lumps form late, strain through a fine mesh sieve while the pudding is still hot, then chill again so the gel can re-set.
When should I add the orange blossom water?
Add orange blossom water after you remove the pudding from heat. Off-heat addition keeps the fragrance bright and prevents the aroma from dulling.
Stir gently, taste, and adjust in small increments if needed before you portion and chill.
Can I make silky milk & cornstarch pudding without whole milk?
You can use reduced-fat dairy or unsweetened plant milk, but texture may feel lighter. Keep cornstarch the same so thickening still works as intended.
For the closest “custard-like” mouthfeel, whole milk delivers the most stable richness after chilling.
How long should I chill it for the best set?
For clean slices, chill at least 2 hours. That time gives the starch gel enough structure to hold its shape.
For a softer spoon dessert, chill 45–60 minutes and serve right away.
What’s the best fix if my pudding is already lumpy?
First, whisk hard while it’s still hot and reduce heat next time to avoid aggressive bubbling. Lumps sometimes break down if you correct the process early.
If lumps remain, strain through a fine mesh sieve, stir well, then chill again so the gel re-stabilizes.