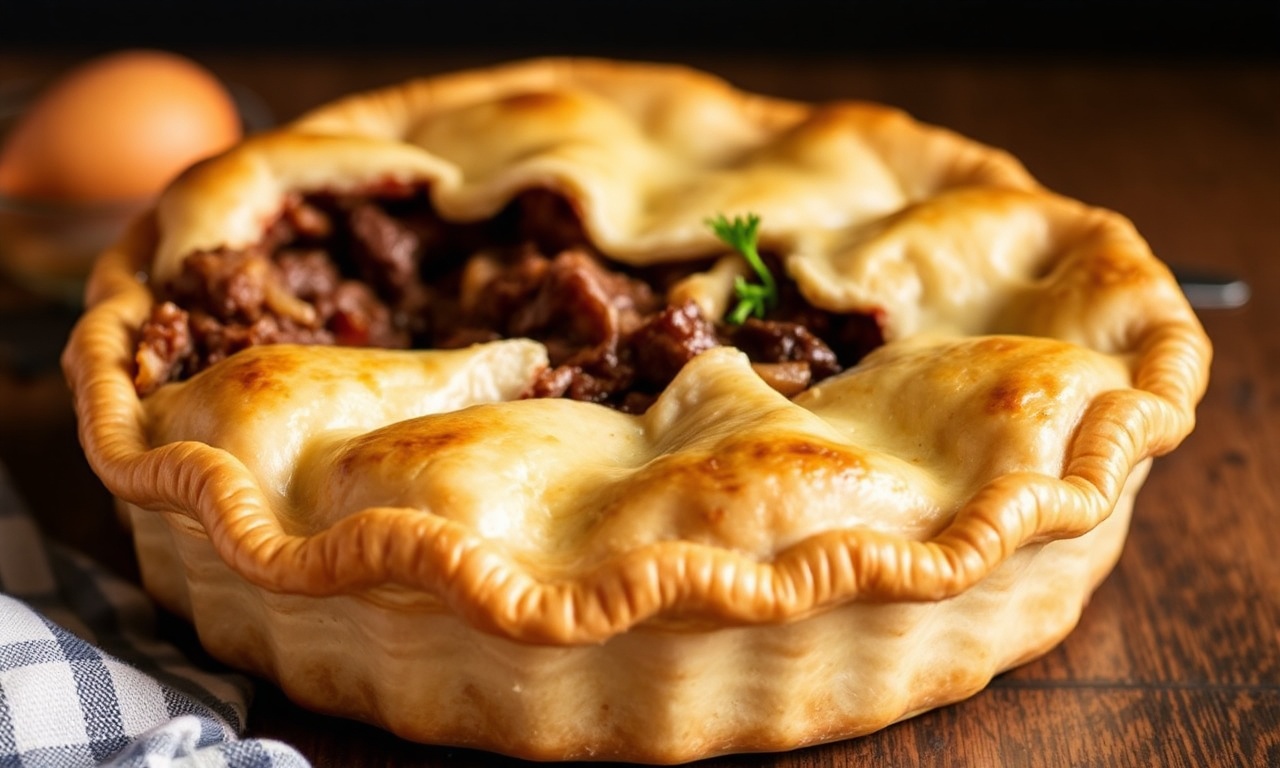
Few dinners feel as satisfying as a beef and onion pie with a crisp, flaky crust and a deeply savory filling. You get comfort fast because the flavor builds in two smart steps: caramelized onions and a browned beef base, then cold pastry bakes into golden layers.
- What Makes This Beef & Onion Pie So Good?
- Planning a Real 45-Minute Prep (Without Cutting Corners)
- Ingredients You Need (With the “Why” Behind Them)
- Step-by-Step: Flaky Crust + Thick, Cozy Filling
- Step 1: Caramelize the Onions (Deep, Sweet Flavor)
- Step 2: Brown the Beef for Roasted Savory Notes
- Step 3: Combine, Simmer, and Thicken
- Step 4: Make the Pastry Dough (Cold Butter = Flaky Layers)
- Step 5: Chill, Roll, and Assemble
- Baking: The Two-Stage Temperature Method for Maximum Browning
- Quality Checklist: How to Fix Common Problems Fast
- If the Filling Is Too Runny
- If the Crust Turns Tough Instead of Flaky
- If the Bottom Crust Browns Too Slowly
- If the Top Browns Too Fast
- Flavor Upgrades That Stay Balanced
- Serving Suggestions That Keep It from Feeling Heavy
- Make-Ahead, Storage, and Reheating (So It Stays Crisp)
- FAQ
- Keyword focus: beef and onion pie in every stage—filling and crust.
- Speed method: prep fast, then bake with a two-stage temperature plan.
- Texture control: cool filling + cold butter for a crisp bottom.
- Finish right: bake until vent bubbles for even thickening.
This recipe targets 45-minute active prep. You’ll slice onions, brown beef, simmer briefly to thicken, and assemble while the dough stays cold. Baking does the rest, so the pie emerges with browned edges and a rich, meaty aroma.
What Makes This Beef & Onion Pie So Good?
A hearty pie tastes “slow” because two key reactions build depth. First, onions turn sweet as sugars concentrate. Second, browned beef adds roasted savory notes through Maillard chemistry.
When you manage heat and timing, the filling tastes layered, not flat. Caramelized onions deliver mellow sweetness, while beef browning boosts umami that holds up after baking. For the science behind sugar browning, see caramelization.
For meat browning, use Maillard reaction as your guide. You want deep color, not burnt bits. Stir often, keep the heat controlled, and let time do the work.
Planning a Real 45-Minute Prep (Without Cutting Corners)
“45 minutes” means active work, not total oven time. In practice, you spend about 45 minutes on prep tasks: slicing onions, browning beef, thickening the filling, and assembling the pie.
The secret is sequencing. Caramelize onions first, brown beef second, combine and simmer briefly to thicken, then cool. Only then should you assemble the crust so you protect the bottom pastry from steam.
Best Timeline
Active prep: ~45 minutes for onions, beef, simmering, and assembly. Keep your pans ready and your steps linear.
Chill time: at least 30 minutes so butter firms and dough relaxes. If you can chill longer, the crust bakes even flakier.
Bake time: roughly 55–70 minutes depending on oven heat and pie depth. Start hot for lift, then lower heat for deep browning.
Yield and Difficulty
This beef and onion pie makes one 9-inch pie and serves about 6. It also scales well if you want a second pie for later.
Difficulty stays at medium. You don’t need advanced pastry skill, but you must respect temperature and doneness cues.
Ingredients You Need (With the “Why” Behind Them)
Great pies rely on a short list of ingredients used with smart technique. Each item earns its place through flavor, texture, or structure.
For a quick refresher on how onions behave when cooked, use onion as background. For meat structure and composition, see beef to understand why chuck becomes tender with simmering.
Filling Ingredients
Beef: 1.5 lb (700g) chuck, finely chopped or minced. Chuck has enough fat and connective tissue to soften during simmering.
Onions: 3 large onions, thinly sliced. Thin slices caramelize faster and melt into a rich, uniform filling.
Fat and aromatics: olive oil, garlic, tomato paste, fresh thyme, and bay leaf. These add depth without overpowering the beef-onion core.
Liquid and thickener: low-sodium beef broth plus a small amount of flour. Flour helps the filling set so slices stay neat.
Pastry Ingredients
You’ll use a classic butter pastry: flour, salt, cold cubed butter, and ice water. Cold fat forms pockets that create steam layers while baking.
For layer-forming pastry basics, read puff pastry. The same fat/steam logic supports flakiness in this pie crust style.
Exact Ingredient List
Filling
- 1.5 lb (700g) beef chuck, finely chopped
- 3 large onions, thinly sliced
- 3 tbsp olive oil
- 2 cloves garlic, minced
- 1 tbsp tomato paste
- 1 cup beef broth (low sodium)
- 1 tsp fresh thyme leaves
- 1 bay leaf
- Salt and black pepper, to taste
- 1 tbsp all-purpose flour (for thickening)
Pastry
- 2 1/2 cups (320g) all-purpose flour, sifted
- 1 tsp salt
- 1 cup (225g) unsalted butter, cold and cubed
- 6–8 tbsp ice-cold water
- 1 egg, beaten (egg wash)
Step-by-Step: Flaky Crust + Thick, Cozy Filling
Follow the order closely. Caramelizing and browning first builds a bold filling. Chilling and gentle mixing protect crust layers.
As you work, keep your hands cool and minimize mixing. Those habits directly improve flake quality and help your beef and onion pie slice cleanly.
Step 1: Caramelize the Onions (Deep, Sweet Flavor)
Heat 2 tbsp olive oil in a large skillet over medium-low. Add onions and a small pinch of salt, then cook 25–35 minutes, stirring occasionally.
Cook until onions turn deep golden and smell sweet. If they brown too fast, lower heat and add a splash of water as needed to prevent scorching.
For deeper flavor notes, remember onions shift from sharp to sweet as browning begins. Use caramelization as your mental model while you cook.
Step 2: Brown the Beef for Roasted Savory Notes
While onions cook, heat 1 tbsp olive oil in a separate pan over medium-high. Add beef in a single layer and cook 6–8 minutes.
Break up lumps as it browns. Stir in garlic and tomato paste, then cook 2 minutes to toast the paste so it tastes smoother in the pie.
Step 3: Combine, Simmer, and Thicken
Add caramelized onions, thyme, bay leaf, and beef broth to the beef. Bring to a gentle simmer, then sprinkle in flour.
Stir until thickened, then simmer 12–15 minutes. Remove the bay leaf, season with salt and black pepper, and cool completely.
Cooling matters because hot filling steams your crust from below. That steam can soften the bottom pastry before the oven sets it.
Step 4: Make the Pastry Dough (Cold Butter = Flaky Layers)
In a bowl, combine sifted flour and salt. Add cold butter cubes, then cut or rub them into the flour until the mixture looks like coarse crumbs with visible butter pieces.
Drizzle ice-cold water one tablespoon at a time. Mix lightly until the dough just holds together. Do not knead.
Step 5: Chill, Roll, and Assemble
Form the dough into a disk, wrap it, and refrigerate for at least 30 minutes. Chilling firms butter so it melts in the oven instead of during mixing.
Roll about two-thirds of dough to line your 9-inch pie dish. Add cooled filling, then roll remaining dough for the top. Trim, crimp, and cut 3–4 steam slits.
Brush with egg wash for a consistent golden finish.
After assembly, keep the pie cold while you preheat. A firm crust browns more evenly and holds its shape during the first stage bake.
If you rush this step, the filling may also spread before the flour fully sets. Let the filling cool to room temperature or chill until firm, then assemble.
Baking: The Two-Stage Temperature Method for Maximum Browning
Most home ovens vary, so the two-stage bake keeps texture consistent. Starting hot sets the crust and helps lift. Finishing lower lets the top brown deeply while the center cooks through.
Bake until filling bubbles through the steam vents. That bubbling shows moisture reduction and signals a thick, stable interior for slicing.
Ideal Bake Settings
Preheat oven: 400°F (200°C).
Stage 1: bake 25 minutes until the crust begins to color.
Stage 2: reduce to 350°F (175°C) and bake 30–40 minutes until deeply golden and bubbling.
Rest Before Slicing
Rest the pie 10–15 minutes. This helps starches settle and reduces runny slices.
Slice with a sharp knife and wipe between cuts if needed. Keep pressure steady so the crust holds crisp layers without cracking.
Quality Checklist: How to Fix Common Problems Fast
Even skilled cooks run into issues. Use this checklist to fix texture fast and lock in the best results for your beef and onion pie.
Most failures come from temperature (butter too warm, filling too hot) or timing (filling too loose, crust underbaked). Adjust one variable at a time so you can learn what changed.
If the Filling Is Too Runny
Runny filling usually means the simmer didn’t reduce enough or the flour needs a bit more time. After cooling, the filling should coat a spoon and hold shape.
Next time, simmer 5–10 minutes longer after thickening. Always cool fully before assembly so the flour sets.
If the Crust Turns Tough Instead of Flaky
Tough crust often comes from overmixing or overworking the dough. Gluten develops when you knead and handle too much.
Stop mixing as soon as dough holds together. Chill longer if your kitchen stays warm, since cold fat supports flake.
If the Bottom Crust Browns Too Slowly
Some ovens under-brown the base. If the top looks golden but the bottom stays pale, bake longer at 350°F (175°C).
You can also place the pie on a preheated baking tray for the first stage. That transfers heat to the bottom quickly.
If the Top Browns Too Fast
Cover the pie loosely with foil once the top looks well colored. Continue baking until the filling bubbles at the vents.
This step protects edges while the interior finishes cooking. Keep an eye on vent bubbling so you don’t underbake.
Flavor Upgrades That Stay Balanced
This beef and onion pie already delivers a strong balance: sweet onions, savory beef, and thyme depth. Still, small upgrades can sharpen the taste without changing the core profile.
Pick one or two options, then keep the rest classic. Over-seasoning hides the onion sweetness and can dull the beef’s roast notes.
Boost the Smoked/Herby Notes
Add 1/2–1 tsp smoked paprika for gentle warmth. Or increase black pepper for a slightly sharper finish.
Thyme and bay leaf handle those flavors well because they stay aromatic during baking.
Strengthen the Tomato Depth
Cook tomato paste for the full 2 minutes. That step removes harsher notes and rounds out the umami feel.
For flavor-balance background, read umami. Use it to understand why savory ingredients build a fuller taste.
Serving Suggestions That Keep It from Feeling Heavy
Rich pies taste best with bright, crisp sides. Choose vegetables that cut fat and add color next to the deep brown filling.
Light acids help. A squeeze of lemon or a quick vinaigrette can lift the beef-onion flavor without adding sweetness.
Best Side Pairings
- Steamed green beans with lemon
- Buttered peas
- Roasted root vegetables
- Simple herb salad with a light vinaigrette
- Mustard or chutney for tang
Make-Ahead, Storage, and Reheating (So It Stays Crisp)
Plan ahead when you want weeknight ease. The filling often tastes even better after resting, and it thickens more as it chills.
Always cool the pie fully before wrapping or refrigerating. Heat trapped in packaging softens pastry and reduces crispness.
Refrigeration
Wrap tightly and refrigerate up to 3 days. The filling sets firmer, so slices stay neat.
If the crust softens slightly, reheating restores structure.
Reheat Without Losing Flake
Reheat slices in a 325°F (165°C) oven until hot through. This method warms the center while keeping the crust crisp.
A microwave heats fast but usually softens pastry. If you use one, re-crisp in an oven for a few minutes.
Freezing for Future Dinners
Freeze after full cooling. Wrap well to prevent freezer burn and label with the date.
Reheat from frozen in a moderate oven until the center bubbles. Bubbling shows the filling has warmed and the crust has re-set.
FAQ
What beef works best for a fast-hearty pie?
Chuck works very well because it contains enough fat and connective tissue to become tender with simmering. Finely chop or mince it so it cooks evenly and thickens smoothly.
If you use leaner beef, you may lose richness and risk a drier filling after baking.
How do I keep the pastry flaky instead of chewy?
Keep butter cold, mix dough lightly, and chill before rolling. Overworking develops gluten, which makes pastry feel tough and reduces flake.
Also, handle the dough gently during rolling. Try to keep thickness even so the crust bakes uniformly.
Why must I cool the filling before assembling?
Hot filling steams the bottom crust and can prevent it from setting crisp. Cooling also helps thickened filling hold shape for cleaner slices.
Cold dough and warm filling balance differently. Aim for room-temp or chilled filling before assembly.
Can I make the filling ahead of time?
Yes. Cook the filling, cool it completely, and refrigerate up to 3 days. Assemble and bake when you’re ready for the flaky crust.
Cold filling can even help the pie bake more evenly, since the crust heats at a steadier pace.
How can I prevent a soggy bottom crust?
Cool the filling fully, bake until the filling bubbles, and avoid underbaking the base. If needed, place the pie on a preheated tray during the first bake stage.
Steam vents matter too. They let excess moisture escape as the pie finishes.
See also: Beef & Onion Pie