

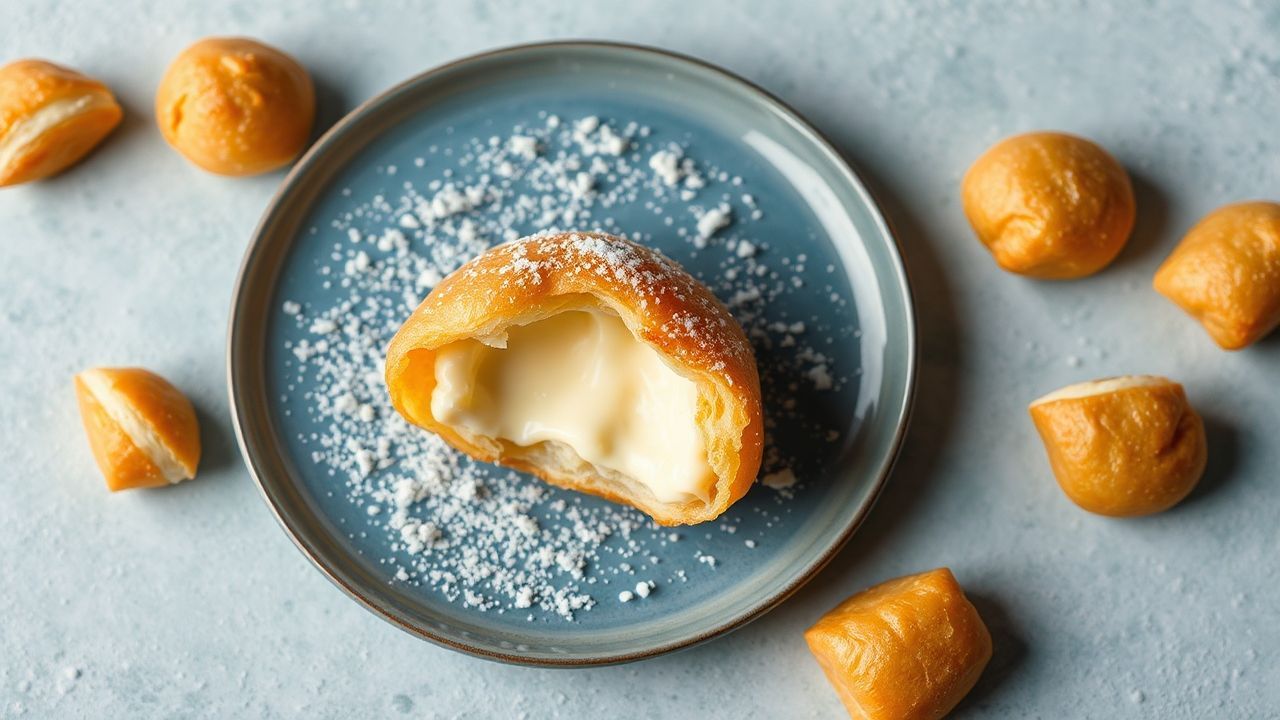
Golden fried dough delights filled with sweet cheese bliss hit the sweet spot between crisp, airy texture and rich, creamy filling. This classic style of fried pastry uses simple pantry ingredients, yet it delivers a restaurant-level contrast in every bite.
- What Makes Golden Fried Dough Delights So Irresistible?
- Ingredients for Sweet Cheese Filling and Golden Dough
- Prep and Cook Time
- Yield and Difficulty
- Ingredients
- Instructions
- Step 1: Prepare the Dough
- Step 2: Form and Rest
- Step 3: Make the Sweet Cheese Bliss Filling
- Step 4: Roll, Cut, and Fill
- Step 5: Fold and Seal
- Step 6: Fry to Golden Perfection
- Step 7: Cool Briefly and Serve
- Tips for Success (Texture, Crunch, and Flavor)
- Serving Suggestions
- The Technique Behind the Texture and Flavor
- At a Glance
- FAQ
- Focus flavor: golden crust + creamy sweet cheese
- Best results: drain well and keep oil at 350°F
- Texture cue: thick ricotta prevents a soggy center
- Make-ahead: assemble in advance, fry fresh
Whether you call them fried cheese pockets, filled dough triangles, or sweet cheese pastries, the core method stays the same. You rest the dough for easy shaping, seal the edges tight, then fry until evenly golden.
In many regions, fried dough plays a major role in celebration food. If you want a reliable anchor for the idea, you can compare this approach with the broader history of fried dough traditions worldwide.
This recipe keeps your results consistent by using a soft-cheese filling with balanced sweetness. You also control the crunch by shaping evenly and frying in manageable batches.
What Makes Golden Fried Dough Delights So Irresistible?
The magic comes from two contrasts. First, the exterior sets quickly in hot oil, forming a crisp shell. Second, the filling stays creamy and warm once sealed inside.
To understand the texture, it helps to know how frying works. Oil-driven cooking triggers rapid surface gelatinization and browning, which is why products like frying create that signature crunch when temperatures stay steady.
Sweet cheese bliss works because it balances dairy richness with bright flavor. A touch of lemon zest adds aroma, while powdered sugar sweetens without making the filling watery.
You also get better eating quality when the dough has enough fat and rest time. Resting relaxes gluten, which improves rolling and sealing.
Ingredients for Sweet Cheese Filling and Golden Dough
This recipe uses a tender, lightly sweet dough and a creamy ricotta-based filling. You can keep the ingredient list straightforward and still get a bakery-style result.
For dough, you’ll use all-purpose flour, chilled butter, lukewarm milk, and a yolk for richness. For filling, ricotta and cream cheese create a smooth, scoopable texture.
If you want a helpful reference on dairy-based fillings, review general concepts behind ricotta and why draining matters for thickness. Drained ricotta prevents steam buildup that can loosen the pastry interior.
Dough Essentials (Flaky, Not Tough)
Use chilled butter so it stays firm during mixing. That firmness helps create tender layers as the dough fries.
Mix just until the dough forms. Overmixing makes gluten tight, and tight gluten can lead to chewy centers instead of crisp shells.
Sweet Cheese Bliss (Creamy, Thick, and Sealed)
Blend ricotta, cream cheese, powdered sugar, lemon zest, vanilla, and a pinch of salt. Stop when the mixture turns smooth and creamy.
Chill the filling so it firms slightly. Firmer filling spreads less and improves edge sealing during folding.
Prep and Cook Time
This schedule supports fast, high-quality frying without rushing dough handling. You’ll still get a clean seal and consistent golden color.
Plan your workspace: thermometer ready, tray lined with paper towels, and filling chilled. Those steps cut errors and improve dwell time for readers who follow closely.
- Readiness: 25 minutes
- Cook Time: 15 minutes
- Total Time: 40 minutes
Yield and Difficulty
This recipe makes about 12 golden fried delights. It’s a good batch size for even frying because you don’t overload the pan.
The method suits cooks with basic kitchen confidence. You’ll get the best outcome by sealing carefully and frying in controlled batches.
Difficulty: Medium — requires basic frying skills and dough handling.
Ingredients
Use fresh, room-temperature dairy for filling, and chilled butter for dough. Those temperature differences matter for texture and sealing.
If any ingredient feels off (dry ricotta or watery spread), adjust early. Drain ricotta well and keep filling thick to protect crispness.
For the Dough
- 2 cups all-purpose flour, sifted
- 2 tablespoons granulated sugar
- 1/2 teaspoon salt
- 1/2 cup unsalted butter, chilled and cubed
- 1/2 cup milk, lukewarm
- 1 large egg yolk
- 1 teaspoon vanilla extract
- Vegetable oil, for frying
For the Creamy Sweet Cheese Filling
- 1 cup ricotta cheese, well-drained
- 1/2 cup cream cheese, softened
- 1/3 cup powdered sugar
- 1 teaspoon lemon zest, finely grated
- 1 teaspoon vanilla extract
- Pinch of salt
Instructions
Follow the steps in order for the best dough strength and the cleanest frying. Each step sets up the next one.
Keep the dough covered while resting, and keep filling chilled. That steady workflow reduces mess and helps you fry evenly.
Step 1: Prepare the Dough
- Mix dry ingredients: In a large bowl, combine sifted flour, sugar, and salt.
- Cut in butter: Work in chilled butter with a pastry cutter or your fingertips until the mixture looks like coarse crumbs.
Cutting in butter evenly matters because it helps create tenderness. You want visible butter pieces before liquids go in.
Overworking at this stage can warm the butter. If the kitchen runs hot, pause and chill the bowl for 3–5 minutes.
Step 2: Form and Rest
- Add wet ingredients: Stir in egg yolk, vanilla extract, and warm milk gradually until a soft dough forms.
- Rest: Wrap and refrigerate for 30 minutes.
Resting improves rollability and sealing. After chilling, the dough feels less sticky and more cooperative.
If you want background on why dough behaves this way, check general notes on gluten and dough structure. Proper rest helps manage texture.
Step 3: Make the Sweet Cheese Bliss Filling
- Blend until smooth: Mix ricotta, cream cheese, powdered sugar, lemon zest, vanilla, and salt until creamy.
- Chill: Refrigerate the filling until you’re ready to assemble.
Thick filling reduces leaks. It also keeps the center creamy instead of turning runny.
Step 4: Roll, Cut, and Fill
- Roll: Roll dough to about 1/8-inch thickness on a lightly floured surface.
- Cut: Cut into 3×3-inch squares.
- Fill: Add a generous teaspoon of filling in the center of each square.
Keep dough thickness consistent. Uneven thickness can cause dark spots or undercooked centers.
Work in batches if the kitchen warms. Warm dough sticks more and makes sealing harder.
Step 5: Fold and Seal
- Fold: Fold diagonally into a triangle or fold into a rectangle.
- Seal: Press edges firmly. Crimp with a fork for better airtight closure.
A sealed edge keeps filling inside during frying. It also prevents oil contact with dairy, which can reduce texture quality.
Step 6: Fry to Golden Perfection
- Heat oil: Heat vegetable oil to 350°F (175°C) in a deep pan.
- Fry in batches: Fry 2–3 minutes per side until golden brown and crisp.
- Drain: Transfer to paper towels with a slotted spoon.
Maintain oil temperature to avoid greasy results. If the oil runs too cool, dough absorbs more oil; if too hot, the outside browns before the center sets.
For general frying temperature principles, refer to deep frying. Stable heat drives consistent browning and texture.
Step 7: Cool Briefly and Serve
- Cool: Let pastries cool slightly so filling thickens and the crust sets.
This short rest prevents steam burn and helps the pastry hold its shape. You still want them warm for the best “creamy center” feel.
Serve right away for maximum crunch and melt-in-filling contrast.
Tips for Success (Texture, Crunch, and Flavor)
Small adjustments improve results fast. Use these tips before you start frying so you don’t have to troubleshoot mid-batch.
Most issues come from uneven sealing, loose filling, or temperature swings. Fix those points and the recipe behaves predictably.
- To avoid soggy pastries, ensure filling is thick. Strain ricotta if needed.
- Keep oil temperature consistent. Use a thermometer for accuracy.
- Resting the dough is crucial-it relaxes gluten and supports easier rolling.
- For extra warmth, mix a pinch of cinnamon or nutmeg into the cheese filling.
- Store assembled, un-fried pastries in the refrigerator up to 24 hours, then fry fresh.
When you store assembled pastries, keep them covered so the dough doesn’t dry out. Dry dough makes sealing weaker and can cause leaks.
Also, keep notes for your next run. Oil strength and pan size differ, so your frying time may shift by 15–30 seconds per side.
Serving Suggestions
Serve golden fried dough delights warm for peak contrast. Dust them lightly with powdered sugar, or add a thin honey drizzle for shine.
For balance, pair with berries or berry compote. The acidity cuts the dairy richness and keeps the sweetness from feeling heavy.
You can also use a simple sauce style like lemon syrup. Lemon adds brightness and makes the cheese taste more “fresh” instead of flat.
Pair with mild tea or coffee to complement roasted notes. If you want a broader drink pairing idea, see coffee basics and flavor balance concepts.
The Technique Behind the Texture and Flavor
The ideal texture comes from good dough handling and careful frying. Your butter content supports tender, layered dough, while correct temperature locks in a crisp shell.
Hot oil drives rapid cooking at the exterior, so the pastry sets quickly. That quick set prevents collapse and helps the crust stay crunchy after draining.
The filling stays creamy because it never boils inside the pastry. Sealing matters here, too, because trapped heat warms the dairy gently.
For more context on how heat transfers in cooking, you can review heat transfer. It explains why thin surfaces cook faster than thick centers.
Each bite delivers a crisp crackle, then soft melt. With practice, your folds become uniform and your color turns evenly golden.
| Nutrient | per Serving |
|---|---|
| Calories | 280 kcal |
| Protein | 7 g |
| Carbohydrates | 25 g |
| Fat | 16 g |
If you love filling-based pastries, you can connect this method with other cheese or cream techniques. For a dairy background, see cream cheese and how it behaves when blended and warmed.
For frying science and troubleshooting, consult food frying concepts. Use those ideas to adjust temperature, pan depth, and batch size.
At a Glance
Ready to execute with confidence? Use this quick checklist while you prep your station.
- Oil: 350°F (175°C) and steady batches
- Filling: thick ricotta + chilled mixture
- Seams: crimp well to prevent leaks
- Serve: warm with powdered sugar or honey
FAQ
What cheese works best for sweet cheese bliss?
Ricotta and cream cheese work best because they blend into a creamy, sweet filling. Drain ricotta well so the filling stays thick and doesn’t steam out during frying.
If you want a different flavor profile, you can add a little lemon zest or vanilla for aroma. Keep the sweetness moderate to protect texture.
Why do my pastries come out greasy?
Grease usually comes from oil that’s too cool or from overcrowding the pan. When temperature drops, dough absorbs oil instead of forming a crisp shell fast.
Use a thermometer and fry in small batches. Drain on paper towels right after each batch.
How do I prevent filling from leaking?
Don’t overfill, and seal edges firmly. Crimping with a fork creates a stronger closure that holds as the dough expands in hot oil.
Also chill the filling before assembly. Cold filling spreads less and makes sealing easier.
Can I make the dough and filling ahead of time?
Yes. Refrigerate the dough after mixing for up to 1 day, then roll when it’s easier to handle. Chill the filling so it stays thick during filling and folding.
For best crunch, fry on the day you plan to serve. Fresh frying keeps the crust crisp.
Can I bake instead of frying?
Baking can work as a lighter option, but you won’t get the exact same deep-fried crunch. The signature golden exterior depends on hot oil cooking.
If you bake, brush with oil or butter and use high heat. Expect a softer crust and a different texture.
See also: Golden fried dough