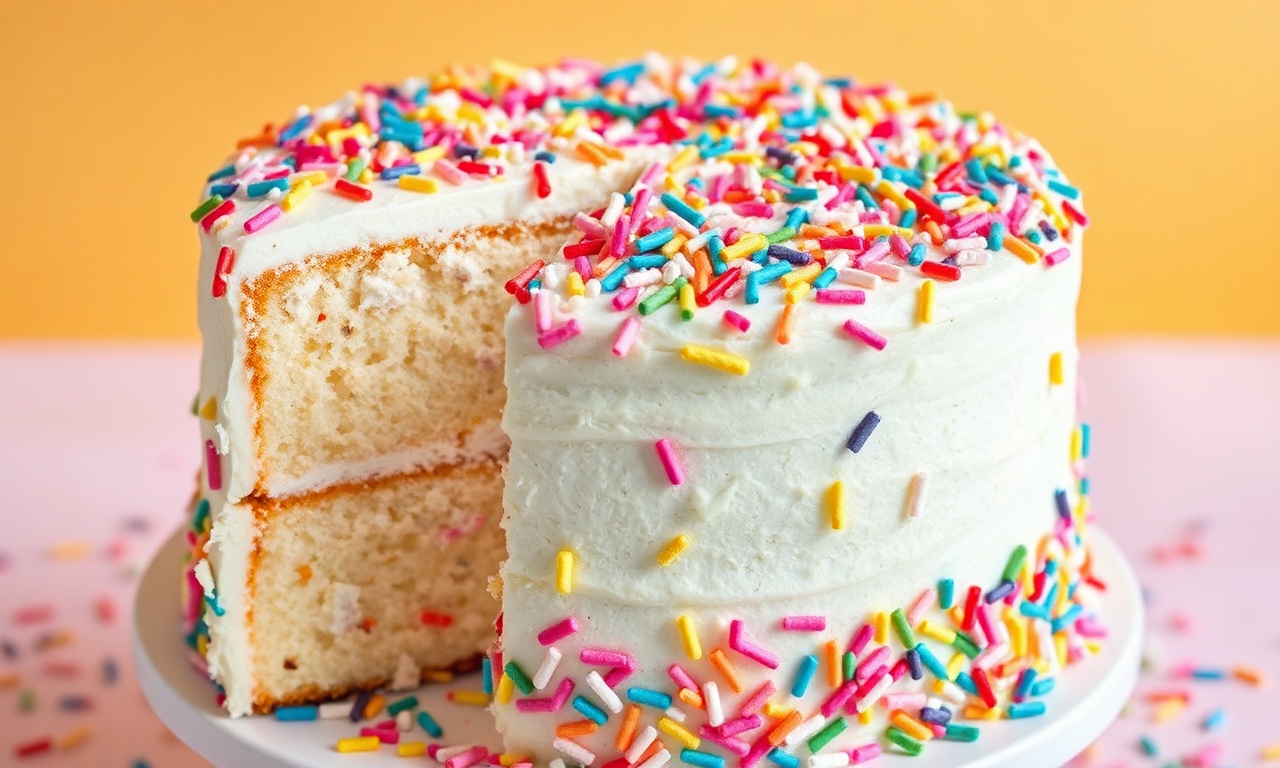
The Unspoken Magic of a Perfect Funfetti Cake
Imagine the scene: a child’s birthday party, eyes wide with anticipation, a cake unveiled that’s more than just dessert – it’s a burst of pure joy. This is the power of a well-executed Funfetti cake. It’s not merely a vanilla cake studded with sprinkles; it’s a delicate balance of tender crumb, vibrant speckles that refuse to bleed, and an airy lightness that makes each bite a celebration. Achieving this elusive perfection, however, often feels like a culinary tightrope walk. Many home bakers find their creations dense, their sprinkles faded or sunken, leaving them wondering what elusive secrets elude their grasp.
- The Unspoken Magic of a Perfect Funfetti Cake
- Essential Ingredients for an Airy and Vibrant Funfetti Cake
- Mastering the Art of Mixing for Supreme Fluffiness
- The Creaming Technique: Building the Airy Foundation
- Alternating Dry and Wet Ingredients: The Gentle Dance
- The Sprinkle Secret: Preserving Vibrancy and Preventing Sinking
- The Flour Toss: A Simple Solution for Color Bleeding
- Gentle Folding: The Key to Even Distribution
- Sprinkle Type Matters: Jimmies vs. Nonpareils
- Baking and Cooling: Setting the Stage for Perfect Layers
- Frosting Techniques for a Polished and Professional Finish
- Serving Suggestions and Storage for Maximum Enjoyment
- Frequently Asked Questions
- Can I make Funfetti cake ahead of time?
- How do I prevent sprinkles from bleeding color in Funfetti cake batter?
- Is it better to use jimmies or nonpareils for Funfetti cake?
- What is the best frosting for a Funfetti cake?
- Can I freeze unfrosted Funfetti cake layers?
This guide demystifies the process, offering practical, tested techniques born from years of professional baking experience to ensure your next Funfetti cake is nothing short of spectacular.
The true magic of Funfetti cake lies not just in its playful appearance, but in the precise techniques that ensure a tender crumb and vibrant, intact sprinkles, making every slice a delightful surprise.
The Foundation: Understanding What Makes Funfetti Cake Shine
At its core, a Funfetti cake is a canvas for celebration. The characteristic confetti-like bursts of color are achieved by folding sprinkles into a classic cake batter. Yet, the simplicity of this concept belies the nuanced execution required for a truly superior result. The primary challenges lie in preventing the sprinkles from bleeding their colors into the batter and ensuring they don’t sink to the bottom during baking. Furthermore, the delicate nature of the cake itself demands an airy, tender crumb that complements the visual festivity without being overshadowed by it. This requires a foundational understanding of ingredient interactions and precise mixing techniques.
Essential Ingredients for an Airy and Vibrant Funfetti Cake
The journey to a superior Funfetti cake begins with the selection and preparation of your ingredients. Opting for high-quality staples and ensuring they are at the correct temperature is paramount. For a cake that boasts both tenderness and a magnificent rise, focus on ingredients that contribute to structure without adding density.
The Building Blocks of a Tender Crumb
- All-Purpose Flour: The backbone of your cake, sifted to remove lumps and aerate. For two 9-inch layers, approximately 2 ¾ cups is a good starting point. Sifting is not merely a procedural step; it’s a critical action that incorporates air, contributing to a lighter final texture.
- Leaveners (Baking Powder & Baking Soda): These are your primary agents for lift. A combination of baking powder (for consistent rise) and baking soda (to react with acidic components and provide an extra boost) is often ideal. We’ll typically use around 1 tablespoon of baking powder and ½ teaspoon of baking soda.
- Salt: A mere ½ teaspoon of salt doesn’t just prevent blandness; it actually enhances the sweetness and complexity of the other flavors, making the overall cake more palatable and balanced.
- Unsalted Butter: Softened to room temperature, approximately 1 cup, it provides richness and is crucial for the creaming process, which traps air. Using unsalted butter allows for better control over the final saltiness.
- Granulated Sugar: Around 1 ¾ cups of granulated sugar is standard. While it adds sweetness, its granular structure, when creamed with butter, creates air pockets essential for a fluffy texture.
- Eggs: Four large eggs, crucially at room temperature, bind the ingredients, add richness, and contribute significantly to the cake’s structure and volume.
- Pure Vanilla Extract: A tablespoon of pure vanilla extract is key for its aromatic depth and ability to clarify and enhance other flavors, preventing the cake from tasting one-dimensionally sweet.
- Whole Milk: 1 cup of whole milk, also at room temperature, provides the necessary moisture and fat for a tender crumb. Its fat content contributes to a softer texture than skim milk might.
- Rainbow Sprinkles (Jimmies Preferred): Approximately ¾ cup. For Funfetti cake, the type of sprinkle matters. While many varieties exist, jimmies are generally preferred over nonpareils for their superior color retention and shape stability in wet batter.
When it comes to Funfetti cake, 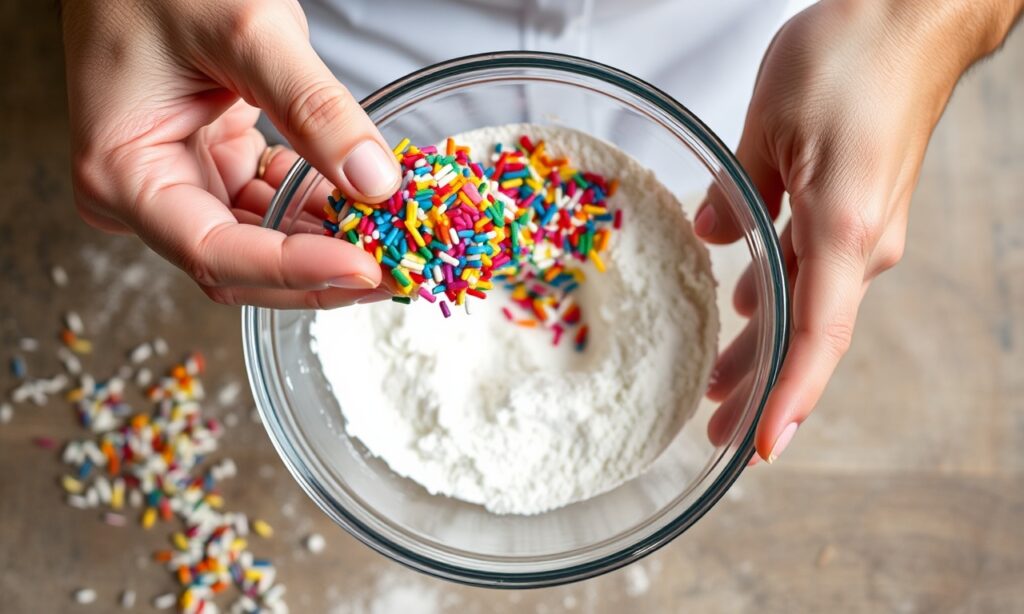
The Crucial Role of Room-Temperature Ingredients
In the context of Funfetti cake, The instruction to use room-temperature ingredients like butter, eggs, and milk isn’t a suggestion; it’s a cornerstone of successful baking, particularly for cakes like Funfetti. When butter and sugar are creamed together, their ability to emulsify and create air pockets is directly dependent on the butter’s consistency – soft enough to yield but not so warm that it liquefies. Similarly, room-temperature eggs and milk integrate more smoothly into the batter, forming a stable emulsion that bakes evenly. Data from the University of Nebraska-Lincoln Extension highlights that temperature plays a significant role in emulsion stability, with ingredients closer to room temperature forming more uniform mixtures, leading to a more consistent bake and finer crumb.
This prevents the batter from separating, which can result in a dense, uneven cake.
Mastering the Art of Mixing for Supreme Fluffiness
The method by which you combine your ingredients is as critical as the ingredients themselves when aiming for a truly fluffy Funfetti cake. The goal is to incorporate air at every stage and to preserve it throughout the mixing process.
The Creaming Technique: Building the Airy Foundation
The process begins with creaming the softened butter and granulated sugar. This isn’t just about mixing; it’s about aeration. Using an electric mixer on medium speed for approximately 3-4 minutes, you aim for a pale, fluffy mixture. This stage is where countless microscopic air bubbles are trapped within the sugar crystals and butter matrix, forming the primary structure for your cake’s lightness.
After creaming, eggs are introduced one at a time, with thorough beating after each addition. This ensures each egg is fully incorporated, contributing to the emulsion’s stability and adding further volume. The vanilla extract is then mixed in.
Alternating Dry and Wet Ingredients: The Gentle Dance
The introduction of dry and wet ingredients requires a delicate hand. The standard practice is to alternate between the flour mixture (sifted flour, baking powder, baking soda, salt) and the milk. Typically, you’ll add about one-third of the dry ingredients, mix until just combined, then add half of the milk, mix again, and repeat this process, ending with the dry ingredients. This method ensures that the gluten development in the flour is minimized, leading to a tender crumb. Overmixing at this stage can toughen the cake. Mixing on low speed and stopping as soon as ingredients are incorporated is key.
The Sprinkle Secret: Preserving Vibrancy and Preventing Sinking
The hallmark of Funfetti cake – those delightful bursts of color – requires specific attention to prevent them from becoming muddy or disappearing into the cake’s base.
The Flour Toss: A Simple Solution for Color Bleeding
Before folding the sprinkles into the batter, a seemingly simple yet profoundly effective step is to toss them with about 1 tablespoon of flour. This light coating acts as a barrier, absorbing excess moisture from the batter and preventing the dyes from migrating and bleeding into the surrounding cake. This technique, often overlooked by novice bakers, is a staple in professional kitchens for maintaining crisp, distinct colors.
Gentle Folding: The Key to Even Distribution
Once coated, the sprinkles are gently folded into the batter using a silicone spatula. The motion should be a careful lifting and turning, rather than vigorous stirring. The aim is to distribute them evenly throughout the batter without overworking it, which could lead to toughening the cake and further encourage color bleed. Stop folding as soon as the sprinkles appear evenly dispersed; a few extra seconds of mixing can make a difference.
Sprinkle Type Matters: Jimmies vs. Nonpareils
When selecting your sprinkles, opt for “jimmies” whenever possible. These are the rod-shaped sprinkles. They are generally more stable in wet batters compared to “nonpareils,” which are tiny sphere-shaped sprinkles. Nonpareils are more prone to dissolving and releasing their color. Research from food science journals often points to the higher moisture absorption capacity and structural integrity of jimmies as reasons for their better performance in baked goods.
Baking and Cooling: Setting the Stage for Perfect Layers
The baking and cooling phases are critical for achieving the desired texture and preparing the cake for assembly.
Precise Baking for an Airy Crumb
Preheat your oven to 350°F (175°C). Grease and flour two 9-inch round pans, lining the bottoms with parchment paper for easy release. Divide the batter evenly between the prepared pans, smoothing the tops with a spatula. Bake for 30–35 minutes, or until a toothpick inserted into the center comes out clean with a few moist crumbs attached. An oven thermometer is a valuable tool here, as oven temperatures can vary significantly.
The Cooling Process: Patience is a Virtue
Allow the cakes to cool in their pans on a wire rack for about 10 minutes. This initial cooling period allows the cakes to set slightly, making them easier to handle. Then, carefully invert the cakes onto the wire racks to cool completely. Rushing this process can lead to condensation, making the cakes gummy and difficult to frost.
Frosting Techniques for a Polished and Professional Finish
Once your Funfetti cake layers are completely cool, the assembly and frosting begin. The choice of frosting and application technique can elevate the cake from homemade to haute patisserie.
The Classic Pairing: Vanilla Buttercream
A classic vanilla buttercream is the quintessential companion to Funfetti cake. Its creamy texture and sweet, but not overpowering, flavor provide a perfect counterpoint to the cake’s tender crumb and colorful speckles. For a bakery-quality buttercream, whip softened unsalted butter until very pale and fluffy, then gradually add sifted powdered sugar. Finish with pure vanilla extract and a splash of milk to achieve the desired consistency for spreading.
Achieving a Flawless Finish
- Crumb Coating for Cleanliness: Before applying the final layer of frosting, apply a very thin, even layer known as a crumb coat. This traps any loose crumbs, preventing them from marring the final frosting.
- Chilling for Stability: After applying the crumb coat, chill the cake in the refrigerator for about 20-30 minutes. This firms up the crumb coat, providing a stable base for the final frosting application and making it easier to achieve smooth sides and sharp edges.
- Two-Toned Swirls for Visual Appeal: For an extra pop of visual interest, divide your buttercream and tint one portion with a soft pastel color. Apply dollops of both colors side-by-side on the cake and then use an offset spatula to gently swirl them together for a dynamic, multi-hued effect.
- Decorative Accents: Use piping bags fitted with various tips (like an open star or round tip) to create decorative borders or rosettes. A light dusting of additional sprinkles pressed into the still-tacky final frosting layer adds a celebratory flourish.
Serving Suggestions and Storage for Maximum Enjoyment
The final touches ensure that your Funfetti cake is enjoyed at its absolute best.
Enhancing the Experience
Serve slices slightly chilled, but allow them to come to room temperature for about 20 minutes before serving. This allows the crumb to soften and the flavors to meld, creating a more luxurious mouthfeel. Pair with a scoop of vanilla bean ice cream or a scattering of fresh berries to introduce a contrasting acidity and texture that cuts through the cake’s sweetness.
Preserving Freshness
Store the frosted cake in an airtight container. At room temperature, it will remain fresh for 2–3 days. If you reside in a warmer climate or wish to extend its shelf life, refrigeration is an option, typically keeping it fresh for up to 5 days. Always bring refrigerated cake back to room temperature for at least 30 minutes before serving to revive its tender texture.
Frequently Asked Questions
Can I make Funfetti cake ahead of time?
Absolutely. The unfrosted cake layers can be baked up to 48 hours in advance. Wrap them tightly in plastic wrap and store them at room temperature if your environment is cool, or refrigerate them if it’s warm. Ensure they come to room temperature for at least an hour before frosting for optimal handling and flavor.
How do I prevent sprinkles from bleeding color in Funfetti cake batter?
The most effective method is to toss your sprinkles with about 1 tablespoon of all-purpose flour before folding them into the batter. This light coating acts as a moisture barrier. Additionally, avoid overmixing once the sprinkles are added, and bake the batter promptly after mixing.
Is it better to use jimmies or nonpareils for Funfetti cake?
For Funfetti cake, jimmies are generally the superior choice. Their rod-like shape and composition allow them to hold their color and shape better in moist cake batter compared to the small, spherical nonpareils, which are more prone to dissolving and bleeding. Always choose high-quality sprinkles specifically designed for baking.
What is the best frosting for a Funfetti cake?
A classic vanilla buttercream is widely considered the best pairing for Funfetti cake due to its balanced sweetness and creamy texture, which complements the cake without overwhelming the sprinkles. However, lighter options like stabilized whipped cream or cream cheese frosting can also be delicious if you prefer a less sweet profile.
Can I freeze unfrosted Funfetti cake layers?
Yes, unfrosted cake layers freeze exceptionally well. Once completely cooled, wrap them tightly in a double layer of plastic wrap, followed by a layer of aluminum foil or place them in a freezer-safe container. They can be stored for up to one month. Thaw them overnight in the refrigerator and then bring them to room temperature before frosting.
RELATED TOPICS: Cake Decorating, Baking Techniques, Vanilla Cake Recipes, Party Planning
The pursuit of the perfect Funfetti cake is a rewarding endeavor. By understanding the fundamental principles of ingredient interaction, mastering precise mixing techniques, and employing these pro-tested methods for handling sprinkles and frosting, you are well-equipped to create a cake that is not only visually stunning but also boasts an exquisite texture and flavor. Embrace these insights, and transform your baking from ordinary to extraordinary, ensuring every celebration is met with a truly memorable slice of Funfetti cake.
See also: Funfetti cake