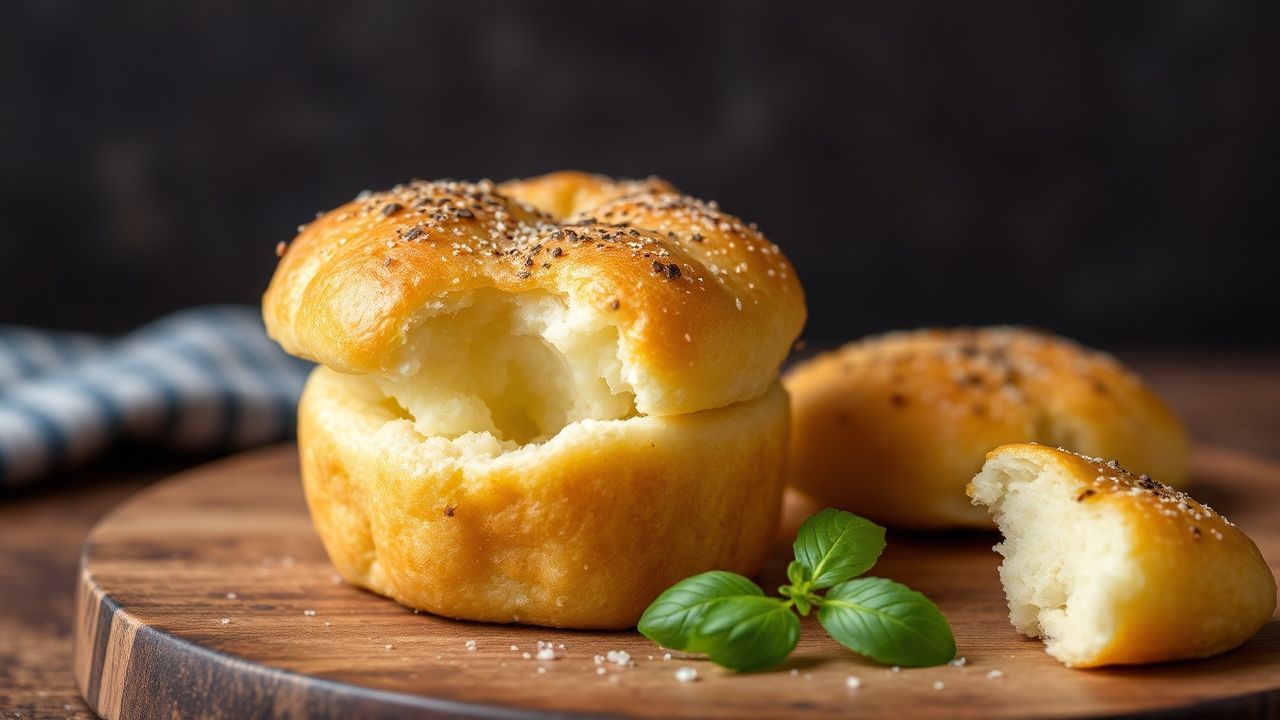
Imagine the first bite: warm, golden, and airy on the inside. That is Pão de Queijo—Brazil’s beloved cheese bread made with tapioca flour and melty cheese. If you want a snack that turns routine into a treat, this is it.
- Prep and Cook Time
- Yield
- Difficulty Level
- Ingredients
- Step by Step Guide to Mastering the Perfect Pão de Queijo Texture
- Exploring Cheese Variations for Authentic and Creative Twists
- Best Serving Suggestions and Pairings to Elevate Your Pão de Queijo Experience
- Chef’s Notes: Tips for Success
- FAQ
- What exactly is Pão de Queijo?
- Why is tapioca flour so essential in Pão de Queijo?
- What kind of cheese is traditionally used?
- How do I get the right dough consistency?
- Can I make Pão de Queijo ahead of time?
- Final Thoughts on Pão de Queijo Texture
At a Glance
- Pão de Queijo gets its fluff from tapioca starch gelatinization.
- Minas cheese is traditional, but you can blend cheeses for texture.
- Simple shaping and baking timing create the crisp shell and tender center.
- Freezing dough balls helps you bake fresh whenever you want.
Pão de Queijo has roots in Brazilian kitchens and links to cassava, the crop that supports tapioca. Cassava starch behaves differently from wheat flour, so you skip yeast and rely on a hot-liquid technique instead. For background on cassava’s role, see cassava.
This bread also travels well because it stays gluten-free by design. That makes it a strong option for people who avoid gluten, as long as you use certified gluten-free tapioca flour. For general context on the gluten issue, review gluten.
In Brazil, you’ll often find it sold warm at bakeries and street stalls. The texture matters: the outside turns crisp while the inside stays soft and slightly chewy. You can recreate that contrast with the right heat control and dough consistency.
Fluffy Pão de Queijo delivers a golden crust with a cloud-like center. Most home bakers notice two things first: the dough feels different from wheat dough, and the final puff looks dramatic. That puff comes from steam expansion inside a starch-stabilized dough.
If you’ve ever tasted a street-side pão de queijo in São Paulo, you know it’s hard to forget. The iconic flavor comes from cheese plus the unique mouthfeel of tapioca starch. For a broader look at how starches behave in cooking, visit starch.
Prep and Cook Time
Plan ahead, then bake with confidence. The active work moves fast, but the dough needs a short cool-down so eggs blend smoothly. A warm dough protects the airy texture you want.
Use this schedule as your baseline and adjust for your oven. Most people will land close to these times with standard-sized dough balls. If your dough balls get larger, add a few minutes.
- Readiness: 15 minutes
- Resting: 10 minutes (optional, improves texture)
- Baking: 20–25 minutes
- Total Time: About 50 minutes
Yield
This recipe makes about 30 pão de queijo pieces, depending on how large you shape them. Smaller balls rise more evenly, so keep a consistent size. If you’re serving a crowd, half-size scoops usually simplify portioning.
For meal prep, you can scale the recipe up. Tapioca starch and cheese hold the structure, so the ratio matters more than exact grams when you scale. Keep your liquids proportional to avoid a dry or runny dough.
Difficulty Level
Easy to Medium fits most home kitchens. The method looks technical, but it follows a clear pattern: boil liquids, stir in tapioca, rest, then mix in eggs and cheese. Once you nail the dough feel, repeats get easy.
You don’t need yeast, kneading, or long proofing. Instead, your main job is to watch heat and stirring speed when you add tapioca flour. That step forms the base structure of the bread.
Ingredients
Use fresh, well-flavored cheese for the best results. The cheese provides salt, fat, and melt, while tapioca flour delivers the chewy, airy interior. If you substitute cheeses, choose ones that melt smoothly.
Minas cheese is traditional, but you can adapt. For a general cheese reference, see cheese. Aim for a similar melt and tang level rather than chasing one “perfect” brand.
- 1 cup whole milk
- 1/2 cup water
- 1/3 cup vegetable oil (or melted unsalted butter for richer flavor)
- 1 teaspoon salt
- 2 cups tapioca flour (tapioca starch)
- 2 large eggs,at room temperature
- 1 1/2 cups grated Minas cheese (or a blend such as Parmesan + Mozzarella)
Step by Step Guide to Mastering the Perfect Pão de Queijo Texture
Start with clean, prepared tools. Preheat your oven early, and line a baking sheet with parchment paper for easy release. Then you’ll move through the dough stages without rushing.
Texture control matters more than fancy technique. You want a dough that holds shape, feels slightly sticky, and looks smooth after mixing. If you get that, you’ll bake consistent puffs.
- Preheat your oven to 375°F (190°C). Line a baking sheet with parchment paper or a silicone mat.
- Combine liquids and salt: In a medium saucepan, bring milk, water, oil, and salt to a gentle boil over medium heat. Stir occasionally.
- Add tapioca flour: Remove the pan from heat as soon as it boils. Add tapioca flour right away, then stir vigorously with a wooden spoon until a sticky, dough-like ball forms. This step gelatinizes the starch for the characteristic interior.
- Cool slightly: Rest the dough for 5 minutes. It should be warm, not scalding. This helps eggs incorporate without cooking.
- Add eggs and cheese: Transfer dough to a mixing bowl. Beat in eggs one at a time until fully combined. Then fold in grated cheese until evenly distributed. Expect a soft, slightly sticky mixture.
- Shape the dough balls: Use wet hands or a small scoop. Shape into 1½-inch balls and place them on the baking sheet. Leave about 2 inches between balls for expansion.
- Bake: Bake for 20–25 minutes until puffed, golden, and crisp outside while tender inside.
- Cool slightly: Rest 5 minutes before serving. This short wait firms the exterior so the center sets properly.
When you cut into a fresh batch, you should see a moist, elastic crumb rather than a dry interior. If your center looks dense, review two things next time: stirring speed at the tapioca step and baking time. Small adjustments often fix the result.
Exploring Cheese Variations for Authentic and Creative Twists
Minas cheese delivers the classic tang and creamy melt people expect from pão de queijo. Still, your local market may not carry it. That’s where blending cheeses helps you recreate the balance of salt, fat, and stretch.
Try a blend like Parmesan (umami and salt) plus Mozzarella (melt and stretch). If you want a milder profile, choose a softer melting cheese and keep the total salt steady. For cheese-aging and flavor background, reference Parmesan and Mozzarella in your selection process.
Best Cheese Swaps
Consider Queso Fresco for a gentle, fresh taste, but expect a slightly different melt. For a stronger, stretch-forward result, stick closer to cheeses that melt cleanly. Your goal is a consistent cheese distribution in the dough.
If your cheese is very salty, reduce added salt by a pinch. If your cheese is mild, keep the salt and let the cheese provide the main flavor. Measure your cheese amount and grate it finely for smoother mixing.
Best Serving Suggestions and Pairings to Elevate Your Pão de Queijo Experience
Pão de queijo shines warm, especially within the first hour. Serve it with something that matches its salty, cheesy flavor and complements its airy texture. Warm bread tastes even better with a hot drink.
For a Brazilian-style pair, try Brazilian coffee or a mild espresso. If you want a tangy contrast, add a squeeze of lemon or a bright sauce. Fresh herbs like parsley or cilantro also lift the flavor quickly.
Pairing Ideas
For breakfast, pair pão de queijo with coffee and fruit like pineapple. For a snack plate, add chimichurri-style herb sauce or a simple tomato-based dip. Keep the sauces chunky enough to add texture.
At gatherings, arrange the puffs on a wooden board and serve them as soon as they come out of the oven. People will keep coming back when the first batch tastes fresh. That small detail boosts your overall serving experience.
Chef’s Notes: Tips for Success
These notes help you fix the most common issues before they affect the batch. Use them as a quick checklist while you cook. They also help you adjust if your dough behaves differently than expected.
Pay attention to dough feel and oven browning. A well-cooked exterior supports the chewy center, and it also improves shelf stability for leftovers. Small cues—like color and puff height—tell you when to stop baking.
- Liquid temperature is vital: Boiling the milk mixture activates the tapioca starch so the dough sets into a chewy-yet-fluffy interior.
- Rest the dough: A brief cool-down makes eggs blend without cooking prematurely.
- Consistency matters: The dough should be sticky but pliable. Too dry? Add 1 tablespoon milk at a time. Too wet? Add 1–2 tablespoons tapioca flour and mix well.
- Freeze for convenience: Freeze unbaked dough balls. Bake from frozen and add 5 extra minutes to baking time.
- Oven placement: Bake on the middle rack for even heat and fewer browning surprises.
| Nutrient | Per Serving (1 piece) |
|---|---|
| Calories | 70 kcal |
| Protein | 2 g |
| Carbohydrates | 9 g |
| Fat | 3.5 g |
FAQ
What exactly is Pão de Queijo?
Pão de Queijo is a Brazilian cheese bread made primarily with tapioca starch and cheese. The hot-liquid method gelatinizes the starch, creating a chewy interior and crisp exterior. It’s naturally gluten-free when you use pure tapioca flour.
Why is tapioca flour so essential in Pão de Queijo?
Tapioca flour drives the bread’s signature texture because starch gelatinizes during the cooking step. That process creates structure without wheat flour or yeast. As a result, the crumb stays elastic and airy.
What kind of cheese is traditionally used?
Minas cheese is common in traditional recipes. Its mild tang and good melting behavior help form the classic flavor and texture. When you swap cheeses, choose options that melt well so the dough stays cohesive.
How do I get the right dough consistency?
After adding tapioca flour, stir until you form a sticky dough ball. Then, when you mix in eggs and cheese, the dough should feel soft and slightly tacky. If it’s too dry or too wet, adjust in small increments with milk or tapioca flour.
Can I make Pão de Queijo ahead of time?
Yes. Freeze shaped, unbaked dough balls on a tray, then transfer to a freezer bag once firm. Bake from frozen and extend baking time by about 5 minutes for best puffing.
Final Thoughts on Pão de Queijo Texture
The best pão de queijo tastes like comfort with a clear structure: crisp outside, soft inside, and a cheesy aroma that fills the kitchen. Each batch depends on two controlled moments—the boiling starch step and the cooling before eggs. When those pieces line up, your results become repeatable.
Make it once, then tweak cheese blends and shaping size. You’ll learn what your oven does and how your ingredients behave. After that, you can bake warm pão de queijo whenever you want, with texture that stays true to the Brazilian original.
See also: Pão de Queijo