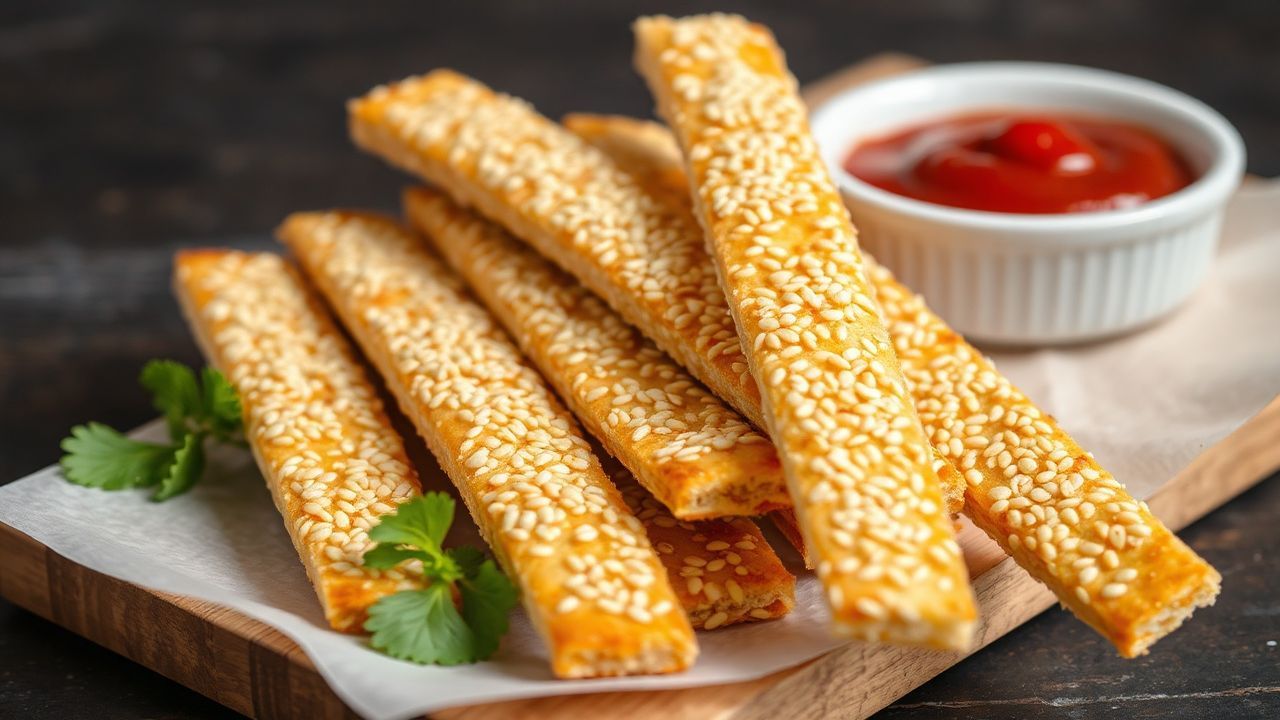
Crunchy sesame thin breadsticks deliver the kind of snack crunch you can hear—because the dough dries fast, the surface browns evenly, and the sesame crackles on contact. You can make them for a weeknight board, a soup topper, or an “I need a crunchy bite now” moment, without any special equipment.
- Why Sesame Thin Breadsticks Get That “Snap” Texture
- Ingredients for 1-Hour Crunchy Sesame Breadsticks
- Step-by-Step Recipe (Thin, Crispy, and Weeknight Friendly)
- Step 1: Activate the Yeast (5–7 Minutes)
- Step 2: Mix and Knead (8–10 Minutes)
- Step 3: First Rise (About 1 Hour)
- Step 4: Preheat and Prep Trays (While Dough Rises)
- Step 5: Roll Thin (The Crispness Step)
- Step 6: Add the Crunch Layer
- Step 7: Bake Until Dry and Firm (15–18 Minutes)
- Step 8: Cool Completely for Maximum Crunch
- Baking Science Cheatsheet (So You Can Troubleshoot Fast)
- Pro-Cautions for Thin, Crispy Breadsticks
- How to Store (and Re-Crunch) Without Losing the Snap
- Serving Ideas That Actually Use the Crunch
- Variations Without Breaking the Crisp Method
- Time, Yield, and Difficulty
- FAQ: Crunchy Sesame Thin Breadsticks
- Thin rolling wins crisp: target about 1/8 inch (3 mm) or thinner for maximum snap.
- High heat dries the crumb: bake until the sticks feel firm and dry, not merely “set.”
- Toasted sesame boosts both flavor and texture: it clings better and adds a nutty aroma.
- Cool completely to lock in crunch: steam ruins snap fast if you store early.
Why Sesame Thin Breadsticks Get That “Snap” Texture
When breadsticks turn chewy, the culprit usually comes down to moisture. Thin dough creates a larger surface area, so heat reaches more of the water inside quickly. Then the oven pulls moisture out during the bake, which forms a crisp, dry crust.
Sesame matters too. Toasted sesame seeds bring a deeper, nuttier aroma than raw seeds, and they add tiny points of texture. As the surface bakes, the seeds become slightly brittle, so they contribute to that crackly bite.
To understand the mechanics, it helps to know what gluten does during baking. Gluten forms a flexible network that traps gas and holds structure as the dough bakes and dries. For a reliable baseline, review the basics of gluten. That structure lets thin breadsticks stay crisp instead of collapsing.
Also remember: crispness isn’t just “browning.” Crisp products are dry throughout, or at least dry enough that steam can’t soften them. For a wider food science perspective, see starch, since starch gelatinization and drying drive much of the texture shift in baked dough.
Thin Dough vs. Thick Dough: The Real Difference
Thin sticks bake faster because heat transfer has less distance to travel. That means the outside dries and sets before the interior stays wet. In other words, thin breadsticks don’t get a long window for steam to remain trapped inside.
If your sticks vary in thickness, you also vary in crispness. Thicker sections keep moisture longer, so they cool down soft instead of crisp. Aim for consistent width and even thickness from tip to tip.
Ingredients for 1-Hour Crunchy Sesame Breadsticks
This recipe focuses on simple ingredients, then uses one upgrade—freshly toasted sesame—to make the flavor pop. You’ll use pantry staples, plus a few small choices that change crispness.
Use instant yeast for speed, and keep your water warm (not hot). Warm water activates yeast and helps the dough become elastic quickly. For general yeast background, read baker’s yeast.
Recommended Ingredients
Below is a balanced formula for thin, crisp breadsticks with a gentle olive oil richness. It yields about 30 sticks depending on how long and thin you roll.
Dry
– 2 cups (250 g) all-purpose flour (sift if it’s lumpy)
– 1 tsp instant yeast
– 1 tsp fine sea salt
– 1 tbsp sugar
– 2–3 tbsp toasted sesame seeds (for the dough)
– 1 tsp nigella seeds (optional)
Wet
– 3/4 cup (180 ml) warm water (~110°F / 45°C)
– 2 tbsp olive oil
– Extra toasted sesame seeds + a little coarse salt for topping
Why toasted sesame? Toasting drives off some moisture and creates aromatic compounds. It also makes the seeds slightly more brittle, so they sit on the surface and snap under the bite.
Sesame Toasting Shortcut
Toast seeds in a dry skillet over medium heat. Stir constantly until fragrant and lightly golden, about 2–3 minutes. Remove immediately, because sesame can go from “perfect” to “burnt” fast.
If you want a consistent topping, keep a small portion of toasted seeds uncooked for rolling/sprinkling. That helps you maintain a stronger “fresh toast” aroma.
Step-by-Step Recipe (Thin, Crispy, and Weeknight Friendly)
This method balances fast time with the fermentation step that builds structure. You’ll mix, rise, roll thin, and bake until dry. After that, you cool fully—no shortcuts.
Active effort stays short, but the dough does work while it rests. That rest improves handling and helps the dough bake with better structure even in thin form.
Step 1: Activate the Yeast (5–7 Minutes)
Combine warm water, sugar, and instant yeast in a bowl. Wait 5–7 minutes until the mixture looks foamy.
If nothing foams, your water may be too cool or too hot, or yeast may be old. Fix it now, not later—breadsticks rely on proper rise behavior.
Step 2: Mix and Knead (8–10 Minutes)
Whisk flour, salt, and 2 tablespoons toasted sesame seeds in a separate bowl. Pour in the yeast mixture and olive oil, then stir until you form a shaggy dough.
Knead until smooth and elastic. If the dough feels sticky, add flour sparingly—1 tablespoon at a time. Over-flouring can make thin rolling harder and can create tougher texture.
Step 3: First Rise (About 1 Hour)
Place dough in an oiled bowl, cover, and let it rise for about 1 hour. You want the dough to roughly double.
This rise develops gas and strengthens gluten alignment, which helps the dough stretch evenly when you roll. For a deeper look at dough fermentation concepts, you can review yeast and how fermentation generates flavor and gas.
Step 4: Preheat and Prep Trays (While Dough Rises)
Preheat the oven to 375°F (190°C). Line two baking sheets with parchment so the sticks release easily.
High-sided racks aren’t required, but airflow helps. Bake in the center of the oven for steadier heat and more even drying.
Step 5: Roll Thin (The Crispness Step)
Divide dough into portions—smaller pieces make it easier to roll evenly. Roll each portion into long sticks, about 6–8 inches, with thickness around 1/8 inch (3 mm) or thinner.
Use a ruler if you want consistency, especially when testing for your oven. Thickness variations bake at different speeds, so consistent rolling improves predictability.
Step 6: Add the Crunch Layer
Brush each stick lightly with water, then roll or sprinkle with extra toasted sesame seeds. Add nigella seeds if you want that subtle onion-pepper aroma.
Finish with a pinch of coarse salt. Coarse salt melts less than fine salt, so you get bright salty pops instead of a fully dissolved coating.
Step 7: Bake Until Dry and Firm (15–18 Minutes)
Bake 15–18 minutes until golden and firm to the touch. Check at minute 13, because thinner sticks brown faster and can go from perfect to overdone quickly.
Look for a dry surface, not just a set surface. The goal is a crust that feels dry even before cooling.
Step 8: Cool Completely for Maximum Crunch
Move breadsticks to a wire rack as soon as you remove them from the oven. Cooling on airflow prevents steam from softening the crust.
Let them cool fully. If you store them warm, the trapped moisture rehydrates the crust, and crispness collapses.
After they cool, you can taste right away. If your kitchen runs humid, crispness may feel slightly slower at the start—but the drying stabilizes as they cool fully.
Baking Science Cheatsheet (So You Can Troubleshoot Fast)
You don’t need a lab to bake crisp breadsticks, but a few principles explain almost every failure. Use this cheatsheet when your sticks go soft, uneven, or bland.
Also remember that flour and water behavior shapes texture. For background on how dough components behave under heat and moisture, read all-purpose flour and bread to connect ingredients to structure.
Problem: Chewy Breadsticks
Chewy texture usually means underbaking or too much thickness. Roll thinner next time and bake until the sticks feel dry and firm.
If browning already looks good but texture still feels soft, keep baking in small increments of 1–2 minutes. Thin baked goods can look set while still holding moisture.
Problem: Burnt Seeds but Soft Bread
Seeds can darken quickly on hot surfaces. If seeds burn while the stick stays soft, lower oven temperature by 10–15°F and bake longer.
Another fix: add seeds after a brief light pre-bake for a few minutes. That reduces seed exposure to peak heat while still letting the crust dry.
Problem: Pale and Soft
Pale breadsticks often indicate insufficient drying time. Bake 2–4 minutes longer, and consider raising oven temperature slightly if your oven runs cool.
Ovens vary. If you bake breadsticks often, keep a quick note of “my oven temperature runs 10°F cool” so you can adjust in one step.
Pro-Cautions for Thin, Crispy Breadsticks
Thin breadsticks reward patience and punish shortcuts. The dough can go from “ready to bake” to “too moist to crisp” if you don’t manage handling and cooling.
Pay attention to texture cues, because crispness depends on drying—not just time in the oven.
If you want an extra-dry result, you can turn the oven off and leave the tray inside for 2–3 minutes with the door cracked. That gently finishes moisture removal without over-darkening.
How to Store (and Re-Crunch) Without Losing the Snap
Crunch fades when breadsticks absorb humidity. Sesame breadsticks act like crisp crackers: they taste best when they stay dry and airy.
So store them only after fully cooling. Then use an airtight container at room temperature.
Storage Best Practices
Store in an airtight container to limit moisture exchange with the air. Keep them away from steam sources like the kitchen sink or near reheating appliances.
If you live in a humid climate, consider adding a small food-safe moisture absorber in the storage area (not touching the breadsticks). That helps slow texture loss.
Re-Crunch Method (Fast)
To restore crispness, reheat in a hot oven for a short burst. Try 350°F (175°C) for 3–5 minutes, then cool briefly again on a rack.
Avoid microwaving. Microwaves add steam and soften crisp baked goods.
Freeze for Longer Freshness
Freeze fully cooled breadsticks in a sealed bag. Remove only the portion you need, then reheat directly from frozen in a hot oven.
That quick reheating evaporates surface moisture and helps you recover the snap.
Serving Ideas That Actually Use the Crunch
Sesame breadsticks aren’t just “something to eat.” Their thin crunch makes them functional for dips and spreads, and they add texture to bowls.
Use them in ways that match their flavor: sesame works with tangy, creamy, salty, and herb-forward profiles.
Dip Pairings
Serve with hummus, tzatziki, or olive tapenade. The crisp surface grabs thick dip, while the inside stays dry enough not to go gummy.
They also work well with roasted red pepper spread or bean-based dips. For a broader Mediterranean context, browse Mediterranean cuisine.
Cheese Board Crunch
Place breadsticks next to aged cheeses like Manchego or goat cheese. Crackly sticks give contrast to creamy textures.
If you want a more savory sesame vibe, pair with olives and salty cured meats. The salt in both components creates a consistent “snack board” flavor.
Soup and Salad Topping
Break breadsticks into pieces and sprinkle them over tomato soup, lentil soup, or any broth-based bowl. Add them right before serving to protect the crunch.
For salads, use them as a crunchy layer on top rather than mixing in early. That keeps the bite intact.
Variations Without Breaking the Crisp Method
You can adjust flavor while keeping the core crispness method intact. The crispness depends on thin rolling, heat drying, and full cooling—so variations should stay within that framework.
As long as you don’t change hydration drastically or make the sticks thicker, you can swap toppings and small aromatics safely.
Whole Wheat Swap
Replace up to half the flour with whole wheat. Whole wheat absorbs more water, so you may need a small splash extra water if dough feels tight.
Expect a slightly nuttier flavor and a bit less delicate crispness because bran can disrupt gluten structure. Rolling very thin helps offset that.
Spice Boost Topping
Add garlic powder, za’atar, or smoked paprika to the sesame topping step. Keep it light; too much dry seasoning can scorch before the stick dries fully.
If you want a reliable herb option, you can explore za’atar and adjust seasonings to taste.
Vegan-Friendly Notes
This recipe uses plant-based ingredients already. Choose vegan-friendly sugar substitutes if you want to experiment with sweetness.
If you switch oils, use a neutral oil with similar fat content to olive oil so dough texture stays consistent.
Make-Ahead Dough
You can mix the dough and refrigerate it after mixing, then rise more slowly. Cold fermentation improves flavor but still requires a final rise before rolling.
Bring dough to room temperature before shaping. Cold dough can resist stretching and make thin rolling harder.
Time, Yield, and Difficulty
This project fits a true weeknight schedule if you plan around the rise. Total time runs about 1 hour 40 minutes, but active work is much shorter.
Yield depends on your stick length and thickness. Expect around 30 breadsticks when you roll each portion to 6–8 inches and thin width.
Typical Timeline
– Prep/mixing: 15 minutes
– First rise: 1 hour
– Shaping/rolling: 10–15 minutes
– Baking: 15–18 minutes
– Cooling: until fully dry (typically 20–30 minutes)
Difficulty stays easy to medium. You need consistent rolling, not special technique.
FAQ: Crunchy Sesame Thin Breadsticks
Why are my breadsticks chewy instead of crispy?
Chewiness usually comes from rolling too thick or baking too briefly. Roll thinner, then bake until the sticks feel firm and dry to the touch. Also cool them fully on a rack before storing.
Can I use active dry yeast instead of instant yeast?
Yes. Bloom active dry yeast in warm water first and wait until foamy, then proceed with mixing. The rise may take slightly longer, so watch for doubling rather than relying on an exact clock.
How thin should I roll the dough?
Target about 1/8 inch (3 mm) or thinner. Even thickness matters more than extreme thinness, because consistent thickness ensures uniform drying and browning.
How do I keep sesame breadsticks crisp for days?
Store them airtight at room temperature once fully cooled. If they soften, re-crisp in a 350°F (175°C) oven for 3–5 minutes, then cool briefly again on a rack.
Can I freeze and reheat without losing the snap?
Yes. Freeze fully cooled breadsticks in a sealed bag. Reheat in a hot oven until crisp again, typically a short burst of a few minutes, then cool on a rack.
What’s the best way to toast sesame for this recipe?
Toast in a dry skillet over medium heat, stirring constantly, until fragrant and lightly golden. Remove as soon as they brown a shade darker, because sesame can burn quickly after you pull it from the heat.
See also: sesame breadsticks