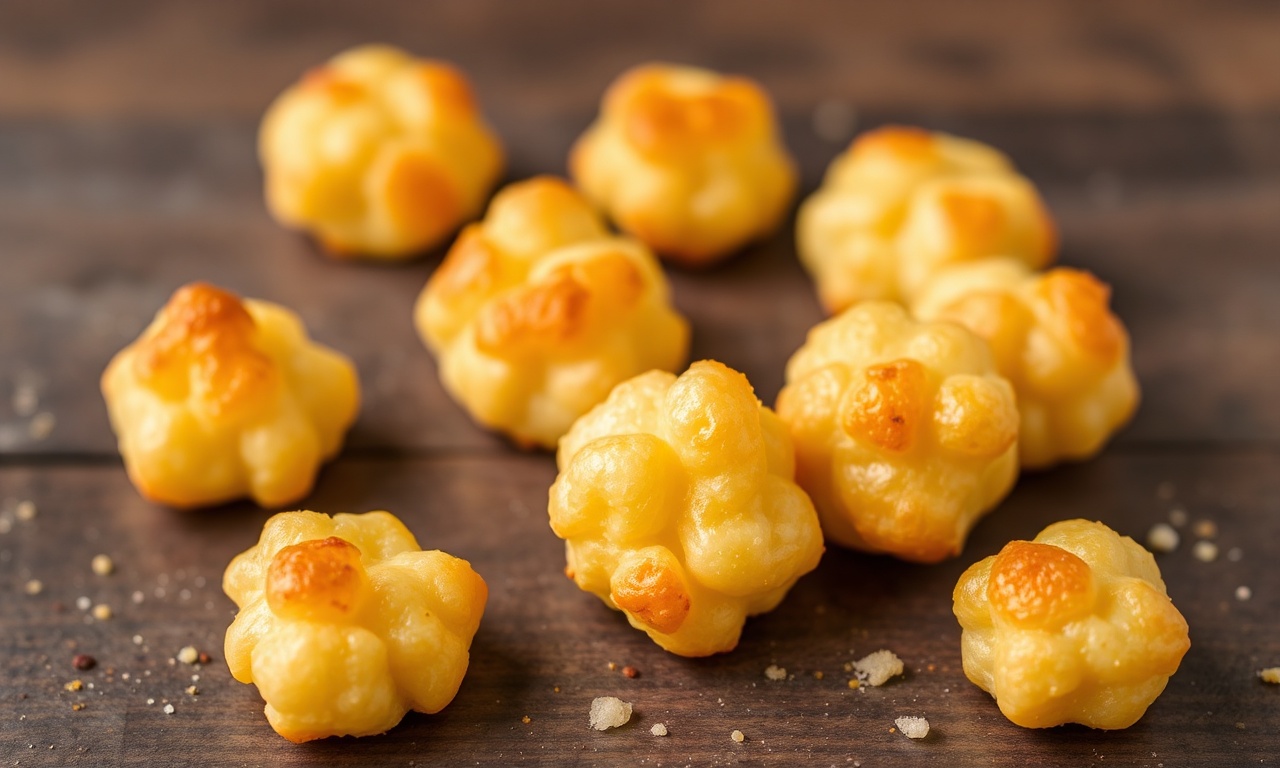
Delicious Cassava Cheese Puffs deliver a crisp bite, melty cheese, and a gluten-free base made from cassava flour. You get that classic cheese-puff satisfaction, but with a naturally grain-free ingredient that fits gluten-free snacking needs.
- What Are Cassava Cheese Puffs?
- Why Cassava Flour Works for Gluten-Free Snacking
- Prep and Cook Time for Cassava Cheese Puffs
- Yield and Difficulty Level
- Ingredients List (Gluten-Free)
- Step-by-Step Instructions
- 1) Preheat and Prepare the Trays
- 2) Mix Dry Ingredients
- 3) Combine Wet Ingredients
- 4) Combine Wet and Dry
- 5) Fold in the Cheeses
- 6) Shape for Even Puffing
- 7) Bake Until Golden and Crisp
- 8) Cool Briefly, Then Rack
- Tips for Success (Texture, Flavor, and Crisping)
- Serving Suggestions for Cassava Cheese Puffs
- Nutritional Snapshot
- FAQ: Cassava Cheese Puffs
At a Glance
- Gluten-free by design using cassava flour instead of wheat.
- Crisp exterior + melty center thanks to proper cheese ratios and baking time.
- Easy shaping with chilled dough for consistent puffing.
- Make-ahead friendly for faster party prep.
Golden crackers of cheese and cassava have one job: satisfy crunch cravings. First, cassava flour brings a starchy structure that helps the dough hold its shape. Then, cheese melts into pockets of savory flavor that taste rich without needing wheat flour.
These Delicious Gluten-Free Cassava Cheese Puffs suit busy weeknights and party platters. Serve them with dips, pack them for movie nights, or set them on a snack table where people reach for “just one more.”
What Are Cassava Cheese Puffs?
Cassava Cheese Puffs are baked or roasted cheese snacks made using cassava flour as the main gluten-free base. Cassava is a starchy root crop, and its flour can create a dough that crisps well when heated. For more background on the ingredient, see cassava on Wikipedia.
Unlike bread-based snacks, cassava flour relies on starch behavior and heat-driven setting. As the puffs bake, water evaporates and proteins from eggs plus fat from butter help create a tender interior. If you want to understand crisping chemistry, check the Maillard reaction for why golden surfaces taste so good.
In this recipe, cheese takes center stage. Cheddar adds sharp flavor, while mozzarella brings stretch and melt. Parmesan contributes umami depth, which helps the puffs taste “cheesy” even when you keep portions controlled.
These puffs also work well for guests with gluten sensitivity. Cassava flour does not contain wheat gluten, so it fits a gluten-free approach when all other ingredients also stay gluten-free.
Why Cassava Flour Works for Gluten-Free Snacking
Cassava flour brings a dense, starchy base that helps cheese puffs puff and crisp. When you bake, steam and starch gelatinization support structure, then the surface dries into a crunch. For more on starch behavior, read starch on Wikipedia.
Still, cassava flour can absorb liquid differently than wheat flour. That’s why careful wet-to-dry mixing matters for dough texture. You want dough that holds together but still feels pliable for shaping.
For best results, use fully dried cassava flour (not fresh tapioca). Fresh tapioca behaves differently and can change moisture balance. If you prefer a quick reference on gluten-free grains and flours, you can review gluten-free diet basics for context.
When you balance hydration and bake long enough for surface browning, the puffs turn out golden and crisp instead of gummy.
Prep and Cook Time for Cassava Cheese Puffs
You can plan this recipe without surprises. Total time comes in around 45 minutes, which includes prep and baking. That timeline works for after-work snacks and quick hosting.
- Preparation Time: 25 minutes
- Cooking Time: 20 minutes
- Total Time: 45 minutes
For timing accuracy, preheat your oven fully. Also, bake on lined trays so the puffs crisp evenly and release cleanly.
Once baked, cool for a few minutes on the pan. Then move to a wire rack so steam escapes and crunch strengthens.
Yield and Difficulty Level
This recipe yields about 24 Cassava Cheese Puffs. It serves about 6 people as an appetizer, depending on how hungry the crowd is.
The difficulty level stays Medium. You mainly do whisking, mixing, folding in cheese, shaping, and baking. If you follow the mixing notes closely, you will get consistent puffing.
Ingredients List (Gluten-Free)
Gather your ingredients first so you can mix with confidence. The core of the recipe uses cassava flour, eggs, butter, and three cheeses for flavor and melt.
Below is the full list. Keep spices fresh for the best aroma, and use shredded cheese for smoother melt.
Core Ingredients
- 2 cups cassava flour (use dried processed cassava flour)
- 1 cup shredded sharp cheddar cheese
- 1/2 cup shredded mozzarella cheese
- 1/4 cup grated parmesan cheese (depth and umami)
- 1/2 cup unsalted butter (softened)
- 3 large eggs
- 1 teaspoon baking powder
- 1/2 teaspoon fine sea salt
- 1/4 teaspoon smoked paprika (optional)
- Freshly ground black pepper to taste
- 1/4 cup whole milk
Cheese Choice Notes
Choose cheeses that melt reliably. Cheddar delivers bold flavor, mozzarella gives stretch, and parmesan adds aged savoriness. If you like research-backed flavor, you can read cheese for a quick overview of cheese types and melting behavior.
Shredding yourself helps because pre-shredded cheese may include anti-caking agents. Those additives can slightly affect how smoothly cheese melts in high-heat baking.
Step-by-Step Instructions
Follow these steps in order. Each one controls moisture, structure, and browning so your Cassava Cheese Puffs come out crisp rather than dense.
Read through the whole process once before you start. Then work with a steady pace—especially during mixing and shaping.
1) Preheat and Prepare the Trays
Preheat your oven to 375°F (190°C). Line two baking sheets with parchment paper or a silicone mat. This step prevents sticking and supports even browning.
Make sure trays fit comfortably with airflow. Overcrowding can slow crisping and soften the bottoms.
2) Mix Dry Ingredients
In a large bowl, whisk together cassava flour, baking powder, salt, smoked paprika, and black pepper. Whisking evenly distributes leavening so the puffs puff more consistently.
Mix until the color looks uniform. No white flour streaks should remain.
3) Combine Wet Ingredients
In a separate bowl, beat the eggs and milk until smooth. Add softened butter in small portions and keep mixing until the mixture looks creamy.
This creates a stable base for the dough to bind, even with a gluten-free flour.
4) Combine Wet and Dry
Pour the wet mixture into the dry ingredients. Fold gently with a spatula until a thick dough forms. Avoid aggressive stirring to keep the puffs light.
If the dough feels too dry, add milk one teaspoon at a time. If it feels too wet, add a small spoonful of cassava flour and re-check texture.
5) Fold in the Cheeses
Fold in shredded cheddar, mozzarella, and parmesan. Ensure even distribution so every puff gets a cheese pocket that melts at baking heat.
This is where flavor builds. The sharpness from cheddar balances the mild melt of mozzarella and the savory punch from parmesan.
6) Shape for Even Puffing
Use a small cookie scoop or spoon. Portion the dough into rounds about 1 1/2 inches. Space them around 2 inches apart so they can expand without merging.
For consistent shapes, press each round lightly and smooth the surface. Rough edges can brown unevenly.
7) Bake Until Golden and Crisp
Bake for 18–20 minutes until the surface turns golden brown and feels firm. Rotate trays halfway for uniform browning.
Golden color matters. Pale puffs often turn chewy as they cool.
8) Cool Briefly, Then Rack
Let the puffs cool on the pan for 5 minutes. Then transfer to a wire rack to crisp further. Serve warm for best melt and crunch.
If you cool them fully on a plate, steam can soften the crust.
That small check saves time and prevents under-baking. It also helps you dial in your personal oven’s hot spots.
Keep your tray spacing consistent to protect airflow. If needed, bake in batches.
Tips for Success (Texture, Flavor, and Crisping)
Small choices make a big difference for Cassava Cheese Puffs. Use these notes to improve melting, shape consistency, and browning.
Most issues come from moisture imbalance or under-baking. Solve both by adjusting liquids slowly and watching for deep golden color.
Cheese Texture and Melting
Use finely shredded cheese for better melt and a smooth texture. Avoid pre-shredded cheese with anti-caking agents if you notice grainy melt in earlier batches.
Also, keep cheeses at room temperature for easier folding. Cold cheese can clump and create uneven pockets.
Hydration Control
If cassava flour is new to you, remember it absorbs liquids differently than wheat flour. Start mixing with the full recipe amounts, then adjust with small increments as needed.
You’re aiming for dough that holds and shapes without spreading. If it spreads, the dough needs a little more flour or less liquid.
Mixing Technique
Don’t overmix once wet and dry combine. Fold until just combined. Overmixing can produce a tighter dough that bakes up denser.
Keep your folding gentle and quick.
Make-Ahead and Freezing
You can shape the dough balls ahead. Place them on a tray and freeze until firm, then transfer to a container. Bake from frozen when you need a snack.
Add about 3–4 extra minutes to the bake time. Watch for golden surfaces, not just time.
Flavor Add-Ins
Smoked paprika offers warm, savory notes. If you want more heat, use cayenne in tiny amounts. You can also add finely chopped chives for a fresh herbal lift.
If you want a quick guide to spice profiles, you can review paprika for how it differs by type and flavor intensity.
Serving Suggestions for Cassava Cheese Puffs
Cassava Cheese Puffs work like a base for your favorite dips. Their crunchy shell and melty center pair well with cool, tangy sauces that cut richness.
Serve them warm so the cheese stays elastic. Then offer a dip so guests can customize flavor intensity.
Dip Ideas That Match the Flavor
Try a refreshing avocado-cilantro dip, or a roasted red pepper sauce for sweet-smoky balance. A simple sour cream dip also works because it rounds out sharp cheddar flavor.
If you like classic pairings, consider flavors like yogurt-based dips that provide cooling acidity. For a quick reference on avocado, see avocado.
Party Platter Pairings
For a party spread, add a cucumber salad or lightly pickled vegetables. Crisp acidity helps the cheese puffs taste lighter between bites.
You can also serve them alongside soft cheeses such as ricotta. Their creamy texture contrasts nicely with crunchy cassava puffs.
Storage and Reheating
Store cooled puffs in an airtight container. For best results, reheat in an oven or toaster oven to restore crispness.
Microwaving often softens the crust because it heats moisture inside. Crisping with dry heat keeps the crunch.
Nutritional Snapshot
This recipe provides a clear serving estimate. Based on the listed table, you can expect a snack that’s satisfying without tasting overly heavy.
Remember that nutrition can vary with cheese brands and exact portion size. Use the numbers below as a planning guide.
| Nutrient | Per Serving (4 puffs) |
|---|---|
| Calories | 190 |
| Protein | 7g |
| Carbohydrates | 16g |
| Fat | 12g |
If you want broader background on dairy nutrition and energy, you can review cheese for general nutrition context.
FAQ: Cassava Cheese Puffs
Are Cassava Cheese Puffs truly gluten-free?
Yes, the base uses cassava flour, which is gluten-free. Still, gluten-free puffs require that every ingredient used (including baking powder and cheese) stays gluten-free and free from cross-contact. Check labels for your specific brands.
What makes Cassava Cheese Puffs crisp instead of chewy?
Crispness comes from two things: enough oven heat and correct spacing on the tray. Bake until the puffs turn deep golden and feel firm on the surface. Also, cool on a wire rack so steam doesn’t soften the crust.
Can I use only one type of cheese?
You can, but the flavor and texture will shift. Cheddar alone gives strong taste, while mozzarella alone brings melt and stretch. Using a blend like cheddar + mozzarella + parmesan makes the center taste richer and more complex.
How do I adjust the dough if it feels too sticky?
Add cassava flour a teaspoon at a time until the dough holds its shape when scooped. Cassava flour absorbs liquid differently, so small adjustments help you reach a workable consistency without changing the recipe’s balance too much.
Can Cassava Cheese Puffs be frozen?
Yes. Freeze shaped dough balls or fully baked puffs after cooling. When baking from frozen, extend baking time by a few minutes. When reheating baked puffs, use an oven to restore crispness.
Enjoy your crispy, cheesy adventure with Cassava Cheese Puffs, where gluten-free cassava meets melty comfort in every bite. Once you dial in your oven timing, these puffs become a reliable snack for weeknights and gatherings.
See also: Cassava Cheese Puffs