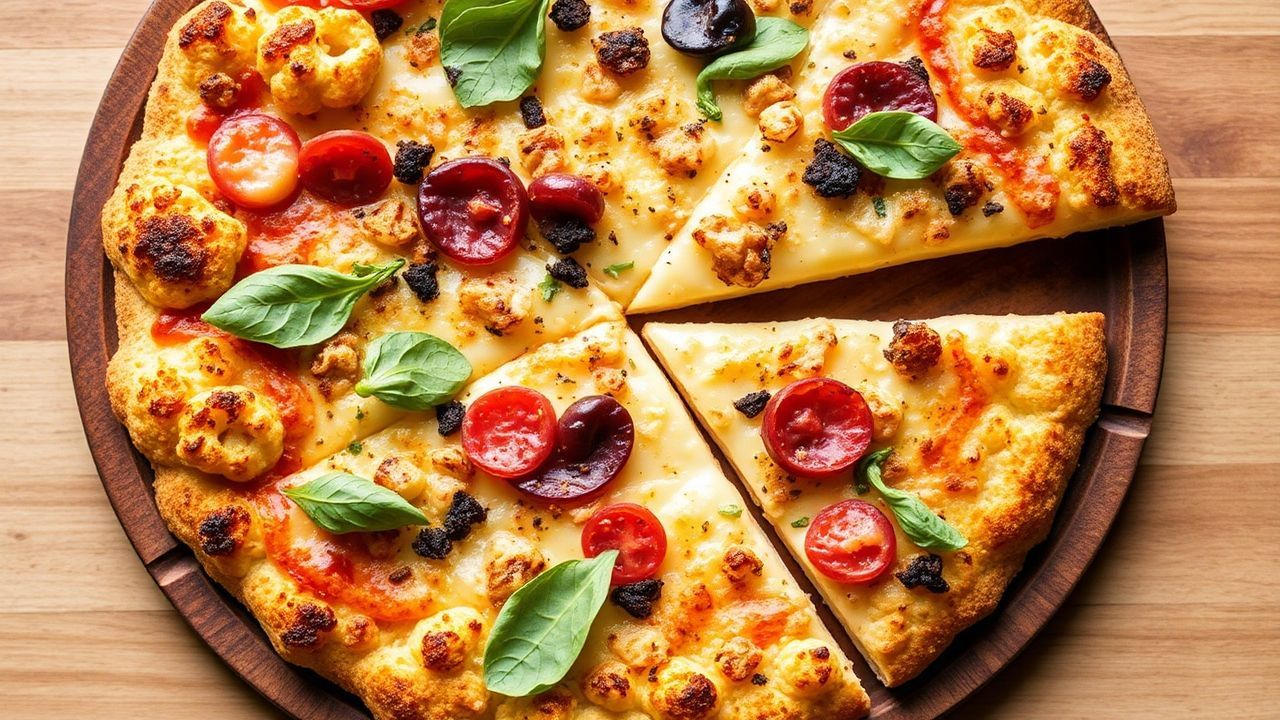
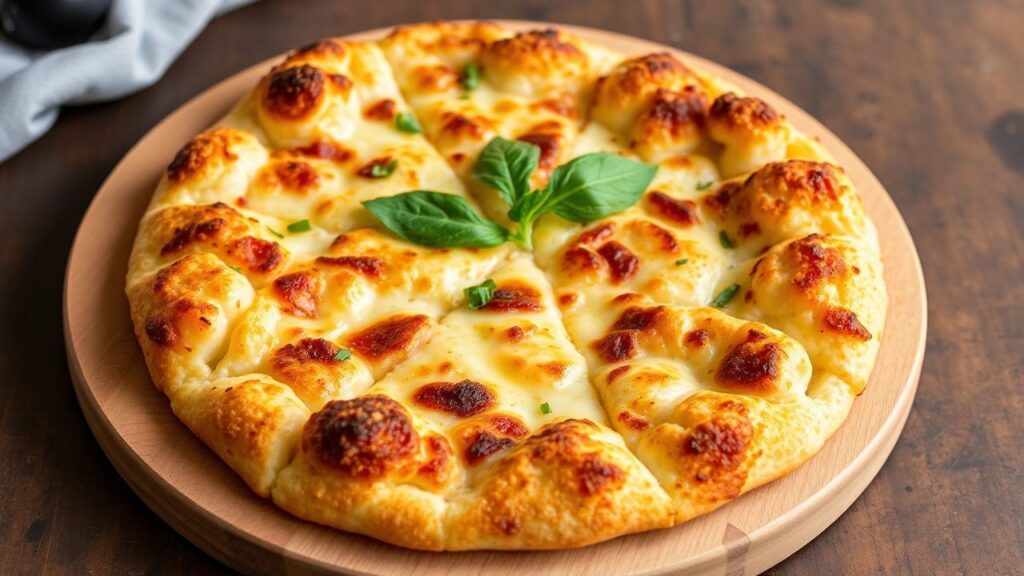
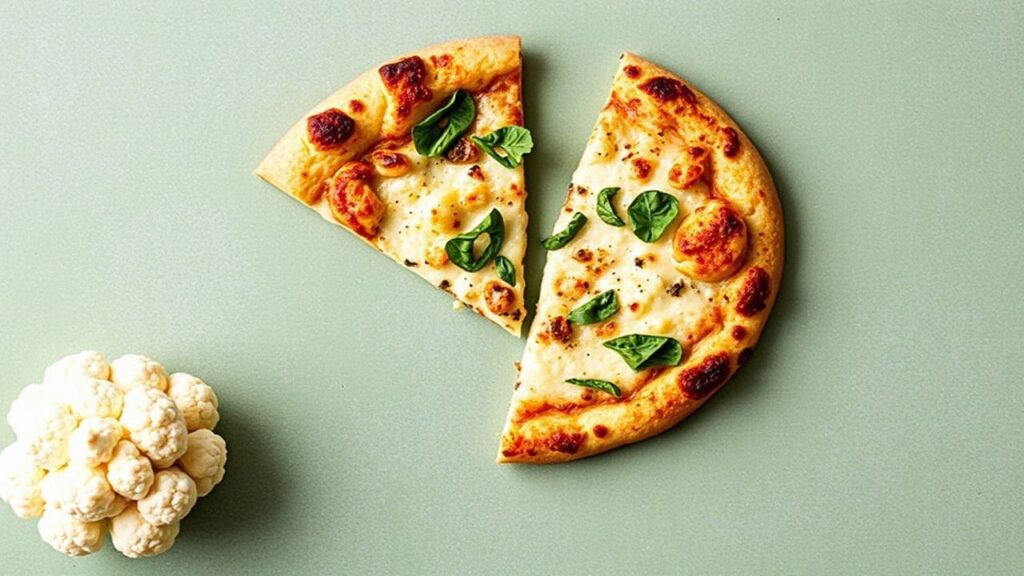
Imagine a pizza slice that stays crispy and flavorful while keeping gluten out of the mix. That promise drives this extra-crispy cauliflower crust pizza: a base made from riced cauliflower plus binders that help it hold shape. You get a texture close to traditional crust, but built for gluten-free eating.
- At a Glance: What Makes Crispy Cauliflower Crust Pizza Work
- Choosing the Right Cauliflower for a Gluten-Free Crust
- Mastering Crispiness: How to Dry, Bind, and Bake
- Flavor Boosters and Toppings for Crispy Cauliflower Crust Pizza
- Expert Tips: Storage, Serving, and Re-Crisping
- Prep and Cook Time
- Yield
- Difficulty Level
- Ingredients
- Instructions
- Tips for Success
- Serving Suggestions
- Q&A
- What makes a crispy cauliflower crust different from a cauliflower base that turns soft?
- How do I stop my cauliflower crust from getting soggy under sauce?
- Can I make this gluten-free cauliflower crust without eggs?
- What toppings work best for texture on a cauliflower crust?
- How do I store and re-crisp leftover slices?
- Recommended Reading:
- Crispness starts with moisture control, not just ingredients.
- High-heat baking and pre-baking create browning and crunch.
- Smart binders like egg or flax improve slice integrity.
- Toppings with less liquid prevent soggy spots under cheese.
Whether you avoid gluten for health reasons, you cut carbs, or you simply want a lighter crust, this method works. You also gain a flexible base you can season for any pizza style. For the texture science, focus on how cauliflower holds water and how heat removes it.
At a Glance: What Makes Crispy Cauliflower Crust Pizza Work
A great crispy cauliflower crust pizza follows one repeatable pattern: rice it, cook it gently, squeeze hard, then bake hot until the surface dries out. If you skip any step, water wins and the crust softens.
From there, toppings matter. Wet sauces and watery vegetables steam the base, so you need drier toppings or a two-step bake plan. That small change keeps the crust crisp.
Quick causes of failure include under-squeezing, skipping pre-bake time, and overloading with thin, watery toppings. You can fix each one with a targeted move that takes only minutes.
For ingredient background, cauliflower holds water inside its structure, and heating drives off that moisture. For deeper reading on the food source itself, see Cauliflower.
For the flavor effect of browning, understand that high heat helps create complex flavors through browning reactions. If you want the chemistry overview, read Maillard reaction.
To see why binders improve slice integrity, review how proteins and gels behave under heat. A solid starting point is Protein.
Moisture also links to shelf life because lower surface water makes crisp textures last longer. If you want a clear explanation of the concept behind crispness and stability, review water activity.
Choosing the Right Cauliflower for a Gluten-Free Crust
Start with a fresh, firm head of cauliflower. Choose one that feels dense for its size and shows tight florets. Avoid florets with dark spots or a soft texture because they often signal higher spoilage risk and inconsistent moisture.
Cut it into florets and rice it. A food processor works fast, but stop before you turn it into a paste. You want rice-sized bits because they dry more evenly.
If you buy pre-riced cauliflower, check the package for excess liquid. Extra moisture forces you to squeeze longer, or it forces the oven to do extra work that you can’t fully fix.
Moisture-driven cooking outcomes connect to how water behaves in foods. For a simple food science reference, see Water.
Then plan your bake surface. Parchment helps release, but too much moisture can pool if the crust sits on a cool pan. Preheat a sheet if you can, and keep your oven stable at the target temperature.
If you keep the baking environment hot, you speed drying and browning. That improves crust strength before toppings add new steam potential.
Mastering Crispiness: How to Dry, Bind, and Bake
Crispness depends on drying plus browning. After ricing, cook the cauliflower gently to drive off some water, then cool it enough to squeeze safely.
Then squeeze. Use a clean towel, cheesecloth, or a nut-milk bag and press until the cauliflower looks drier and feels less fluffy. This step prevents steaming and helps the crust set firm.
Next, add binders and structure. Many versions use Parmesan for salt and added protein. You can also use a vegan substitute, but you still need a binder system that forms structure when heated.
For general baking structure concepts, review baking. Heat transfer changes texture by moving water out and setting the mixture’s structure.
Binder Options That Slice Cleanly
Egg helps the mixture set as it bakes. Flax can bind by forming a gel when hydrated, and the gel helps hold the crumb together after cooking.
If you go egg-free, keep the mixture drier to compensate for the binder’s gentler set. In practice, egg gives more immediate structure, so squeezing accuracy matters more without it.
To understand how proteins and related structures change under heat, read protein. That helps you trust the method: set structure, then control moisture under toppings.
Also, consider fat and salt. Parmesan adds salt and contributes to browning, while a small amount of oil supports surface crisping during the final bake.
Oven Temperature and Timing
Preheat your oven to 425°F (220°C). Spread the crust evenly and press it to a thin, uniform thickness. Even thickness helps one side finish crisp instead of staying soft.
Bake until the surface turns golden and feels firm. Rotate the pan halfway through for even browning, especially if your oven has hot spots.
For best results, do a short “pre-bake” before adding sauce and cheese. This prevents the base from getting wet before the structure fully sets.
A two-step bake also helps the crust handle toppings better. The first bake dries the cauliflower; the second bake melts cheese and cooks toppings without flooding the base.
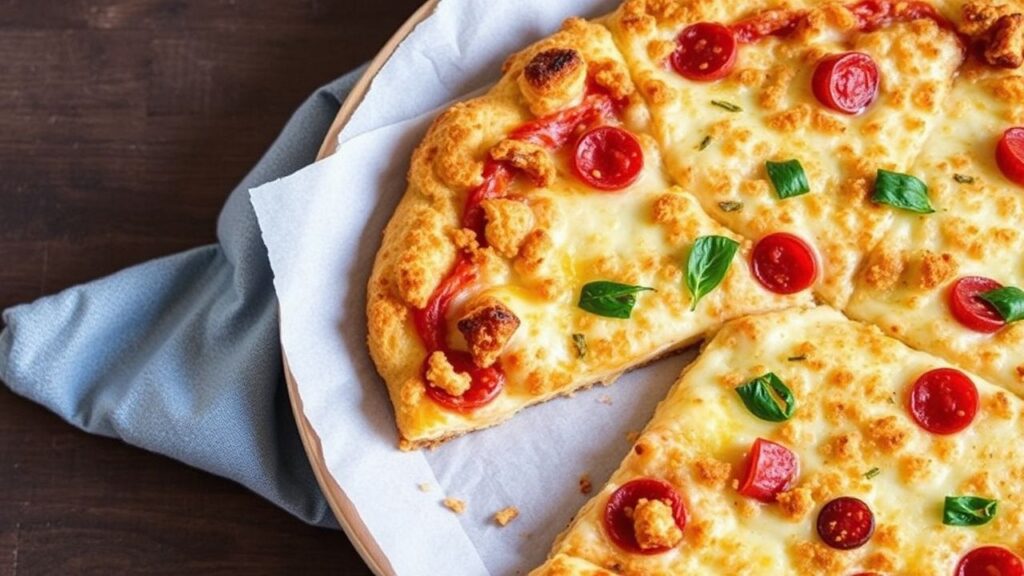
Flavor Boosters and Toppings for Crispy Cauliflower Crust Pizza
Your crust starts neutral and slightly sweet, so toppings should add clear flavor and strong aromas. Choose herbs and seasonings that cut through cauliflower notes. Garlic, oregano, basil, and red pepper flakes fit naturally.
Use a moderate amount of sauce. A thicker tomato sauce spreads more evenly and reduces liquid pooling. If your sauce is thin, simmer it briefly to thicken before you top.
Next, think about water content in toppings. Mushrooms release moisture, and fresh tomatoes add juices. Pat mushrooms dry after sautéing, and drain or blot tomato toppings before placing them on the crust.
If you want a basic refresher on water in plant foods, review vegetables. Water-rich toppings need extra attention to protect crust texture.
Two-Step Bake for a Crunch-First Finish
After the crust pre-bake, add toppings and bake again for 8–10 minutes. This second bake melts cheese, warms toppings through, and keeps the base firm if you used a controlled sauce amount.
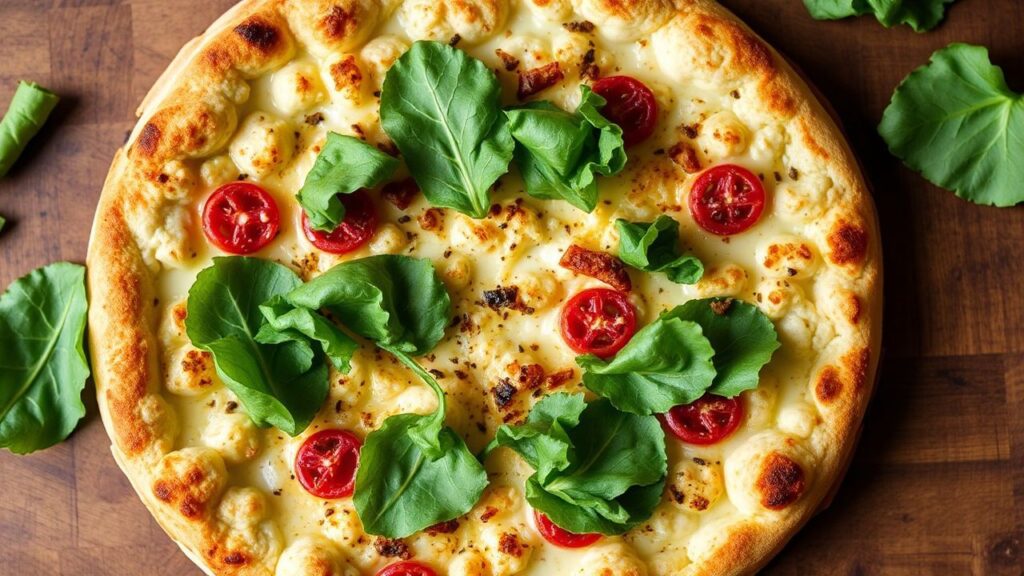
Finish with fresh greens after baking. Add arugula or basil at the end to keep flavor bright and reduce extra steam that can soften the crust.
A drizzle of olive oil or a light balsamic glaze adds aroma without flooding the surface. Use less than you think, because toppings liquid can travel and soften thin edges.
If you want a crisp edge, press the outer ring slightly thicker than the center. Then pre-bake a full golden stage so the rim dries first.
Expert Tips: Storage, Serving, and Re-Crisping
Let the crust cool for 5 minutes before slicing. That short rest helps it set further, so slices hold shape instead of collapsing. Use a sharp pizza cutter or a thin knife for clean cuts.
If you want extra crunch, re-crisp the slices. Warm them in an oven or toaster oven for a few minutes to re-dry the surface.
Microwaving usually softens the crust because it heats water and steam inside the crumb. Skip it when you want crisp texture.
For reheating best practices, focus on dry heat that re-evaporates surface moisture. Baking and broiling work well, and you can review the method concept in broiling and oven.
Serve with a crisp side like a peppery arugula salad. The fresh bite balances the rich, cheesy topping layer and helps you enjoy the contrast between crisp base and juicy toppings.
For more gluten-free pizza ideas, you can explore internal recipe tags and ingredient categories on your site. For example, see crispy cauliflower crust.
Prep and Cook Time
This schedule fits a weeknight. It also builds in drying and squeezing time, so you don’t rush the key step that controls crispness.
Readiness: 20 minutes
Cooking: 30 minutes
Total: 50 minutes
Yield
This recipe makes enough for 2–3 servings. Portion size depends on how thin you press the crust and how heavily you load toppings.
Serves: 2–3 hungry pizza lovers
Difficulty Level
Difficulty stays moderate because the method asks for one careful move: drying. Once you nail your squeeze, repeats get easier.
Level: Medium
Ingredients
Gather ingredients and prep tools before you start. This reduces downtime and helps you keep moisture control consistent throughout the process.
Use fresh cauliflower for best texture, and choose binders that match your dietary needs.
- 1 medium head cauliflower (about 4 cups riced)
- ½ cup freshly grated Parmesan cheese (or vegan alternative)
- 1 large egg (or flaxseed egg: 1 tbsp flaxseed meal + 3 tbsp water)
- ¼ cup almond flour
- 1 tsp Italian seasoning
- ½ tsp garlic powder
- ½ tsp salt
- Freshly ground black pepper, to taste
- Olive oil, for drizzling
- Your favorite pizza toppings (tomato sauce, mozzarella, veggies, herbs)
Instructions
Follow these steps in order. Each step sets up the next one, and that sequence protects crispness under toppings.
Stay focused on drying and even baking, not only on ingredient amounts.
- Preheat your oven to 425°F (220°C). Line a baking sheet with parchment.
- Rice the cauliflower: pulse florets in a food processor until rice-sized.
- Cook the cauliflower rice: microwave or sauté for about 5 minutes to soften.
- Squeeze out moisture using a towel or cheesecloth until very little liquid remains. This step drives crispness.
- Mix the dough: combine dried cauliflower, Parmesan (or vegan cheese), egg (or flax egg), almond flour, Italian seasoning, garlic powder, salt, and pepper. Mix until cohesive.
- Shape: press into a round crust about ¼-inch thick.
- Bake for 25–30 minutes, rotating halfway, until golden and firm.
- Add toppings: spread sauce, add cheese, then bake 8–10 minutes more.
- Rest 5 minutes, then slice and serve.
Tips for Success
Use these fixes when your crust feels off. Each one targets a specific failure point tied to moisture and heat.
Small adjustments beat full recipe changes because the method already works.
- Moisture control: squeeze thoroughly to avoid a soft base.
- Binding alternatives: for egg-free options, use flax or chia gel and keep the mix well-dried.
- Make-ahead: pre-bake the base, cool, and refrigerate up to a few days before re-topping and reheating.
- Crispier edges: brush lightly with olive oil before the final bake.
- Oven variation: start checking at 22 minutes if your oven runs hot.
Serving Suggestions
Serve right away for the best crunch. Pair each slice with a fresh salad or a simple veggie side for balance and contrast.
Try a peppery arugula salad with lemon vinaigrette. Finish with flaky salt and fresh basil leaves. For extra umami, add a small sprinkle of nutritional yeast after baking.
For more gluten-free pizza ideas, browse gluten-free pizza on your site. Then compare crust styles to find what you like best.
You can also reference gluten-free diet for background on why gluten avoidance matters for some people.
| Nutrition (per serving) | Amount |
|---|---|
| Calories | 280 kcal |
| Protein | 15 g |
| Carbohydrates | 12 g |
| Fat | 18 g |
Q&A
Still unsure about technique? These answers focus on texture, toppings, and storage so you can plan with confidence.
If you follow the drying and baking steps, your crust should cut cleanly and stay crisp longer than most one-bake versions.
What makes a crispy cauliflower crust different from a cauliflower base that turns soft?
The difference comes down to moisture. A crust that won’t stay crisp usually has extra water left inside the cauliflower.
Drying through cooking plus squeezing, then pre-baking at high heat, removes that problem by driving out water before toppings add new steam potential.
How do I stop my cauliflower crust from getting soggy under sauce?
Use a pre-bake, then add sauce in a controlled amount. Keep sauce thick and avoid watery toppings.
After topping, bake again to set the surface. That second bake helps melt cheese and lock texture in place.
Can I make this gluten-free cauliflower crust without eggs?
Yes. Use a flax “egg” or chia gel as a binder, and keep the cauliflower mixture drier.
Egg sets firmly, so without it you rely more on squeezing and on an evenly baked, fully dried base.
What toppings work best for texture on a cauliflower crust?
Choose toppings that don’t flood the base. Well-drained sautéed mushrooms, artichokes, roasted peppers, and caramelized onions work well.
Finish with fresh herbs after baking. That timing keeps herbs bright and reduces extra moisture on the crust surface.
How do I store and re-crisp leftover slices?
Cool slices fully, then store airtight in the fridge. Re-crisp in an oven or toaster oven for a few minutes until the surface feels dry again.
Avoid the microwave if you want to keep crunch. Dry heat gives you crispness back.
If you want a pizza night that feels indulgent and still supports gluten-free goals, this extra-crispy cauliflower crust delivers. Follow the drying step, bake hot, then top with restraint.
You’ll get a crunchy base, melty cheese, and a slice that holds up through the first bite and the second.
Your next move: make one crust, taste it plain, then adjust seasoning and topping moisture for the second attempt. That small feedback loop helps you dial in your ideal crispy cauliflower crust pizza fast.
See also: crispy cauliflower crust