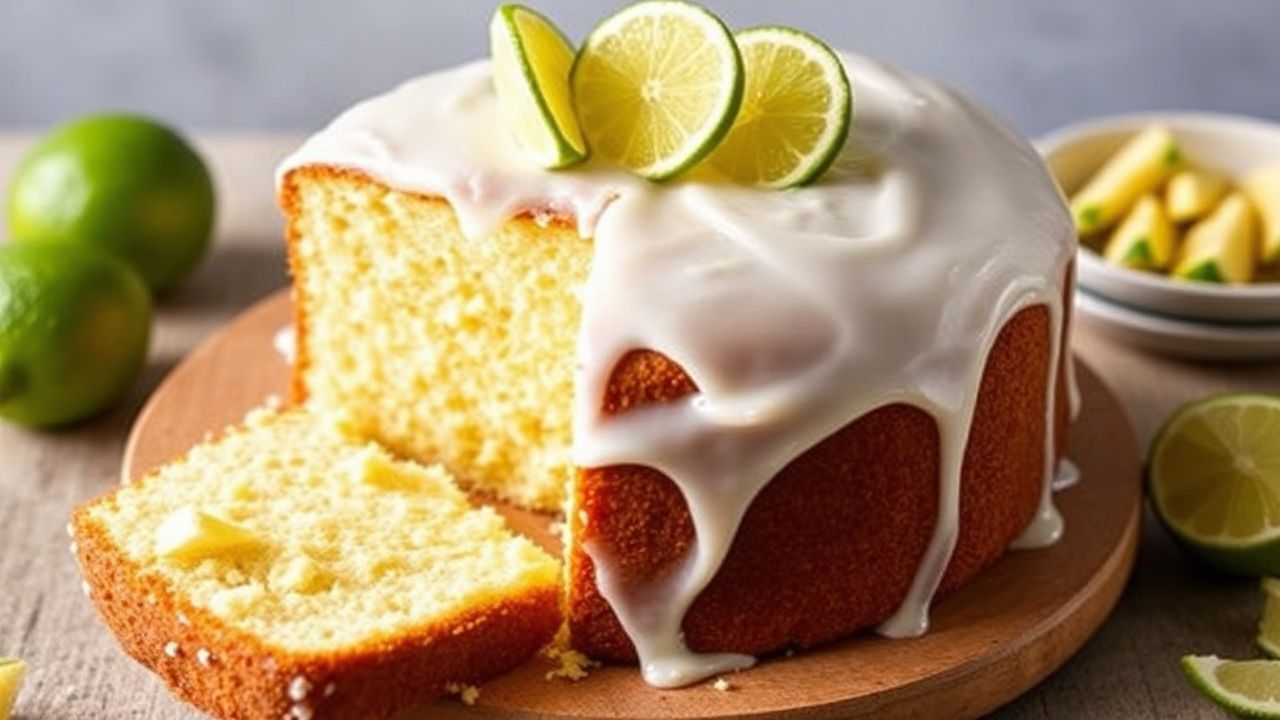
When you want a dessert that feels both bright and buttery, a Key lime pound cake delivers. The citrus tang lifts the richness, so every slice tastes clean, rich, and refreshingly zesty.
- Prep and Cook Time
- Yield and Difficulty
- Ingredients for Key Lime Pound Cake
- Instructions: Step-by-Step Method
- Step 1: Preheat and prep the pan
- Step 2: Mix dry ingredients
- Step 3: Cream butter and sugar
- Step 4: Add eggs slowly
- Step 5: Add lime zest and vanilla
- Step 6: Alternate dry mix and sour cream
- Step 7: Add juice carefully
- Step 8: Bake until set
- Step 9: Cool, then glaze
- Tips for Success (So Your Crumb Stays Tender)
- Serving Suggestions and Storage
- Nutrition Details per Serving
- Final Thoughts
- FAQ
At a Glance
- Zest + juice create real Key lime flavor, not just “lime taste.”
- Proper creaming supports a moist crumb and a steady rise.
- Gentle mixing protects air bubbles for tenderness.
- Cool and rest before slicing for clean, flavorful pieces.
Zesty Delight: The Secrets Behind Perfect Key Lime Pound Cake is built on one idea: balance. You get tang from fresh citrus acids, softness from dairy fats, and structure from flour and eggs. Mix with care, then bake just until the center sets.
Beyond its golden crust and tight, moist crumb lies a simple technique. You’ll learn how to measure dry ingredients, cream butter correctly, and add lime juice at the right time. You’ll also learn how to make a glaze that clings instead of running off.
Whether you bake often or you’re learning to master quick scratch cakes, this recipe gives clear steps. You can scale it, troubleshoot it, and still end with a dessert that looks impressive on a brunch table.
A perfect pound cake starts with texture control. Use fresh key lime zest for aromatic oils and fresh juice for acidity. Together, they boost flavor while the batter stays stable when you mix gently.
Prep and Cook Time
Time matters because pound cake batter likes a steady routine. Plan your prep so your oven heats fully before the batter goes in.
Using accurate timing also helps you avoid dry edges. Set a timer, rotate the pan if your oven runs hot, and check for doneness without overbaking.
- Planning: 20 minutes
- Baking: 55–60 minutes
- Cooling: 30 minutes
- Total Time: Approximately 1 hour 50 minutes
Yield and Difficulty
This Key lime pound cake makes about 10–12 slices. It works well for family desserts, brunch, and holiday tables because it stays tender for several days.
The difficulty level stays “medium” because creaming and mixing technique affect texture. If you follow each step, you’ll nail the crumb without needing special equipment.
Yield
Serves 10–12 slices, ideal for sharing at gatherings or keeping on hand for quick dessert cravings.
Difficulty Level
Medium—best for bakers who know basic mixing. You’ll still get clear instructions for every critical moment.
Ingredients for Key Lime Pound Cake
Use room-temperature dairy and eggs for smoother batter. That helps the emulsions form evenly, which supports a soft, even crumb.
For the most accurate flavor, use fresh key limes. Acid and aromatic oils vary by fruit, and lime flavor depends heavily on freshness and zest quality.
- 1 ½ cups all-purpose flour, sifted
- ½ teaspoon baking powder
- ¼ teaspoon kosher salt
- 1 cup unsalted butter, softened
- 1 ¼ cups granulated sugar
- 4 large eggs, at room temperature
- 2 tablespoons freshly grated key lime zest (about 6–8 key limes)
- ¼ cup fresh key lime juice
- ½ cup sour cream, at room temperature
- 1 teaspoon pure vanilla extract
- ½ cup powdered sugar (for glaze)
- 2 tablespoons fresh key lime juice (for glaze)
- Optional: thin lime slices for garnish
Instructions: Step-by-Step Method
Follow this order to protect the batter’s structure. When the butter and sugar cream well, the cake traps air that expands during baking.
Also keep your mixing gentle once flour and citrus enter the bowl. Overmixing can toughen the crumb by over-developing gluten.
Step 1: Preheat and prep the pan
Preheat your oven to 350°F (175°C). Grease and flour a 9×5-inch loaf pan or line it with parchment paper.
This loaf shape helps heat reach the center evenly. If your pan is dark, bake closer to 55 minutes, not 60.
Step 2: Mix dry ingredients
In a medium bowl, mix the flour, baking powder, and salt. Set this bowl aside so your wet ingredients stay ready.
Sifting reduces flour lumps and helps even leavening distribution. It also supports a smoother batter.
Step 3: Cream butter and sugar
Using a stand mixer, beat softened butter and granulated sugar on medium speed for about 4–5 minutes. You want the mixture pale and fluffy.
This step creates a stable batter with trapped air. For context on why aeration matters, see baking fundamentals and how heat expands trapped gas.
Step 4: Add eggs slowly
Add eggs one at a time, mixing on low speed after each addition. This helps the batter emulsify without breaking.
If the batter looks slightly thick or glossy, that’s normal. Don’t rush; slow additions support smooth texture.
Step 5: Add lime zest and vanilla
Stir in fresh key lime zest and vanilla extract. Mix just until evenly distributed.
Zest brings fragrant oils, so it should stay bright, not cooked off early. Keep this step brief.
Step 6: Alternate dry mix and sour cream
Alternate adding the dry flour mixture and sour cream, starting and ending with flour. Mix gently after each addition.
Avoid overworking the batter. Once flour hydrates, extra mixing can reduce tenderness.
Step 7: Add juice carefully
Fold in the fresh key lime juice carefully. Blend evenly but quickly to preserve air bubbles.
Acids can affect batter balance, so add juice after creaming and after most mixing of dry ingredients. This protects the crumb.
Step 8: Bake until set
Pour batter into the prepared pan and smooth the top. Tap the pan lightly to release large air pockets.
Bake for 55–60 minutes until a toothpick near the center comes out clean with a few moist crumbs. Pound cakes finish by the set of the center, not by a dry toothpick.
Step 9: Cool, then glaze
Cool the cake in the pan for 15 minutes, then transfer to a wire rack. Let it cool enough that glaze won’t melt off immediately.
Whisk powdered sugar and key lime juice until smooth and pourable. Spread or drizzle while the cake still feels slightly warm.
Tips for Success (So Your Crumb Stays Tender)
Small choices create big texture differences in a Key lime pound cake. If you want a slice that feels moist and holds clean edges, follow these checkpoints.
Also, remember that flavor improves as the cake rests. Acids and sugars settle, and the crumb becomes more cohesive.
After baking, let the cake cool before glazing. Then chill or serve based on your preference for firmness and aroma strength.
When measuring flour, sift first and spoon into the measuring cup. Level the top without packing.
Key technique checklist
Room temperature ingredients reduce curdling risk and support smoother emulsions. Cold sour cream can make batter look uneven.
Beat butter and sugar thoroughly for better rise and a fine crumb. Short creaming often leads to a tighter, less moist interior.
Doneness and slicing timing
Check at around 50 minutes, then every 2–3 minutes. Overbaking dries the loaf, especially near the edges.
Rest at least an hour before slicing. For reference on how structure sets during heat, see Maillard reaction and browning chemistry.
Dairy-free option
For a dairy-free twist, replace sour cream with coconut yogurt. Keep it unsweetened and at room temperature for the cleanest texture.
Because coconut yogurt varies by brand, your bake may need 3–5 extra minutes. Use toothpick checks to stay accurate.
Serving Suggestions and Storage
Serve the cake with whipped cream, berries, or a simple dusting of extra zest. A light topping keeps the lime flavor forward.
If you want contrast, try toasted coconut flakes. They add texture and a mild sweetness that supports the cake’s acidity.
For storage, wrap tightly. The cake stays moist at cool room temperature for a day or two, then hold in the refrigerator if your kitchen runs warm.
For longer storage, freeze individual slices. Thaw in the fridge overnight and bring to room temperature before serving.
Nutrition Details per Serving
Nutrition values can vary by brand and portion size. The table below gives a reasonable estimate for planning.
Track totals based on your chosen slice thickness. For broader dietary context, see nutrition basics.
| Calories | Protein | Carbs | Fat |
|---|---|---|---|
| 320 kcal | 5 g | 38 g | 16 g |
Final Thoughts
When your Key lime pound cake bakes up with a tight, tender crumb, you’ll taste the method. The zest smells bright, the juice adds tang, and the butter delivers richness without heaviness.
Use the technique checkpoints, watch the bake time, and rest the loaf before slicing. That combination gives the zesty, buttery slice you want—every time.
FAQ
What makes a Key lime pound cake different from a regular pound cake?
A regular pound cake relies on butter, eggs, and flour for flavor. A Key lime pound cake adds key lime zest and juice, which bring acidity and aromatic oils that brighten the dense crumb.
Can I use bottled lime juice instead of fresh key lime juice?
You can, but fresh juice usually tastes brighter and more natural. If you use bottled juice, choose one with real lime content and adjust cautiously because bottled products vary in acidity.
Why did my pound cake sink in the center?
Sinking usually comes from underbaking, opening the oven too early, or batter that wasn’t creamed enough. Bake until the center sets and the toothpick shows a few moist crumbs.
How do I keep the crumb moist without overmixing?
Mix flour and sour cream gently and only until combined. Overmixing develops gluten and can make the crumb tighter, even if the cake looks fine on top.
What’s the best way to glaze a Key lime pound cake?
Whisk powdered sugar with fresh key lime juice until smooth, then drizzle after the cake cools. If you glaze too hot, the glaze thins and runs; if you glaze too cool, it may set before spreading evenly.
See also: Key lime pound cake