
Get the Sparkle: What “Sparkling” Really Means in Kombucha
Sparkling kombucha isn’t a different organism. It’s the same kombucha fermentation, plus one extra step that turns leftover sugars into carbon dioxide inside a sealed bottle.
- Get the Sparkle: What “Sparkling” Really Means in Kombucha
- Ingredients & Equipment: Build a Reliable Brewing Setup
- Core Ingredients (Quantities for ~1 Gallon / 3.8 L)
- Equipment Checklist (Don’t Skip the Pressure-Rated Part)
- Step 1: Make Sweet Tea That Your SCOBY Can Use
- Step 2: Start Primary Fermentation (Build Acidity and Flavor)
- Step 3: Flavor Strategy for Secondary Fermentation (Where Bubbles Form)
- Step 4: Bottle for Controlled Carbonation (The Part That Can Go Wrong)
- Step 5: Chill, Serve, and Enjoy the Cleanest Fizz
- Troubleshooting Guide: Fix Problems Without Starting Over Every Time
- Not Carbonating After Bottling
- Too Much Carbonation (Bottle Pressure Too High)
- Odd Smells or Strange Texture
- How to Build Consistency: A Brewing Workflow You Can Repeat
- At-a-Glance Recipe (Sparkling Kombucha You Can Start Today)
- FAQ
That’s why the first batch (often called primary fermentation) tastes tangy and alive, while the second stage (bottling) creates the foam, bubbles, and “snap” you want. If you control time, temperature, and bottle pressure, you can dial in consistent fizz.
For the background science on fermentation, yeast, and acids, you can anchor your understanding in fermentation. For the living part of the process, see yeast, since yeast drives much of the carbonation potential.
- Two-stage process: primary builds flavor and acidity; secondary builds carbonation.
- Success hinges on conditions: temperature, cleanliness, and bottle sealing.
- Carbonation is measurable: time + sugar in the sealed bottle = bubbles.
- Taste early: stop primary when it’s right for your preferred sweetness.
Ingredients & Equipment: Build a Reliable Brewing Setup
Start with simple, proven inputs. You need sweet tea as fuel, a healthy SCOBY culture to ferment it, and starter liquid to jump-start the microbial balance.
Then you need a safe vessel strategy. You’ll ferment in a breathable container during primary stage, but you’ll use airtight, pressure-rated bottles during secondary stage.
For a clear overview of how organisms grow in food systems, review microbial growth. It helps explain why cleanliness matters even when the SCOBY feels “protective.”
Core Ingredients (Quantities for ~1 Gallon / 3.8 L)
Filtered water: 8 cups (about 1.9 L) to begin, then top or adjust to your final volume as needed.
Tea: 5 tea bags of black tea or an equivalent amount of loose-leaf (roughly 10 teaspoons). You can blend teas, but avoid oil-based flavored teas.
Sugar: 1 cup organic cane sugar. Keep it as sugar, not substitutes.
Starter kombucha: 1 cup unflavored, unpasteurized starter to lower pH and speed the “good” microbial takeover.
SCOBY: 1 culture (plus any SCOBY layers you have). Use a healthy one with a normal smell and no unusual discoloration.
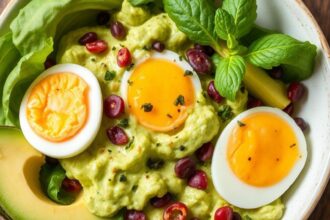
Optional flavor: ginger slices, citrus zest, berries, herbs, or a small amount of fruit purée.
Equipment Checklist (Don’t Skip the Pressure-Rated Part)
You need a large glass jar or food-safe fermentation vessel for primary fermentation. You also need breathable coverage (cloth or coffee filter) to keep out contaminants.
For secondary fermentation, use glass swing-top bottles or another container clearly designed for carbonation. Plastic bottles can work in some systems, but glass is easier to judge for pressure changes.
To understand why boiling and heating reduce microbial load, see pasteurization. Kombucha brewing uses sterilization-like cleanliness, even though the brew isn’t “pasteurized” afterward.
Step 1: Make Sweet Tea That Your SCOBY Can Use
Proper tea preparation prevents weak fermentation. You must dissolve sugar fully and cool the tea to room temperature range before adding the culture.
Use filtered water. Chlorine and heavy mineral load can slow fermentation for some batches, especially if your water is very hard.
Tea Choice: Black, Green, and White
Black tea offers strong tannins and nutrients that many brewers prefer for consistent results. That doesn’t mean green tea never works—many do fine with it—but it can ferment a little differently.
White tea usually creates a softer, lighter profile. If you’re new, start with black tea for the most predictable “vinegar-to-tart” shift during primary fermentation.
A useful background page is tea, which covers why different tea types contain different compounds that affect flavor and microbial behavior.
How to Sweeten Without Killing Fermentation
Bring water to a boil, then dissolve sugar while it’s hot. Stir until you see no grains at the bottom.
Steep tea bags or loose leaves for 10–15 minutes until the tea looks strong. After steeping, cool to around 70–80°F (21–27°C) before you add starter and SCOBY.
Step 2: Start Primary Fermentation (Build Acidity and Flavor)
Primary fermentation usually takes 7 to 14 days. During this time, the SCOBY consumes sugar and produces organic acids, tang, and a small amount of natural effervescence.
Temperature strongly affects speed. A stable warm spot keeps the microbial pace steady and helps you avoid long, unpredictable fermentation cycles.
For a quick reference on how temperature affects biological processes, consult temperature. It’s basic, but it explains why drafts and cold rooms cause delays.
How to Assemble the Ferment
Pour cooled sweet tea into a sanitized glass jar. Add starter kombucha first, then gently place the SCOBY on top.
Cover with breathable cloth or a coffee filter secured with a rubber band. You want airflow but not dust.
How to Tell When Primary Is “Ready”
Do not wait for a rigid date. Start tasting around day 7. Use a sanitized spoon and draw a small amount from the middle portion of the jar.
You’re aiming for a pleasant balance: noticeably tangy, slightly sweet or dry depending on your preference. Longer fermentation often produces a sharper, drier finish.
If you want a quick method, try targeting day 7–9 for the bottling stage. That usually gives strong flavor without pushing too far into vinegar territory.
Step 3: Flavor Strategy for Secondary Fermentation (Where Bubbles Form)
Secondary fermentation happens in sealed bottles. Yeast and bacteria use remaining sugars to produce carbon dioxide, which dissolves into the drink under pressure.
This is also where your flavor additions matter. Fruit and ginger can add aroma, but they also add fermentable material that can boost carbonation faster.
Best Add-Ins for Beginners
If you’re new, choose low-risk flavor boosters: ginger slices, citrus zest, or a small amount of berry purée. Keep additions moderate so you don’t accidentally over-carbonate.
For herbs like mint or basil, add a small amount and taste after chilling. Too much plant material can create bitter notes.
For general food chemistry around compounds and flavors, flavor provides a useful overview.
A Practical “Fizz Control” Rule
More fermentable sugar and more time in sealed bottles usually equals more pressure. If your primary fermentation runs longer, you may have less residual sweetness—so carbonation can be milder.
That’s why you should keep notes. Track primary day count, room temperature, and how many days you let the bottles sit.
Step 4: Bottle for Controlled Carbonation (The Part That Can Go Wrong)
When you bottle, you’re turning a living process into a pressure system. That’s exciting—until it isn’t. Pressure management keeps your bottles safe and your kombucha enjoyable.
Work slowly, pour carefully, and leave the correct headspace. Cleanliness here matters because yeast can spread off flavors if unwanted microbes enter.
Sanitation and Headspace
Use sanitized swing-top bottles. Fill bottles leaving about 1 to 2 inches of headspace to reduce risk of overflow and allow gas expansion.
Pour kombucha through a clean strainer if you want fewer sediment bits, especially if you added fruit or ginger.
How Long to Ferment in Bottle
Secondary fermentation often lasts 2 to 5 days at room temperature. Warmer rooms reach carbonation faster; cooler rooms need more time.
Check daily starting day 2. “Burping” means opening briefly to release excess gas. You can repeat this carefully if you need to fine-tune.
Step 5: Chill, Serve, and Enjoy the Cleanest Fizz
Once carbonation hits your taste goal, refrigerate. Chilling slows fermentation and preserves the bubble profile you built.
Pour gently into glasses. Sediment is normal, especially with fruit flavors. If you dislike sediment, pour slowly and stop before the last inch.
Serving Tips That Make It Feel “Bottled at a Pro”
Serve well-chilled. Cold temperature improves perceived carbonation and sharpness.
Garnish lightly: a small ribbon of lemon zest, a thin ginger slice, or a mint sprig. Keep garnishes minimal so flavors stay crisp rather than grassy.
If you want additional reading on how acids and microbes relate to sourness and stability, you can reference acid. It helps explain why tang builds during fermentation.
Troubleshooting Guide: Fix Problems Without Starting Over Every Time
Most kombucha issues come from one of three causes: temperature swings, contamination, or incorrect timing. Treat it like process control, not luck.
Make one change at a time so you learn what worked. Keep a simple log for each batch.
Not Carbonating After Bottling
If your bottles stay flat, the most common reasons are low residual sugar, too-short bottle time, or a cool room. Also check that bottles are sealed tightly and rated for pressure.
Fix: extend secondary fermentation by 12–24 hours, then refrigerate. Also try slightly earlier primary stop (so more residual sugars remain).
Too Much Carbonation (Bottle Pressure Too High)
If bottles get overly pressurized fast, shorten your secondary window and burp more often. Hot rooms also accelerate carbonation.
Fix: move bottles to a slightly cooler room and check earlier (day 1–2). Reduce fermentable additions like fruit purée.
Odd Smells or Strange Texture
Vinegar-like tang and mild “fermented” aroma are normal. However, foul odors that resemble rot, strong moldy smells, or slimy, irregular growth can signal contamination.
Fix: when in doubt, discard the batch. Kombucha is not sterile, so risk tolerance matters. Use cleaner tools and ensure breathable coverage (not airtight) during primary stage.
How to Build Consistency: A Brewing Workflow You Can Repeat
You’ll brew better sparkling kombucha when you stop treating every batch as a mystery. Build a repeating routine that controls the variables that matter.
Start by choosing your baseline target: for example, “primary on day 8, secondary for 3 days.” Then adjust only one variable per batch.
Keep a Batch Log (It Really Works)
Write down date, room temperature range, tea type, starter volume, and flavor add-ins. Note exactly when you start tasting during primary fermentation.
Also note carbonation: day 2 “light,” day 3 “medium,” day 4 “very fizzy.” This keeps you from guessing.
Manage Your SCOBY Like a Culture, Not a Commodity
A healthy SCOBY should smell pleasantly sour and earthy, not rotten. It may form a new layer over time, which is normal.
If your SCOBY looks unhealthy or fermentation stops, don’t force it. Use fresher starter liquid and keep temperature stable for the next batch.
For general microbiology background on bacteria and yeast roles, see microorganisms.
At-a-Glance Recipe (Sparkling Kombucha You Can Start Today)
This workflow targets a clean, lively fizz with a practical timing window. Adjust for your room temperature, but keep the sequence the same.
You can scale the ingredients, but the core method stays: sweet tea → primary fermentation → bottle for carbonation → chill.
Time & Yields
Preparation: 15 minutes (plus cooling time). Primary: 7–14 days. Secondary: 2–5 days.
Yield: about 1 gallon (3.8 L) of sparkling kombucha, depending on your vessel and fill level.
Step-by-Step
1) Boil water and dissolve sugar completely. Steep tea 10–15 minutes until strong.
2) Cool to room temperature (70–80°F / 21–27°C). Pour into sanitized glass jar, add starter, then place SCOBY on top.
3) Cover with breathable cloth. Ferment 7–14 days in a warm, dark area. Taste from day 7.
4) Remove SCOBY. Pour kombucha into swing-top bottles with optional flavor. Leave 1–2 inches headspace.
5) Seal and ferment 2–5 days at room temperature. Check daily and burp carefully if pressure rises fast.
6) Refrigerate when carbonation matches your preference. Serve cold.
FAQ
What’s the easiest way to get carbonation without overdoing it?
Stop primary fermentation based on taste (around day 7–9 for many rooms), then bottle for a shorter secondary window like 2–3 days. Check daily and refrigerate when it reaches your preferred fizz. If it’s too flat, extend by 12–24 hours next time.
Can I use honey instead of sugar for sparkling kombucha?
You can brew kombucha with honey in some traditions, but honey can complicate consistency and may affect microbial activity. For predictable carbonation in home systems, use organic cane sugar as your baseline.
How do I know if my SCOBY is still good?
A healthy culture ferments with a sour, pleasant aroma and shows normal growth patterns. If you see fuzzy mold or unusual colors and smell rot, discard the batch. For safety, don’t try to “salvage” contaminated kombucha.
Why does my kombucha taste too vinegary even when I bottled early?
That usually means primary fermentation ran too long for your conditions or your room was warmer than expected. Next batch, taste earlier and bottle sooner, then shorten secondary if needed.
Do I have to burp bottles during secondary fermentation?
Burping helps you manage pressure when you want tight control. If your bottles build pressure quickly, burp daily from day 2 onward. Always open carefully over a sink and refrigerate once it hits your target carbonation.
See also: sparkling kombucha