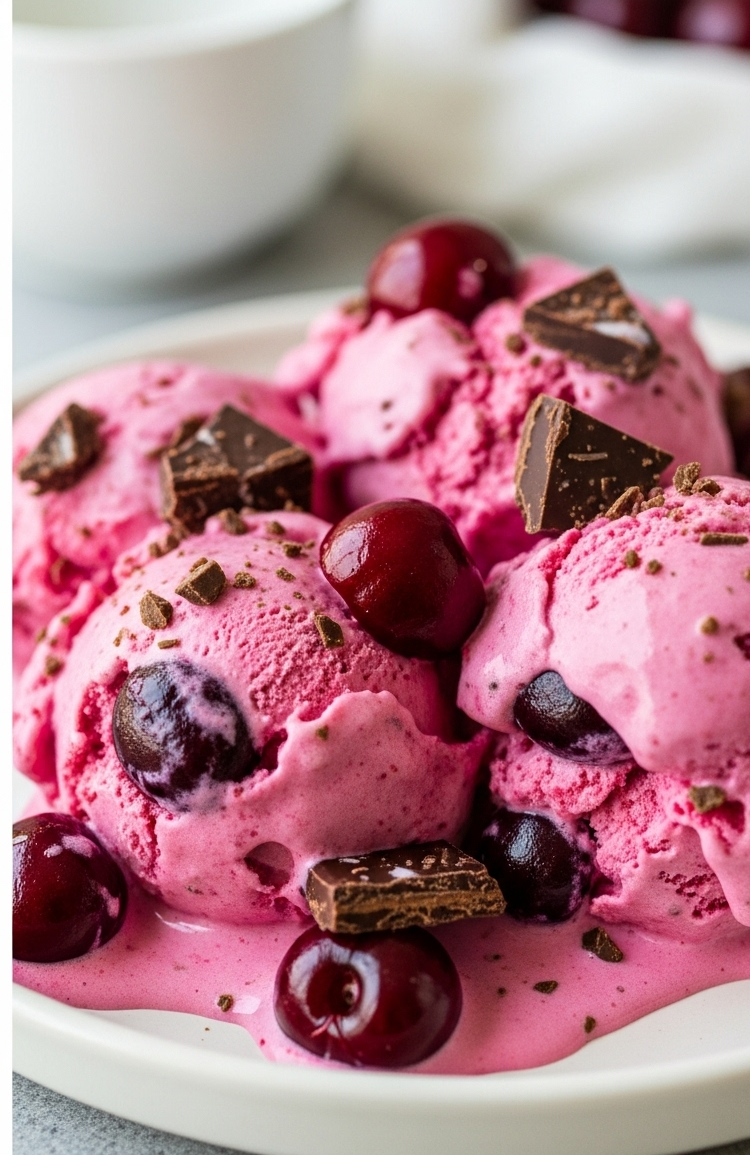

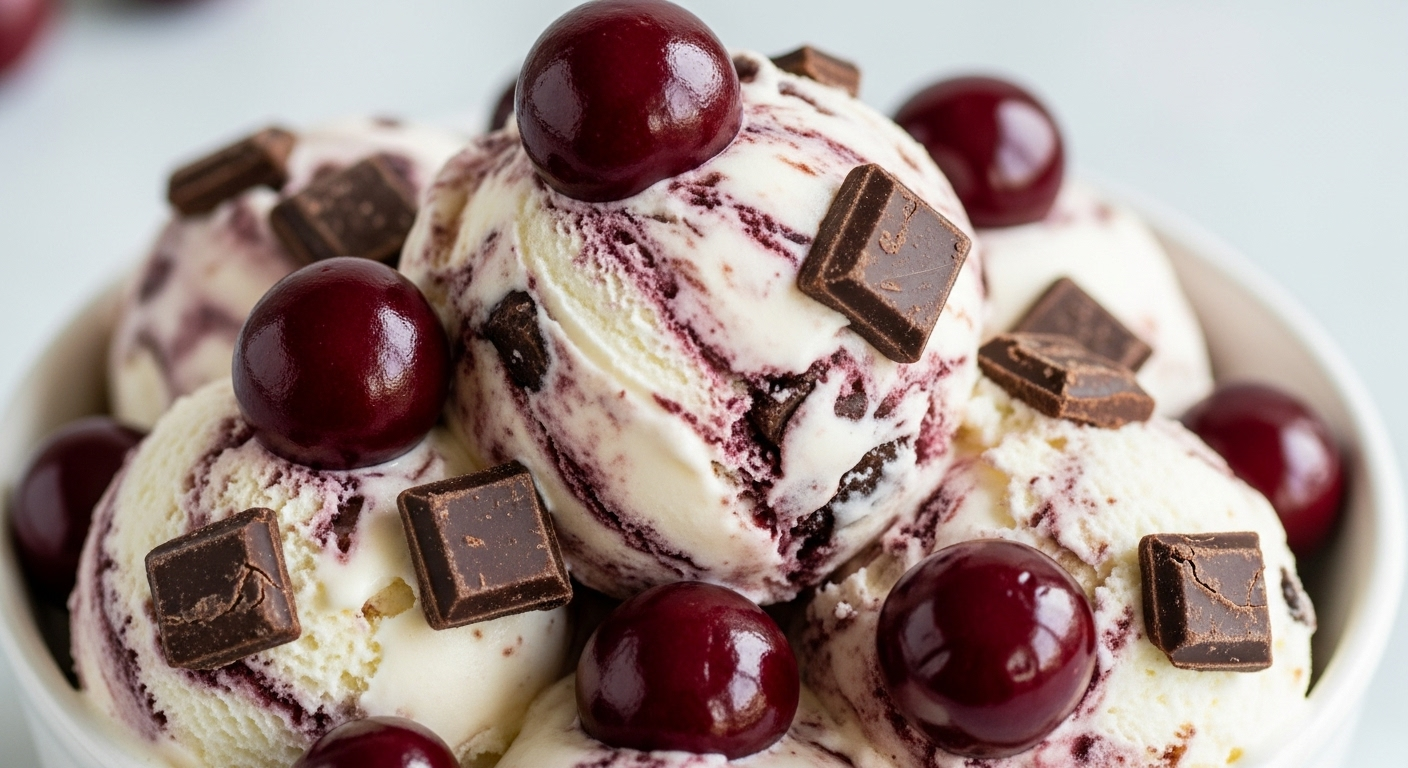
There’s a special kind of magic that happens when creamy vanilla ice cream meets rich swirls of cherry adn decadent chunks of chocolate-the unmistakable signature of Cherry Garcia. originally beloved as a vibrant tribute to a rock legend, this iconic flavour has captured the hearts (and taste buds) of dessert lovers everywhere. But why settle for store-bought when you can bring the experience home?
In this article, we’ll guide you through the art of crafting yoru very own homemade Cherry Garcia-style ice cream, blending luscious cherries, gooey chocolate, and a velvety base into a delightful treat that sings with every spoonful. whether you’re an ice cream aficionado or a curious kitchen experimenter, prepare to indulge in a dessert that’s as inspiring to make as it is to eat.

Selecting the perfect Cherries and Cream Base for Authentic Flavor
Crafting homemade Cherry Garcia-style ice cream delight begins with choosing the freshest, juiciest cherries and a rich, velvety cream base. The key to that signature burst of fruitiness lies in vibrant Bing or Morello cherries, either fresh when in season or frozen without added sugars to maintain natural sweetness. Avoid overly tart cherries unless you prefer a tangier profile, but the balance of sweet and slightly tart is crucial to evoke the iconic flavor.
For the cream base, opt for full-fat heavy cream paired with whole milk to create a luscious texture that feels indulgent but not overly heavy.Infusing the base with pure vanilla extract enhances the natural sweetness and ties the cherry and chocolate elements beautifully together. Skipping artificial stabilizers means the pure creaminess shines, but requires careful temperature control during churning.
Mastering the Art of Chunky Fudge Swirls and Chocolate Chunks
The magic of Cherry Garcia-style ice cream lies in the generous ribbons of fudge and sizeable chocolate chunks that deliver textural contrasts in every bite. Start by preparing a simple fudge swirl using high-quality dark chocolate melted with a touch of cocoa powder and cream. Let this cool to a spreadable consistency-for easier layering during the final freeze.
Chocolate chunks, not chips, provide the best melt-resistant payoff.Chop a high-percentage bittersweet chocolate bar into generous irregular pieces to surprise your palate with bursts of bittersweet richness against the creamy, fruity base. gently fold these chunks into the ice cream near the end of churning to prevent sinking or melting to quickly.
Techniques for Achieving the Ideal Creamy Texture at home
To nail that perfect creamy texture at home, start by chilling all your ice cream components thoroughly-this reduces ice crystal formation and promotes smoothness. Use an ice cream maker to churn your base slowly and evenly; this incorporates air (overrun) that lightens the texture while the cold surroundings thickens it.
Once your cream base approaches a soft-serve consistency, fold in the prepared cherries and fudge swirl carefully without breaking up the chunks. A rapid flash in the freezer immediately after this step firms the structure while maintaining creaminess. Avoid refreezing multiple times, which can cause gritty ice crystals to develop.
Tips for Customizing Your Cherry Garcia Creation with Extra Flair
Infuse your personal creativity by adding a dash of toasted almond slivers for a nutty crunch, or swirl in a spoonful of cherry jam for intensified fruit notes. For a vegan twist, substitute coconut cream and use dairy-free chocolate chunks that melt beautifully. Wont a boozy hint without overpowering? A splash of cherry brandy or rum extract works wonders, added after the base cools.
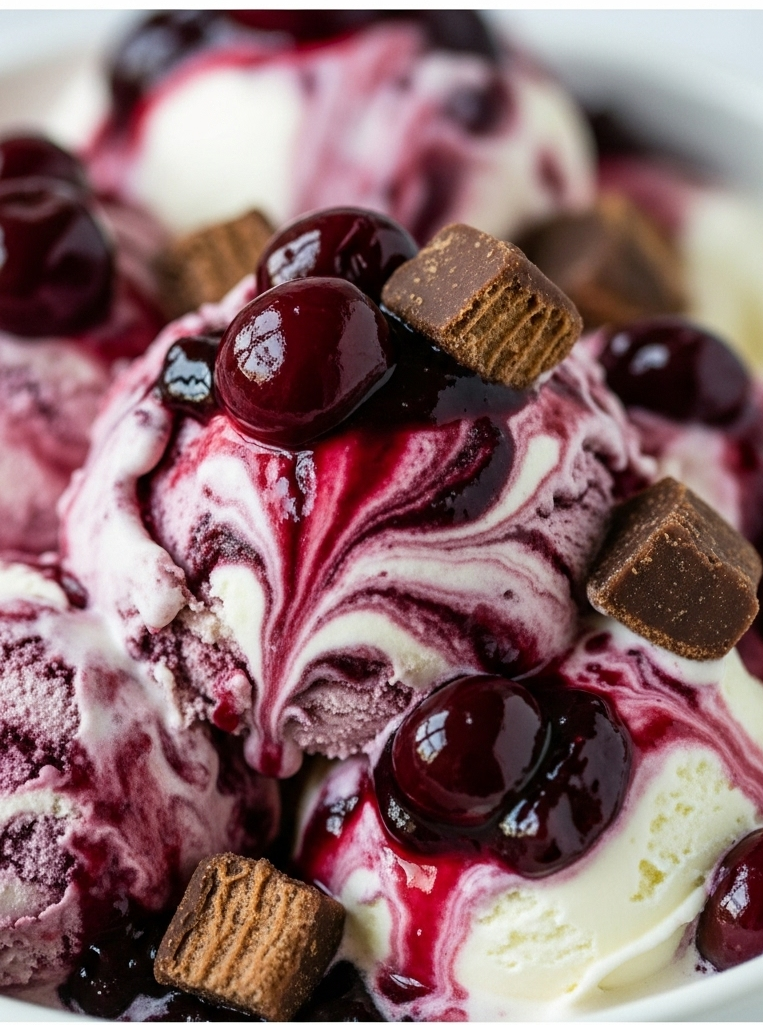
Visually, finish your homemade Cherry Garcia-style ice cream delight with a sprinkle of edible gold leaf or extra whole cherries atop the serving scoop for that irresistible Instagram-worthy presentation. Layering flavors and textures thoughtfully transforms a nostalgic favorite into an artisan masterpiece made entirely by your hands.
Prep and cook Time
- Prep Time: 20 minutes
- Chilling Time: 2 hours (for base and fudge swirl)
- Churning Time: 30-40 minutes
- Freezing time: 4 hours minimum
Yield
Approximately 1.5 quarts (6 servings)
Difficulty Level
Medium
Ingredients
- 2 cups fresh or frozen pitted Bing cherries (freeze thawed if frozen)
- 1 cup heavy cream
- 1 cup whole milk
- 3/4 cup granulated sugar
- 1 tbsp pure vanilla extract
- 100g bittersweet chocolate bar, chopped into 1/2-inch chunks
- For fudge swirl: 100g dark chocolate (70% cacao), chopped
- 2 tbsp unsweetened cocoa powder
- 2 tbsp heavy cream
- optional: 1 tsp almond extract or cherry brandy
Instructions
- Prepare the cherries: If using frozen, thaw and drain excess juice. gently chop into bite-sized pieces, leaving some halves whole for visual appeal.
- make the fudge swirl: Melt dark chocolate with cocoa powder and heavy cream in a double boiler until smooth. Pour onto a parchment-lined tray and chill until spreadable but not hard (about 1 hour).
- Mix ice cream base: Whisk together milk, heavy cream, sugar, and vanilla extract in a chilled bowl until sugar is dissolved. Add optional almond extract or cherry brandy if desired.
- churn the base: Pour the base into your ice cream maker and churn according to manufacturer instructions until it reaches a soft-serve texture (about 30 minutes).
- Incorporate mix-ins: gently fold in the cherries and chocolate chunks, reserving some for garnish.
- Layer fudge swirl: Transfer half the ice cream to a freezer-safe container,dollop half the fudge swirl over,then layer remaining ice cream and fudge swirl. use a butter knife to create marbled swirls without fully mixing.
- Freeze: Cover and freeze for at least 4 hours to fully set.
- Serve: Scoop into bowls or cones, garnish with reserved cherries and chocolate chunks. Enjoy the rich, creamy delight!
Chef’s Notes
- For extra cherry flavor, macerate fresh cherries in a teaspoon of sugar for 15 minutes before folding in.
- If your ice cream feels too icy, allow it to soften at room temperature for 5 minutes before scooping.
- Freeze fudge swirl in a thin tray so it remains soft enough to ripple but solid enough not to mix completely in.
- Use dark chocolate with at least 60% cacao for a richer taste and better texture contrast.
- Make ahead tip: prepare the base and fudge swirl a day in advance to deepen flavors.
Serving Suggestions
Present this homemade Cherry Garcia-style ice cream delight in elegant glass bowls or waffle cones to showcase its charming chunks and swirls. Garnish with fresh cherries, a light dusting of cocoa powder, and finely chopped toasted almonds for contrast. Pair it with a warm brownie or almond biscotti for added texture and flavor balance.
| Nutrient | Per Serving (1/6) |
|---|---|
| Calories | 310 kcal |
| Protein | 4 g |
| Carbohydrates | 30 g |
| Fat | 20 g |
For more exciting homemade ice cream ideas, check out our Homemade Ice Cream Flavor Guide.To learn more about selecting premium chocolates, visit Callebaut, a trusted chocolate authority.
Q&A
Q&A: Crafting Homemade Cherry Garcia-Style Ice Cream Delight
Q1: What makes Cherry Garcia ice cream so special?
A1: Cherry Garcia stands out because of its luscious blend of creamy cherry-infused ice cream, rich chocolate chunks, and a perfect balance of sweetness and tartness. It’s an iconic flavor combo that marries the bright juiciness of cherries with the deep indulgence of chocolate, creating an unforgettable taste adventure.
Q2: Can I replicate Cherry Garcia at home without fancy equipment?
A2: Absolutely! While an ice cream maker helps achieve that smooth, creamy texture, you can craft a delightful version using just a mixing bowl, freezer, and some patience. Whisk your base ingredients until smooth, fold in cherries and chocolate, and freeze-stirring every 30 minutes to break up ice crystals for that creamy feel.
Q3: Which types of cherries work best in this recipe?
A3: Fresh or frozen tart cherries are ideal-they offer a bright, tangy flavor that cuts through the richness of the ice cream. If fresh aren’t available,frozen unsweetened tart cherries work beautifully and help maintain that signature zing.
Q4: How do I incorporate chocolate to mirror Cherry Garcia’s iconic chunks?
A4: Chop high-quality semi-sweet or dark chocolate into chunky pieces to mimic the authentic texture. Fold them gently into the ice cream base just before the final freeze.For an extra touch of flair, consider mixing in some bittersweet cacao nibs for crunch.
Q5: Is it possible to make a vegan Cherry Garcia-style ice cream?
A5: Definitely! Use coconut milk, almond milk, or oat milk as your creamy base. Swap out traditional cream and milk for these plant-based alternatives, and ensure your chocolate chunks are dairy-free. the cherries’ natural brightness will shine through regardless of the base.
Q6: How do I prevent the cherries from sinking to the bottom?
A6: To keep cherries evenly distributed,toss them lightly in a bit of cornstarch or flour before folding them into the ice cream base. This helps them suspend more evenly during freezing, ensuring every scoop bursts with cherry goodness.
Q7: Can I customize this recipe with additional mix-ins?
A7: You can, but moderation is key to maintaining the classic Cherry Garcia vibe. Consider sprinkling in toasted almonds or a hint of vanilla bean for depth. Avoid overpowering flavors that might overshadow the signature cherry-chocolate harmony.
Q8: How long should I let the homemade ice cream set before enjoying?
A8: For the best texture, freeze your ice cream for at least 4-6 hours, or ideally overnight. This allows the flavors to meld and the ice cream to firm up to that perfect scoopable consistency.
Q9: Any tips for enhancing the cherry flavor in the ice cream?
A9: Simmer the cherries briefly with a touch of sugar and a splash of lemon juice before folding them in. This intensifies their natural sweetness and tartness,creating a more vibrant cherry profile in every bite.
Q10: What’s the secret to achieving that creamy, smooth texture without commercial stabilizers?
A10: Use a combination of whole milk and heavy cream, and don’t rush the freezing process. Stirring the mixture periodically helps break down ice crystals, while the fat content in cream lends that luxurious mouthfeel. Patience is your best ally!
To conclude
As you wrap up your adventure in creating this homemade Cherry Garcia-style ice cream delight, you’ll find that the magic lies not just in the final creamy indulgence, but in the journey of blending rich cherry bursts with velvety chocolate chunks and smooth vanilla ice cream. Crafting this frozen masterpiece at home allows you to tailor each spoonful to your liking, transforming a beloved classic into a personal festivity of flavor and creativity.
So next time the craving calls, remember: the perfect scoop is just a few steps away in your own kitchen-ready to turn an ordinary day into an extraordinary treat.