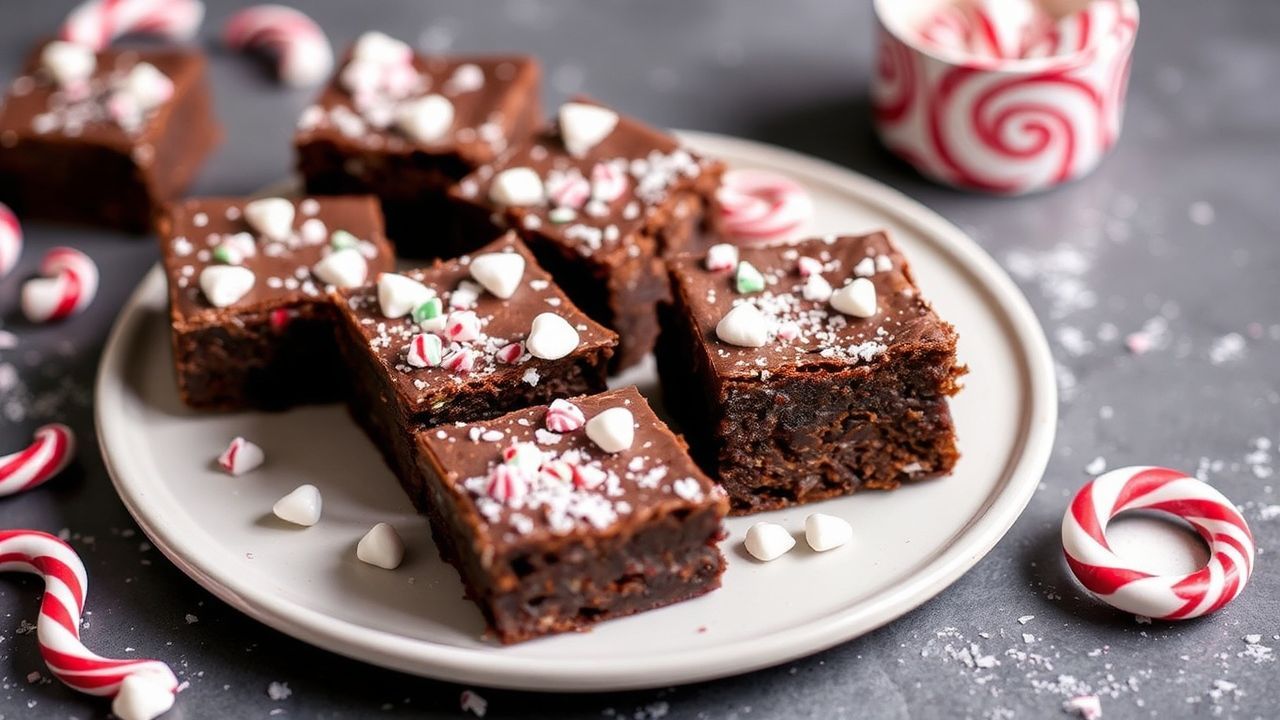
Holiday baking calls for desserts that feel warm, rich, and a little nostalgic. Peppermint brownies deliver that cozy vibe with deep chocolate flavor and a clean mint finish that tastes like winter candy.
- Why Peppermint Brownies Taste Like the Holidays
- Prep and Cook Time
- Yield and Difficulty
- Ingredients for Peppermint Brownies
- Instructions (Step-by-Step)
- Tips for Success (Flavor + Texture)
- Serving Suggestions
- Q&A
- 1) What makes peppermint such a perfect partner for fudgy brownies during the holidays?
- 2) How do I achieve an ultra-fudgy texture?
- 3) How can I infuse peppermint flavor without making it too strong?
- 4) Can I make these brownies gluten-free or vegan?
- 5) How should I store peppermint brownies to keep them fudgy?
- Fudgy texture: Use a high chocolate-to-flour ratio and avoid overbaking.
- Mint flavor: Peppermint extract plus crushed peppermint candies creates balance.
- Pretty swirl: Two-batter layering makes signature peppermint ribbons.
- Make-ahead: Flavors improve after a night of rest.
This Peppermint Brownies holiday treat guide walks you through prep, baking, and the exact steps for a glossy, fudgy center. You’ll also learn how to keep the mint taste bright without turning it sharp or overpowering.
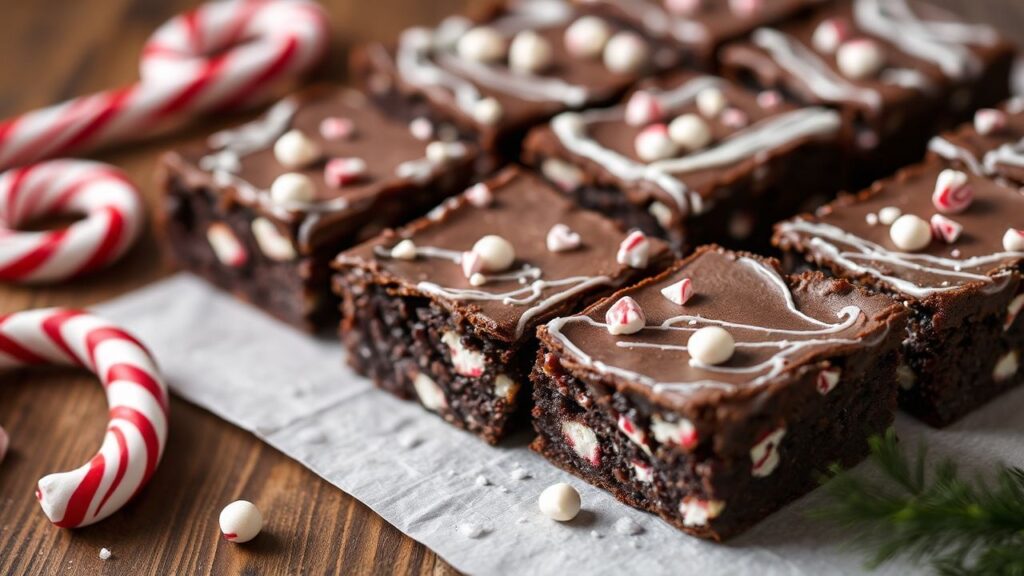
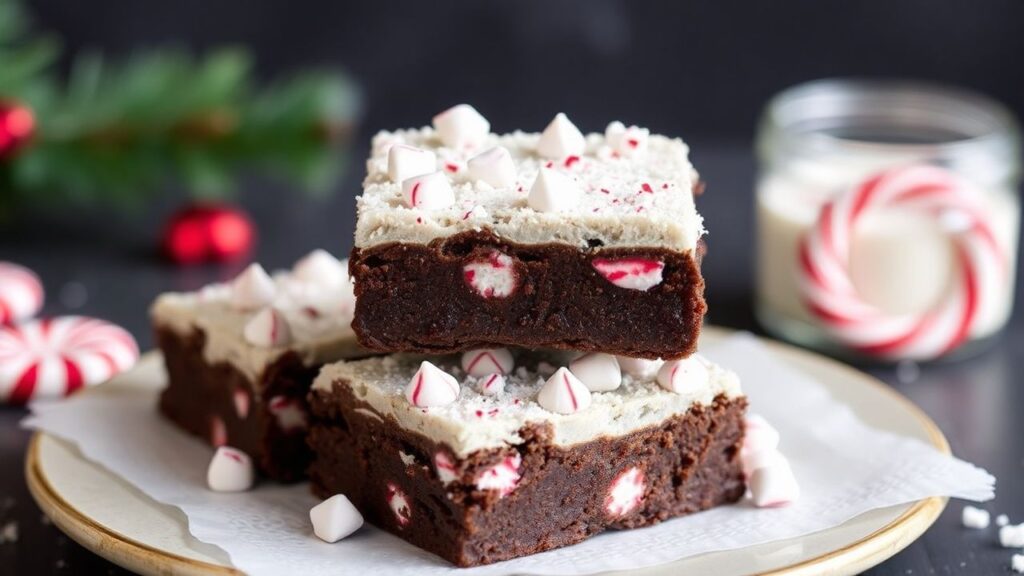
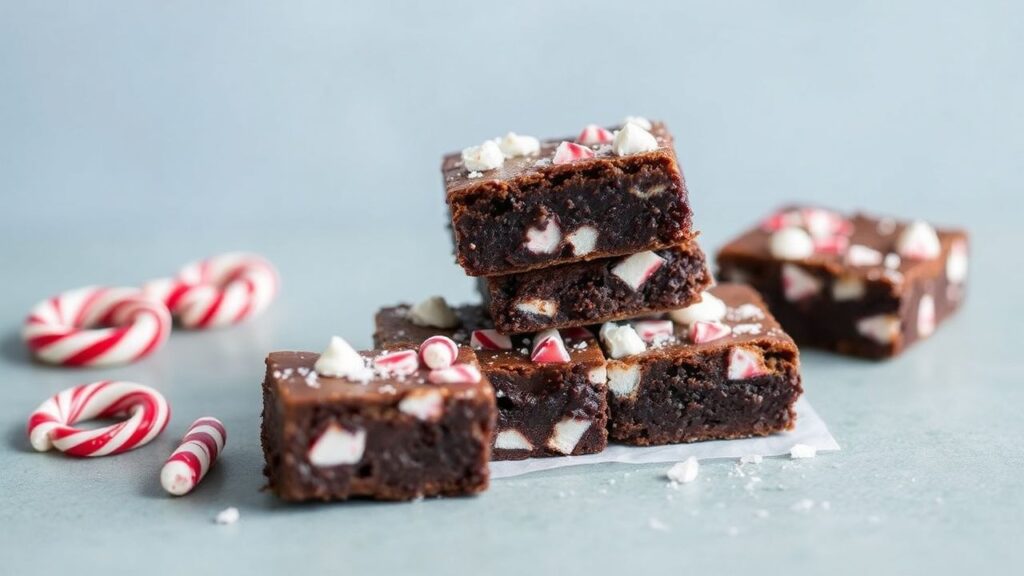
These brownies work for gifting, parties, and quiet nights at home. Serve them cut into clean squares with a sprinkle of crushed candy on top for a festive, high-impact presentation.
Why Peppermint Brownies Taste Like the Holidays
Peppermint brownies combine two classic holiday cues: rich cocoa and winter mint. Chocolate brings roasted depth, while peppermint gives a cool, crisp note that cuts through sweetness.
If you’ve ever wondered why mint feels “seasonal,” it helps to think about flavor pairing. Peppermint is widely used in confections, and chocolate is a natural match because both highlight sweetness and aromatic warmth. For background on flavor science, see flavor.
The key to a true fudgy brownie is ingredient balance. Too much flour dries the center; too little chocolate turns the crumb cake-like. For more on cocoa processing and flavor differences, review cocoa.
[TIP]Expert Insight: Pick a cocoa powder you trust, then match it with a solid chocolate brand. Dutch-processed cocoa tends to taste smoother, which helps peppermint feel cleaner rather than harsh.
Prep and Cook Time
Plan for quick hands-on prep and a short bake. You’ll spend most of your time melting, mixing, and swirling the peppermint batter.
- Readiness: 15 minutes
- Cooking: 25 minutes
- Cooling: 30 minutes
Cooling matters because it sets the fudgy structure. If you cut too early, the centers can look messy instead of clean and dense.
Yield and Difficulty
This recipe makes a shareable batch. It’s sized for serving at gatherings without waste.
Yield
12 rich, decadent peppermint brownies.
Difficulty Level
Easy to Medium—great for bakers who want a holiday wow factor without complicated techniques.
If you’re comfortable with melting and mixing, you’re ready. The only “extra” step is the swirl, and it’s forgiving if you take your time.
Ingredients for Peppermint Brownies
Measure carefully for the fudgy texture. Start with unsalted butter and bittersweet chocolate, then build the batter around cocoa and controlled flour.
For best results, use room-temperature eggs. That helps the batter emulsify smoothly instead of separating.
- 1 cup (225g) unsalted butter, cut into cubes
- 8 oz (225g) bittersweet chocolate, chopped
- 1 ½ cups (300g) granulated sugar
- 3 large eggs, at room temperature
- 1 teaspoon pure vanilla extract
- 1 ¼ cups (160g) all-purpose flour, sifted
- ½ cup (50g) unsweetened cocoa powder, preferably Dutch-processed
- ½ teaspoon salt
- 1 teaspoon peppermint extract
- ½ cup crushed peppermint candies or candy canes
- ½ cup white chocolate chips (optional)
The Perfect Peppermint Swirl
Swirls make these brownies look bakery-made. To get the best ribbon effect, you’ll reserve a portion of batter before adding peppermint.
Stir crushed candies into half the batter, then pour plain batter first. Add spoonfuls of peppermint batter on top and drag lightly with a butter knife to form peppermint ribbons.
Instructions (Step-by-Step)
Follow these steps closely for a dense, fudgy center. You’ll start by lining the pan, melting chocolate, and building the batter base.
- Preheat your oven to 350°F (175°C). Line an 8-inch square baking pan with parchment paper, leaving an overhang for easy lifting.
- Melt the butter and bittersweet chocolate in a heatproof bowl set over simmering water. Stir until smooth, then remove from heat.
- Whisk sugar into the warm mixture until glossy and thick. Add eggs one at a time, whisking well after each addition.
- Stir in vanilla and salt. Fold in sifted flour and cocoa powder gradually. Stop as soon as no dry streaks remain.
- Divide the batter into two bowls, reserving about 1/3 in one. Fold peppermint extract and crushed peppermint candies into the smaller portion.
- Pour the plain chocolate batter into the prepared pan and smooth the top.
- Dollop the peppermint batter over the surface. Swirl gently with a butter knife to create ribbons.
- Finish with toppings: sprinkle white chocolate chips and extra crushed peppermint candies on top, if using.
- Bake for 22–25 minutes until edges look set but the center still looks slightly gooey. Fudgy brownies should not be dry.
- Cool on a wire rack, then lift out using parchment. Cut into squares once mostly cool.
[WARNING]Pro-Caution: Do not overmix after adding flour. Overmixing builds gluten, which can turn fudgy brownies into a firmer, cakey texture.
Also, watch bake time closely. Every oven runs hot in its own way, so use the “gooey center” cue rather than relying only on minutes.
Tips for Success (Flavor + Texture)
Small choices drive big differences in peppermint brownies. Focus on chocolate quality, mint level, and controlled mixing.
Chocolate is the backbone of the recipe. High-quality cocoa notes come through more clearly when the base tastes rich and balanced.
- Chocolate quality: Use bittersweet chocolate for deeper flavor. For broader cocoa context, see chocolate.
- Extract trial: Peppermint extract can taste intense. Start with the measured amount, then adjust in future batches based on your preference.
- Crushing candy: Crush evenly so each bite gets mint crunch. Aim for small pieces, not dust.
- Make-ahead: Brownies often taste better the next day as flavors blend. Store airtight at room temperature for up to 3 days.
- Gluten-free swap: If you need gluten-free, use a 1-to-1 gluten-free baking flour blend and keep mixing gentle to preserve a fudgy structure.
Serving Suggestions
Serve these peppermint brownies warm or at room temperature. Warm brownies taste extra fudgy, while room temperature slices hold their shape better for parties.
Add simple sides that boost the mint-chocolate contrast. A scoop of vanilla ice cream makes a creamy cool finish that balances peppermint.
For a festive plate, add a drizzle of white chocolate or a light dusting of powdered sugar. If you like spices, pair with spiced hot cocoa for a deeper winter flavor profile.
Q&A
This section answers the questions most home bakers ask when making peppermint brownies. Use these notes to troubleshoot texture, flavor, and storage.
1) What makes peppermint such a perfect partner for fudgy brownies during the holidays?
Peppermint brings a crisp, refreshing note that balances rich chocolate. That contrast keeps each bite from feeling heavy, which is why peppermint confections stay popular in winter. For an overview of how taste perception works, see taste.
2) How do I achieve an ultra-fudgy texture?
Use the right ratio: more chocolate and butter, less flour, and short bake time. Remove the brownies when the edges set but the center still looks slightly underdone.
Once cooled, the center firms enough to slice cleanly. Avoid the temptation to bake until fully dry.
3) How can I infuse peppermint flavor without making it too strong?
Measure peppermint extract carefully and taste your batch only as a guide. Peppermint extracts vary in intensity by brand, so slight adjustments may help in future bakes.
Crushed peppermint candies add flavor and texture, but they also boost sweetness. If you want a cleaner mint taste, reduce candy slightly next time.
4) Can I make these brownies gluten-free or vegan?
Yes for gluten-free: use a 1-to-1 gluten-free baking flour blend and fold gently. For vegan, use plant-based butter and dairy-free chocolate, then verify the batter consistency matches your blend.
Because different brands behave differently, start with the same bake time and check the “gooey center” cue.
5) How should I store peppermint brownies to keep them fudgy?
Store in an airtight container at room temperature for up to 3 days. To protect softness, keep slices covered so they don’t dry out.
For longer storage, refrigerate up to a week or freeze wrapped squares for up to 2 months. Thaw at room temperature before serving for best texture.
Enjoy these irresistible peppermint brownies as your go-to holiday treat. Each bite blends rich chocolate depth with refreshing winter mint—exactly what you want when the season calls for comfort and sparkle.
Make a batch, share a few with friends, and keep the rest for later. Your kitchen will smell like the holidays, and your dessert table will look ready for guests.
See also: peppermint brownies