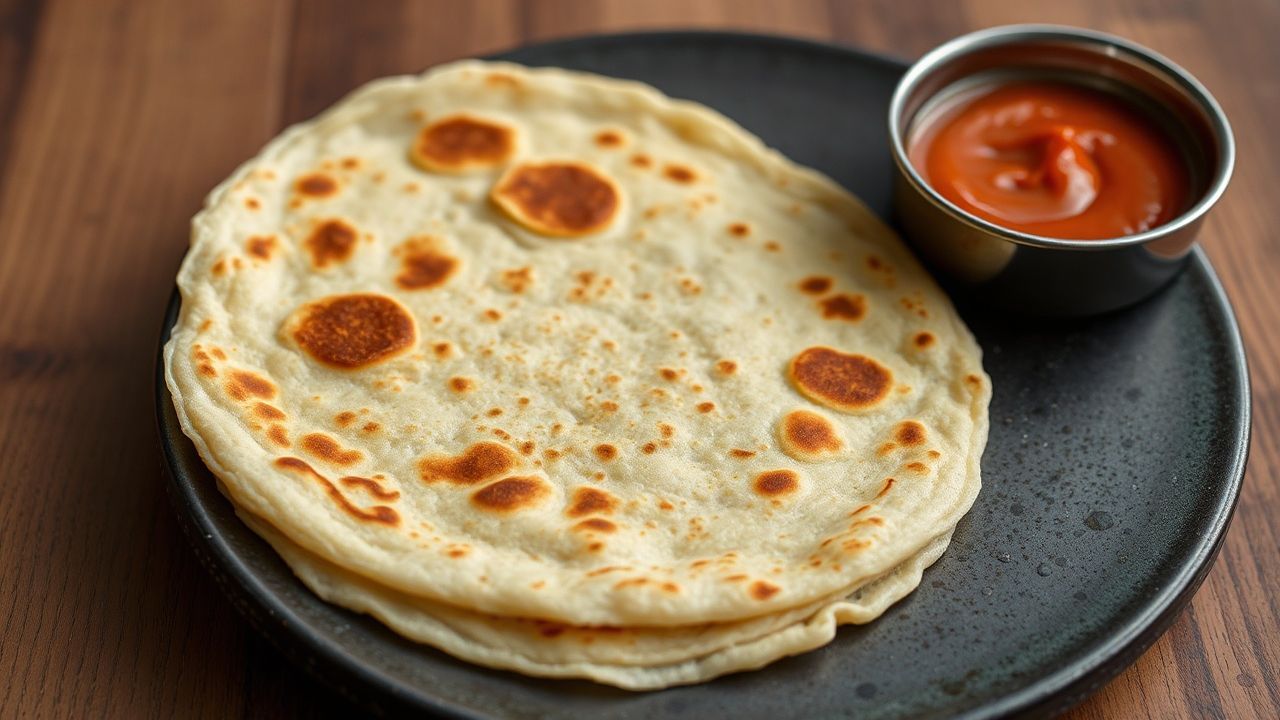
Layered flaky roti canai is one of those foods that rewards close attention. You get a crisp, lacy crust on the griddle, plus soft, pillowy layers inside. That texture comes from a clear method: stretch thin, fold with fat, rest the dough, then cook at steady heat.
- Resting creates stretch for thin layers.
- Oiling + folding traps steam and fat for flakiness.
- Medium heat lets the outside crisp without burning the center.
- Serve fast so layers stay crisp.
In practical terms, roti canai is a Malaysian street staple that blends technique from shared South and Southeast Asian food traditions. You’ll see its core features in related flatbread cultures, from laminated dough methods to griddle breads. If you understand gluten relaxation, fat distribution, and heat control, your results improve fast.
What Makes Flaky Layered Roti Canai Work
Flakiness doesn’t happen by accident. It comes from thin dough sheets, then controlled folding and coiling that create many layers. When those layers hit hot griddle heat, steam and melted fat separate the layers into a crisp-edged structure.
First, the dough needs time to hydrate fully and relax. That reduces tearing when you stretch the dough paper-thin. For the science behind dough structure, review gluten, because roti canai relies on dough elasticity to stretch safely.
Next, fat does real work. A thin film of oil or ghee lubricates the dough layers, so they separate as they heat. To understand the role of fat in dough feel and browning, look at Maillard reaction, since the griddle browns sugars and proteins on the roti surface.
Roti Canai vs. Other Flatbreads
Many flatbreads focus on a single thickness. Roti canai focuses on layered thickness made from folding. That’s why it can feel crisp at the edges but soft and airy in the middle.
Also, roti canai often uses a dough style that’s easy to stretch thin. If you compare with other dough-based breads, you’ll notice different hydration and handling. For basic bread dough concepts, see dough.
Ingredients You’ll Actually Use
You don’t need a long shopping list. You need flour for structure, salt for flavor, a small amount of sugar for browning, warm water for hydration, and fat for layering. Then you need oil or ghee for the griddle.
All-purpose flour works because it forms a stretchable gluten network. If you prefer a deeper explanation of flour types, read flour. Keep the ratios consistent so rest time produces the same dough feel every batch.
Sweetened condensed milk can add richness. It also increases browning potential slightly, so watch the heat. If you use it, fold and cook with the same timing, not longer.
Prep and Cook Time
Plan your day around resting. Most of the real work happens while the dough relaxes. Cooking itself stays quick once your griddle reaches the right temperature.
- Planning: 20 minutes (plus 2 hours resting)
- Cooking: 15 minutes
- Total time: about 2 hours 35 minutes
This timing matches the typical roti canai workflow: mix, knead, rest, stretch, fold, then cook. If you shorten rest time, you usually lose stretch and thinness, which reduces layer formation.
Yield and Difficulty
This recipe makes a batch that feeds a small group. The exact number depends on how thin you stretch each piece and how large you flatten it before cooking.
Serves: 4–6 people
Makes: about 8 medium-sized rotis
Difficulty: Medium (resting + technique)
Step-by-Step Instructions (Layered Flaky Method)
Follow each step in order, because each one supports the next. Mix well, knead until smooth, rest until flexible, then stretch thin enough to see nearly translucent areas. After that, folding and griddling do the rest.
- Combine the dry ingredients: Whisk flour, salt, and sugar until evenly mixed.
- Add the liquids: Make a well and pour in warm water, ghee (or melted butter), and sweetened condensed milk if using. Mix until a shaggy dough forms.
- Knead the dough: Knead about 10 minutes until the dough feels soft, slightly tacky, and elastic. Add a splash more water if it looks dry.
- Rest the dough: Divide into 8 balls. Lightly coat with oil, cover, and rest at room temperature for at least 2 hours.
- Stretch and layer: Oil your hands and surface. Flatten one ball, then stretch gently until very thin. Fold and coil into a spiral, then flatten again into about a 6-inch disc.
- Heat the griddle: Preheat a heavy skillet or non-stick pan over medium heat. Add a teaspoon of oil or ghee.
- Cook the roti: Lay the disc on the griddle. Cook 1–2 minutes until you see golden spots, then flip and cook the second side.
- Serve warm: Stack on a plate with parchment. Serve quickly so the crust stays crisp.
If your rotis turn out thick, you probably stretched too early or not thin enough. If they burn outside quickly, lower heat and cook for a bit longer.
Expert Insight on Layer Formation
This small change helps the dough keep a consistent thickness. That consistency makes folding layers more even and improves the final crisp-to-soft balance.
Pro-Caution on Heat and Timing
Use medium heat and let the griddle do the work. You want golden patches, not dark streaks, before you flip.
Tips for Success: Dough Stretching and Griddling
Use these checks while you work. If the dough tears, it usually needs more rest or more oil on your hands. If the roti feels dry or chewy, heat may be too low or cooking may be too long without steam release.
- Use warm water (not hot). It hydrates without shocking the dough.
- Resting time matters for gluten relaxation and smooth stretching. Less rest means more shrinkage.
- Oil generously while stretching to prevent tearing and create slip between layers.
- Choose ghee for a classic aroma, or use melted unsalted butter for a similar effect.
- Keep heat medium for golden spots and crisp edges.
- Don’t stack directly on bare plates; use parchment to reduce softening.
If you want a deeper food science view of browning and crisping, revisit Maillard reaction and steam. Layered dough relies on both.
Serving Suggestions and Flavor Pairings
Roti canai works best when you match it to warm, flavorful dishes. The crisp edges hold up to thick gravies, while the soft layers scoop up sauce without falling apart quickly.
Traditionally, many people pair it with dhal curry (lentil-based curry) and spicy sambal. The neutral dough also supports aromatic herbs and tangy sides. For curry basics and lentil context, see lentils.
For a sweet direction, serve roti warm with condensed milk, honey, or fruit like mango. Sweet toppings contrast with the crisp griddle surface. Keep the roti warm so the crust doesn’t turn soft before serving.
Build a Quick Meal
If you need speed, cook rotis in a batch and keep them covered with parchment. Then portion curry into small bowls for easy dipping. That flow reduces waiting, which helps keep layers crisp.
You can also wrap sliced roti around shredded chicken curry or sautéed vegetables. Fold it like a wrap while it’s still warm and flexible.
Calories (approx.) per roti: 230 kcal
Protein: 5 g
Carbohydrates: 30 g
Fat: 8 g
Storage and Reheating for Best Texture
Roti canai tastes best fresh, but you can store it and re-crisp it. Cooling fully prevents steam from making the layers soggy. After that, wrapping helps protect texture.
To reheat, use a hot skillet or pan. Brief reheating restores surface crispness better than microwaving. For general guidance on reheating bread, check reheating.
FAQ
These answers address common trouble spots. Use them to adjust your dough, stretch, and griddling so your next batch improves.
Why does my roti canai tear when I stretch it?
Your dough probably needs more resting time or more oil on hands and surface. Also stretch gradually and avoid pulling one area too thin too fast.
How do I get crisp, golden spots without burning?
Cook on medium heat and wait for visible golden patches before flipping. If browning happens too quickly, lower heat and cook a little longer.
Can I make roti canai with a thicker disc?
You can, but you may reduce flakiness. Thin discs create more effective layer separation, so aim for near-6-inch thickness and thin stretching before folding.
What fat should I use for layering?
Ghee gives a classic flavor and helps layers crisp nicely. Melted unsalted butter works too, especially if you want a milder aroma.
How long can I store leftover roti canai?
Store cooled rotis wrapped to reduce moisture loss. Reheat using a hot skillet for best texture, and avoid long storage if you want the crisp crackle.
Layered flaky roti canai turns simple dough into a griddle showpiece. When you rest, stretch thin, fold with fat, and cook on steady heat, the layers show up clearly. Keep practicing, and you’ll soon dial in the thinness and timing that match your griddle and your dough.
See also: roti canai